Sleeping Bag Ratings: How to Choose the Right One for Your Camping Adventures
What Are Sleeping Bag Ratings?
When shopping for the best sleeping bag for camping, you’ll notice numbers like 20°F, 0°F, or 35°F. These are the sleeping bag temperature ratings, which indicate the lowest temperature at which the bag will keep the average person warm.
Most high-quality bags use EN (European Norm) or ISO sleeping bag ratings, which provide standardized measurements so you can compare bags from different brands.
The three main rating categories are:
Comfort Rating – The temperature at which a typical cold sleeper can rest comfortably.
Limit Rating – The lowest temperature a warm sleeper can handle without shivering.
Extreme Rating – The survival limit, designed only to prevent hypothermia.
Why Sleeping Bag Ratings Matter for Campers
Your sleeping bag is your primary source of warmth outdoors. Picking the wrong one can mean a sweaty, uncomfortable night—or shivering until sunrise.
Summer camping trips: A lightweight 35–50°F (2–10°C) bag is usually enough.
Three-season camping: A versatile 20–35°F (-7–2°C) sleeping bag works best.
Winter camping: Look for a 0°F (-18°C) or lower bag, depending on the weather.
👉 Choosing based on sleeping bag ratings ensures you’ll stay comfortable, no matter the season.
Factors That Affect Warmth Beyond the Rating
Even the best sleeping bag rating isn’t a guarantee—it’s a guideline. Your comfort depends on several factors:
Personal body type & metabolism – Some people sleep warmer or colder than others.
Sleeping pad insulation – A good pad keeps cold ground from stealing your heat.
Clothing layers – Wearing thermal base layers can add warmth.
Weather conditions – Humidity, wind, and altitude all affect performance.
How to Choose the Right Sleeping Bag Rating
Here are quick tips to pick the right bag for your adventures:
Match the rating to your coldest expected temperature. Always plan for the worst-case scenario.
Pick a versatile bag. A 20°F (-7°C) sleeping bag is ideal for most three-season campers.
Think about layering. Use a liner or thermal clothing for extra warmth in colder trips.
Know your sleeping habits. If you’re a cold sleeper, go for a warmer rating.
Final Thoughts: Sleeping Bag Ratings Explained Simply
Understanding sleeping bag temperature ratings is the key to better sleep outdoors. The best sleeping bag is one that matches your camping style, trip conditions, and personal comfort.
👉 Quick takeaway: Buy a bag rated for slightly colder than you expect. You can always unzip if it’s too warm—but if it’s too cold, you’ll regret not choosing a lower rating.
Emergency Mylar Thermal Blankets: Essential for Survival and First Aid
In the realm of survival gear, few items are as simple yet profoundly effective as the emergency Mylar thermal blanket. Also known as space blankets, these lightweight and compact sheets are indispensable in emergency preparedness kits for hikers, campers, and disaster relief scenarios. Let’s delve into what makes these blankets vital for survival and how they can be used in various emergency situations.
What Are Mylar Thermal Blankets?
Mylar thermal blankets are made from a heat-reflective thin plastic sheeting, which is coated with a metallic reflecting agent making it capable of reflecting up to 90% of body heat. Originally developed by NASA in 1964 for space exploration, this technology has been adapted for personal use to protect individuals against extreme temperatures.
No products found.
Key Benefits
1. Heat Retention: The primary function of Mylar blankets is to retain body heat. The reflective surface bounces back the body’s warmth instead of letting it dissipate into the cold air, which is crucial during hypothermia prevention in cold environments.
2. Versatility: These blankets are incredibly versatile. Apart from keeping warm, they can be used as a ground cover to keep moisture away, a makeshift shelter shielding against wind or rain, or even to signal for help due to their highly reflective surface.
3. Lightweight and Compact: Weighing only about two ounces and folding down to a size smaller than a deck of cards, Mylar blankets take up minimal space and add hardly any weight to backpacks or emergency kits. This makes them ideal for carrying on any outdoor adventures where weight and space are at a premium.
4. Cost-Effective: Despite their high utility value, these blankets are very affordable. This cost-effectiveness allows organizations and individuals to stockpile them for emergencies without significant financial strain.
Uses in Emergency Situations
The uses of Mylar thermal blankets extend beyond just keeping warm:
– **Emergency Shelter**: In situations where you are stranded outdoors without a tent or proper shelter, the blanket can be used to create an emergency shelter by taping or tying it over a frame.
– **Medical Aid**: In accidents or scenarios where shock is a risk, wrapping up in a Mylar blanket can help reduce body heat loss until medical help arrives.
– **Protection from Elements**: It can serve as an additional layer over sleeping bags during extremely cold nights outdoors or even wrap around cold food items to keep them warmer for longer.
– **Signaling Device**: Because of its reflective material, it can be used effectively as a signalling device in rescue situations where visibility is paramount.
No products found.
Safety Tips
While highly beneficial, there are safety considerations one must keep in mind when using Mylar thermal blankets:
– Since they do not breathe, condensation can form inside the blanket leading to wet clothing which might increase the risk of hypothermia; always ensure some ventilation.
– Be aware that while they reflect heat away when used properly if used incorrectly (with the reflective side out), they can deflect incoming warm rays which could lead potentially cooling instead of warming.
– The noise generated by the material can also potentially hinder sleep if rustling disturbs sleepers during tense scenarios.
Conclusion
Mylar thermal blankets continue to be one of the most effective tools in managing body temperature in harsh conditions despite their simplicity. Their utility stretches far beyond just personal camping trips into areas like disaster readiness planning and emergency medical services. Affordable compact versatile these life-saving sheets underscore an essential mantra among outdoors enthusiasts always be prepared
How to Use GPS for Hiking: Best Devices & Navigation Tips
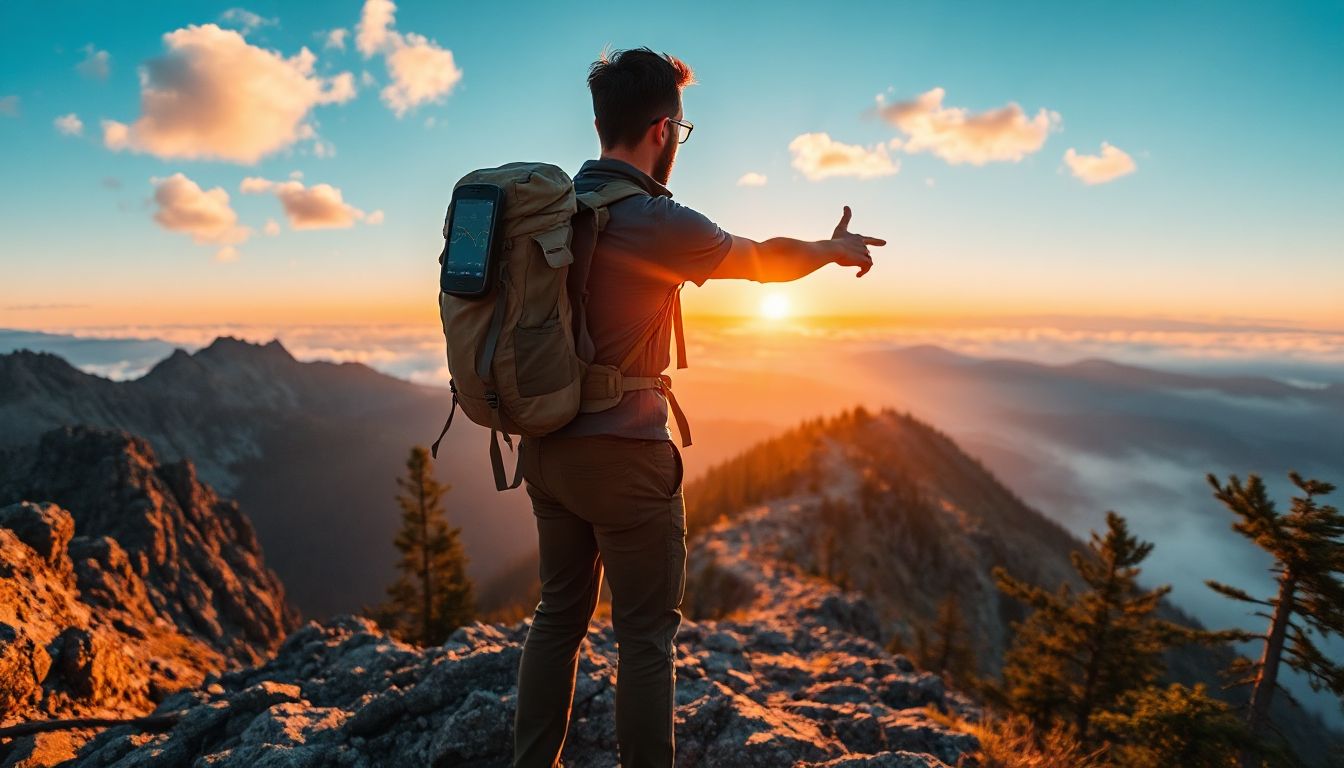
Imagine you’re deep in the woods. The sun dips low. Your map feels useless in the fading light. Panic sets in as shadows grow long. Then, you pull out your GPS. It lights up with your exact spot. Relief washes over you. You find the path back to camp. This simple tool turns danger into just another story to tell.
Hiking draws more people each year. The Outdoor Industry Association reports a rise of over 6% in participation annually. Folks seek adventure in nature. Yet, trails can trick even pros. GPS steps in as your reliable guide. It boosts safety without killing the fun. This guide covers picking the right devices. You’ll learn how to use them well. Plus, get tips to navigate like a champ. Stick around to hike smarter.
Why GPS is Essential for Hikers
The Benefits of GPS Over Traditional Maps
GPS beats paper maps in key ways. It tracks your spot in real time. You get height info and custom paths. This cuts risks on wild trails. Think about remote spots with no signs. GPS shows where you are, fast. In tough spots, it can save lives.
Paper maps stay flat and old. They lack live updates. GPS pulls data from satellites. Accuracy has jumped in recent years. Older units missed by yards. Now, they hit within feet. This change helps hikers trust their steps.
Always back up GPS with a map and compass. Tech fails sometimes. Rain or dead batteries happen. Keep those basics in your pack. They work when screens go dark.
Common Hiking Scenarios Where GPS Shines
GPS proves its worth in many cases. Take off-trail hikes. You wander to a hidden view. GPS marks your start point. No worry about getting turned around. Multi-day trips test it too. Log campsites and water spots. Weather hits? GPS plots a safe detour.
Look at the Appalachian Trail. Thru-hikers use GPS apps a lot. They mark waypoints for rest stops. One hiker shared how it helped during a storm. He rerouted and stayed dry. Apps like these make long hauls easier.
Pre-load maps for spotty cell areas. Many trails lack signal. Download before you go. This keeps navigation smooth. The U.S. Forest Service notes more trail mishaps from lost signals. GPS offline mode fixes that.
Trail incidents rise in backcountry zones. Reports show confusion leads to calls for help. GPS drops those odds. It gives clear bearings and distances. Hikers return home safer. Pair it with skills for best results.
GPS adds fun too. Track your pace. See how far you climbed. It turns hikes into personal wins.
Choosing the Best GPS Devices for Hiking
Handheld GPS Units: Top Picks and Features
Handheld units stand tough against rough use. The Garmin GPSMAP series leads the pack. These devices handle drops and water. Battery life stretches to 20 hours or more. That’s key for long outings.
Top features include topo maps built in. You see trails and hills right away. SOS buttons link to help in emergencies. Press it, and pros get your location. No phone needed.
Pick one with 16GB storage at least. This holds offline maps for big areas. REI reviews praise the GPSMAP 66i for its range. It works in deep woods where phones fail. Battery swaps keep you going.
Backpacker Magazine tested several. The Garmin eTrex scores high for basics. It’s light and cheap. Add solar chargers for endless power.
Device
Battery Life
Storage
Key Feature
Price Range
No products found.
16-20 hours
16GB
SOS satellite
$400-500
No products found.
25 hours
8GB
Topo maps
$250-300
No products found.
18 hours
32GB
Rugged build
$200-250
This table helps compare fast. Choose based on your hike length.
Smartphone Apps vs. Dedicated Devices
Apps offer easy entry to GPS hiking. Gaia GPS packs detailed maps. AllTrails shares user routes. Millions use it for trail finds. Phones link to cameras and lights too.
Cost stays low. Most apps run free or cheap. Update them anytime. But batteries drain quick on screens. A full day hike might kill your phone.
Dedicated devices win on power. They last weeks on AA batteries. No signal? They still work. Apps need cells for live shares.
AllTrails shines for beginners. Pick a path, follow arrows. Community tips add value. Yet, for remote spots, grab a standalone unit.
Tip: Pack a power bank. It juices your phone mid-hike. Choose 10,000mAh for safety.
Wearables and Hybrid Options
Smartwatches blend nav with fitness. The Garmin Fenix tracks heart rate and paths. It’s light for fast packs. See your route on a small screen. No fumbling with extras.
Pros include alerts for turns. Vibrations guide you. Ultralight hikers love the slim fit. Pair it with a phone for more maps.
Calibrate the altimeter first. Stand still in open air. It reads height right. Wrong data leads to bad climbs.
Hybrids like the Suunto 9 mix watch and GPS. Battery hits 120 hours in save mode. REI calls it a top pick for multi-days.
Type
Pros
Cons
Best For
Apps
Cheap, easy
Battery drain
Short hikes
Handhelds
Long life, tough
Bulkier
Remote treks
Wearables
Light, multi-use
Smaller screen
Daily adventures
These options fit different needs. Test before buying.
Types of GPS Devices for Hiking
There are three main types of GPS tools you can use on the trail:
Handheld GPS Devices
Handheld GPS units are the classic choice for serious hikers and backpackers. Designed to withstand tough conditions, they offer long battery life, durable builds, and high accuracy.
Examples: Garmin eTrex 22x, Satmap Active 20, Garmin inReach Mini 2 (with satellite messaging).
Pros: Rugged, long battery life, accurate positioning.
Cons: Bulkier than wearables, some models lack full maps.
Garmin eTrex 22x
No products found.
Garmin inReach Mini 2
No products found.
GPS Watches
These wearable devices bring GPS technology to your wrist. Popular with hikers, runners, and mountaineers, GPS watches are durable, lightweight, and packed with features.
Many, many Europeans get out hiking during the Summer. Trails are crowded everywhere throughout the Dolomites and the Alps. There’s a great shared sense of community here.
Instant gratification. You can ride chair lifts up to the very tops of some of these peaks. How convenient is that? Almost anyone can find a best hike for themselves in this range.
WW I history in the Dolomites is sobering. German, Austrian and Italian soldiers were stuck digging tunnels through these mountains through several winters. This was the “Front”. Needless to say, far more young men died from the elements and falls than by fire fights. There are reminders of the Great War everywhere.
Here is the home of via ferrata (Italian for “iron road”). (In fact, our next trip to the Dolomites will be dedicated to doing some of the best of those assisted climbing routes.)
Not everything is perfect in the Dolomites. We prefer the Sierra Nevada mountains in California, overall.
In the Sierras I can put up a tent anywhere I want. Fantastic.
Unfortunately, in the Dolomites you are required to sleep in alpine buildings called Refuges. (Refugios – Italian). Their locations are stunning. Many people love them. But – personally – I prefer my tent over sleeping on the floor. Or in bunk beds.
Happily you can reach almost any place in the Dolomites by day hike. Public transportation in the valleys below is good!
The two regions – the Sierras and the Dolomites – are similar in that everywhere is a best hike.
I do like the food and drink at Refugios. Prices are regulated.
The main reason I had not hiked in Europe in 30yrs is cost. Italy can be expensive.
It’s possible to hike on the cheap. Putting up my tent in a campground in Cortina only cost 9€ (US$12.80) / night in 2009. Ryan tells us it’s up to 44€ / night summer 2023!
Bread, chocolate, soft cheese and wine are inexpensive. What more do you need?
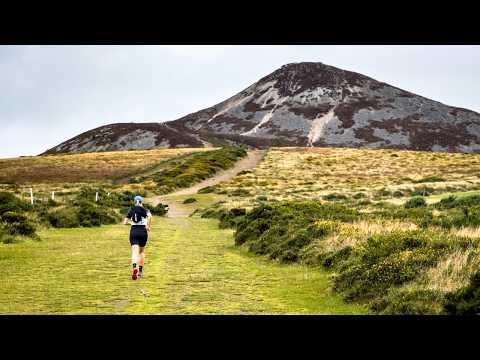
The Wicklow Way is the oldest and most long-distance trail in Ireland.
Stretching 130 km through the Wicklow Mountains, it winds through forests, open moorland, glacial valleys, and through its largest national park.
Our journey would take us through some of the most remote and scenic parts of the trail over 3 days, passing old villages, farms, and ancient ruins—offering a unique glimpse into Ireland’s rural past.
The Bukit Campuhan Ridge Trail is super popular with Ubud tourists as you can walk there from almost any accommodation in the city.
I went early and saw very few, other than morning trail runners.
You can continue to the end — but I turned back after about 2km when the paved-block track ended — at buildings and roadway.
The trail starts at the evocative Gunung Lebah Temple as you’ll see in the video.
The word “Campuhan” itself means “where two rivers meet”. You’ll be on a ridge between those rivers. Vistas are mostly overgrown so you don’t actually get to see much water.
Hikerstore.co.uk is a participant in the Amazon Services LLC Associates Program, an affiliate advertising program designed to provide a means for sites to earn advertising fees by advertising and linking to Amazon.co.uk.
“As an Amazon Associate, I earn from qualifying purchases, at no extra cost to you”


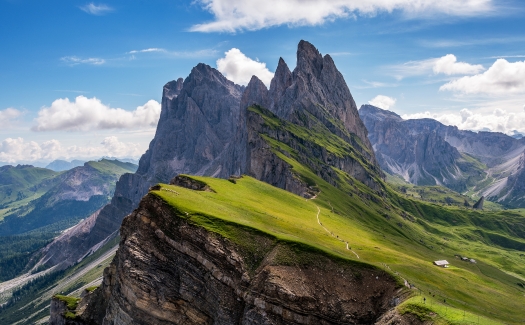
 Seceda – Odle mountains.
 photo by Away On The Road