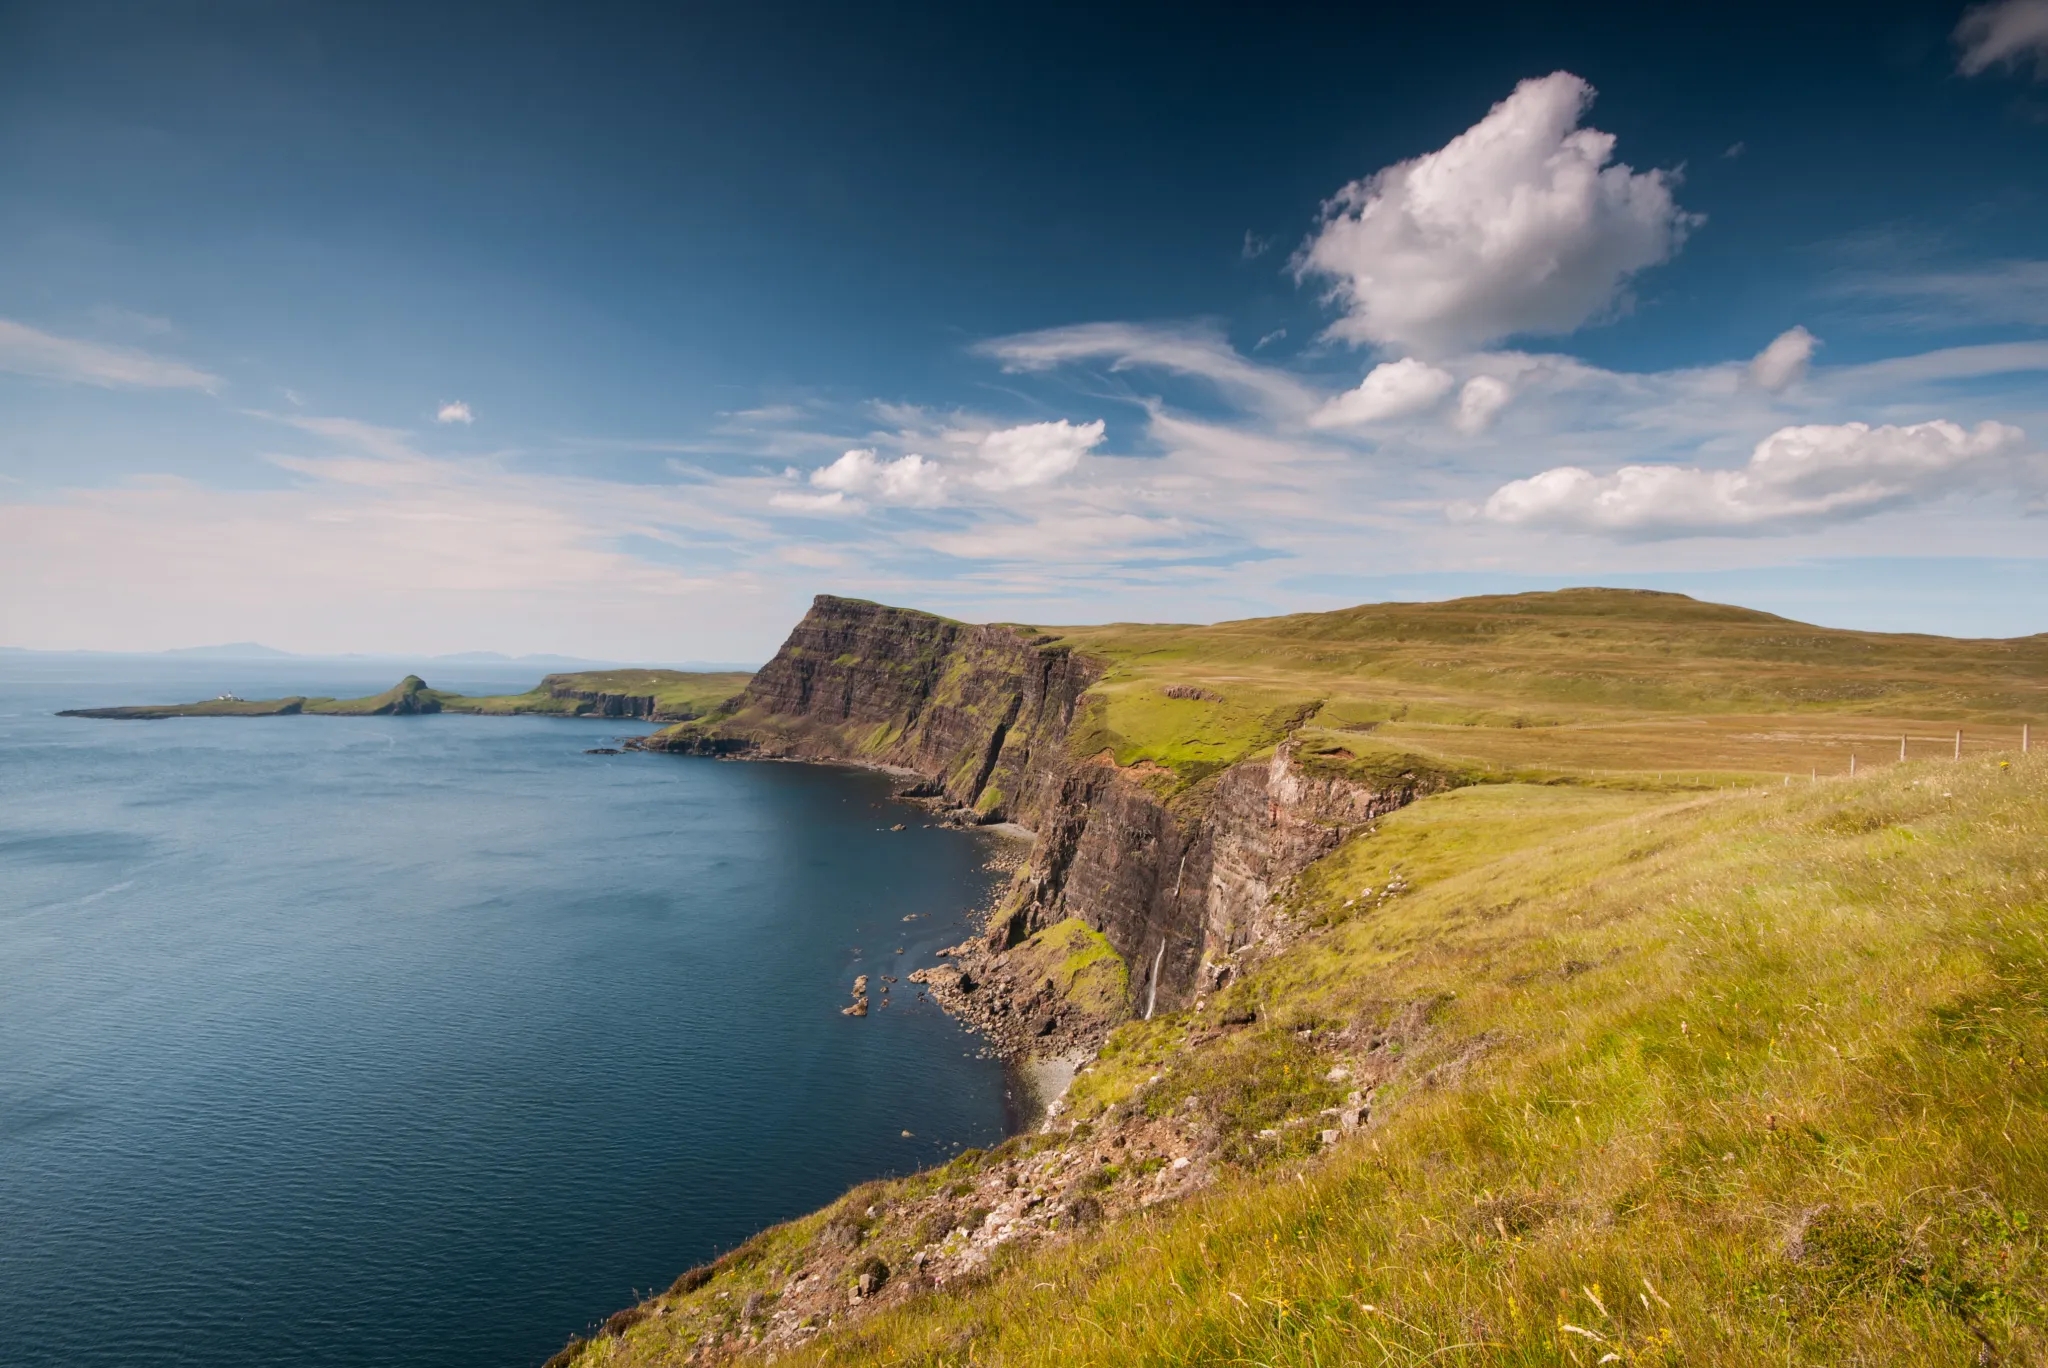
Posted on Leave a comment

Thor Pedersen 203 Nations without Flying

thor-pedersen-203-nations-without-flying

Trailer for the planned 2024 documentary called THE IMPOSSIBLE JOURNEY.

Danish traveler and adventurer Torbjørn C. Pedersen (Thor) made history on May 23rd by becoming the first person ever to visit every country without air travel. …

Onboard a container ship, he arrived in Male, the capital of the Maldives, marking his 203rd and final country.

Thor, a Salomon ambassador, described the journey as “an incredible and challenging adventure that aimed to promote peace, understanding and cultural exchange while raising awareness about global issues”.

Click PLAY or watch it on YouTube.

Posted on Leave a comment

#7 best hiking region in the world is …

#7-best-hiking-region-in-the-world-is-…

NEPAL

A trip to The Kingdom of Nepal may well be the best hiking holiday of your life.

It’s the abode of the Gods.

The exotic Buddhist and Hiindu culture is as fascinating as are the world’s highest peaks.

Most trekkers are set on Everest or Annapurna, but there are many other great choices, especially if you sign on with a trekking company that can get you into restricted areas like Mustang.

Tourism is important to the Nepalis. Foreign hikers feel welcome as soon as they arrive. And hiking in the world’s highest mountains can be “easy” on “tea house” treks where you stroll with just a day pack.

Or, if you want the full mountaineering experience, sidetrip up, up, up towards the clouds.

The weather and conditions are much milder than you might expect. Best months to trek are Oct-Nov (post-monsoon) and April-May (pre-monsoon).

More information on our new Nepal information page.

Our favourite hike in Nepal is the Annapurna Circuit. It’s our #8 hike in the world, as well.

See our Annapurna Circuit Information page.

Some feel Annapurna is in decline as roads and motor vehicles are degrading the Circuit. That won’t happen to the Mt. Everest region. Check out the Nov. 2009 16-day Everest trip report by besthike editor Rick McCharles.

Posted on Leave a comment

BestHike #4 – Ausangate Circuit, Peru

besthike-#4-–-ausangate-circuit,-peru

Ausangate Circuit is one of our top 10 hikes in the world.

Click PLAY or watch a 1 minute introduction on YouTube.

Ausangate Circuit

Our favourite hike in the high Andes. Doing it independently only recommended for confident, self-sufficient hikers experienced at high altitude. It’s remote.

alpacas

AT A GLANCE

Peru
Peru
  • circle sacred Ausangate massif (6372m, 20,905ft), the highest peak in southern Peru
  • 4 high passes between 4757m – 5165m
  • 70km (43.5mi) plus sidetrips
  • almost everyone does Ausangate with a guide, but it’s quite doable independently if you are acclimated
  • many options to extend this trek
  • best months are the May-September dry season
  • Tinqui is 5-8 hours now only about 3.5hrs by bus on a new road, about 100km S.E. of Cusco
  • sidetrip to the “rainbow mountains” of Vinicunca

Read more on our Ausangate Circuit information page.

Best Energy Snacks

[product_table id=”283502″]

Posted on Leave a comment

Chris Lewis Walked 19,000 Miles, 6 Years

chris-lewis-walked-19,000-miles,-6-years

An ex-paratrooper has completed a 19,000 mile walk around the UK coast and raised £500,000 in the process.

Chris Lewis, 43, was joined by hundreds of cheering supporters as he finished the final mile of his journey …

He set off with just £10 in his pocket and has returned with a fiancée, a baby son named Magnus and a pet dog called Jet. …

Mr Lewis, who served with 2nd Battalion, Parachute Regiment, struggled to cope after entering civilian life.

He decided to walk the UK coast after suffering anxiety and depression. …

BBC

Posted on Leave a comment

Girls Hiking Socks: Essential Gear for Happy Feet on the Trails

Coloured socks for girls

Girls Hiking Socks: Essential Gear for Happy Feet on the Trails

Introduction

When it comes to hiking, having the right gear is crucial for a comfortable and enjoyable experience. While most hikers focus on selecting the perfect shoes and clothing, one often overlooked item is hiking socks. Girls hiking socks play a vital role in keeping young adventurers’ feet dry, comfortable, and blister-free on the trails. In this comprehensive guide, we will explore the importance of girls hiking socks, how to choose the right ones, and provide recommendations for top-notch options in the market. So, let’s dive into the world of girls hiking socks and ensure that your young hiker’s feet are well taken care of!

1. Why Girls Hiking Socks Matter: The Importance of Happy Feet

When embarking on a hiking adventure, the last thing anyone wants is uncomfortable, blister-ridden feet. Girls hiking socks play a crucial role in preventing blisters, providing cushioning, and keeping feet dry. They act as a barrier between the feet and the hiking shoes, reducing friction and minimizing the risk of painful blisters. Moreover, hiking socks provide additional support and insulation, keeping young hikers comfortable and ready to conquer the trails.

Girls Hiking Socks – Top Picks


[product_table id=”286281″]

2. The Right Fit: Finding the Perfect Size

Ensuring the right fit is essential when it comes to girls hiking socks. Socks that are too tight can restrict circulation and cause discomfort, while socks that are too loose can result in slippage and friction. To find the perfect size, consider the shoe size and the specific sizing guidelines provided by the sock manufacturer. It’s also important to take into account any specific foot characteristics, such as arch height or width, to ensure a snug and comfortable fit.

3. Material Matters: Choosing the Ideal Fabric

The material of girls hiking socks greatly impacts their performance. Here are some popular fabric options to consider:

  • Merino Wool: Merino wool is a popular choice for hiking socks due to its natural moisture-wicking properties, excellent insulation, and odor-resistance. It keeps feet warm in colder conditions and cool in warmer temperatures.
  • Synthetic Fabrics: Synthetic fabrics like nylon and polyester are known for their durability, breathability, and quick-drying abilities. They are often blended with other materials to enhance the sock’s performance.
  • Bamboo: Bamboo fibers offer softness, breathability, and moisture-wicking capabilities. They are a sustainable and eco-friendly choice for girls hiking socks.

4. Cushioning and Padding: Protecting Little Feet

Hiking involves navigating various terrains, and proper cushioning and padding in girls hiking socks can help protect young feet from impact and pressure points. Look for socks with cushioned soles and targeted padding in high-impact areas such as the heel and ball of the foot. This extra cushioning provides shock absorption and reduces the risk of discomfort and foot fatigue.

5. Moisture Management: Keeping Feet Dry and Comfortable

Girls hiking socks with excellent moisture management properties are essential for keeping feet dry and comfortable during outdoor adventures. Moisture-wicking fabrics like merino wool or synthetic blends are designed to pull sweat away from the skin and allow it to evaporate quickly. This helps regulate temperature, prevents excessive sweating, and reduces the likelihood of blisters and discomfort caused by dampness. Opt for socks with mesh panels or ventilation zones to enhance breathability and airflow.

6. Temperature Regulation: Socks for All Seasons

Girls hiking socks should be suitable for various weather conditions and seasons. Consider the climate and temperature range of your hiking destinations when choosing socks. In warmer weather, lightweight and breathable socks with moisture-wicking properties are ideal to keep feet cool and dry. In colder conditions, opt for thicker socks or layering options to provide insulation and retain heat. Remember to choose socks that can accommodate different temperature fluctuations to ensure comfort throughout the hike.

7. Height and Style: Exploring Different Options

Girls hiking socks come in various heights and styles to cater to different preferences and hiking requirements. Here are some common options:

  • Ankle socks: These low-cut socks are lightweight and offer minimal coverage. They are suitable for warm weather and shorter hikes.
  • Crew socks: Crew socks are the most common height for hiking socks, reaching just below the calf. They provide additional coverage and protection against debris and can be used for a wide range of hiking activities.
  • Knee-high socks: Knee-high socks offer maximum coverage and protection. They are ideal for cold weather, rough terrains, or when extra support is needed.

Choose the sock height that suits your young hiker’s comfort and needs. Keep in mind that taller socks may provide additional protection and prevent rubbing from higher hiking boots.

8. Durability and Longevity: Investing in Quality

When it comes to girls hiking socks, durability is key. Investing in high-quality socks ensures they will withstand the rigors of hiking and last for multiple adventures. Look for reinforced heels, toes, and arch areas, as these are common areas prone to wear and tear. Quality socks are often constructed with strong stitching and durable materials that can withstand frequent use and washing. While they may come with a slightly higher price tag, the longevity and performance they offer make them a worthwhile investment.

9. Top Recommendations: Girls Hiking Socks to Consider

Finding the perfect pair of girls hiking socks can be overwhelming with the plethora of options available. To help you get started, here are some top recommendations known for their performance, comfort, and durability:

  1. Smartwool Kids’ Hike Medium Crew Socks
    • Material: Merino wool blend
    • Features: Medium cushioning, moisture-wicking, odour-resistance
    • Suitable for: Various hiking conditions and seasons
  2. Darn Tough Light Hiker Jr. Micro Crew Light Cushion Socks
    • Material: Merino wool blend
    • Features: Light cushioning, moisture-wicking, seamless construction
    • Suitable for: Warm weather hiking, lightweight hiking shoes
  3. Thorlos Kids’ Hiking Socks
    • Material: Synthetic blend
    • Features: Thick cushioning, moisture-wicking, impact protection
    • Suitable for: Longer hikes, rugged terrains

These are just a few examples, and it’s important to consider individual preferences and specific requirements when choosing girls hiking socks.

Best Girls Hiking Boots

[product_table id=”287244″]

10. FAQs (Frequently Asked Questions)

Q1: Are girls hiking socks different from boys hiking socks? A: While there may be variations in design and color options, the key features and functionality of hiking socks are generally similar for both genders.

Q2: How do I know if the socks are the right size for my child? A: It’s important to refer to the manufacturer’s sizing chart and guidelines. Additionally, you can measure your child’s foot and compare it to the sock size recommendations. Remember to consider any specific foot characteristics, such as width or arch height, to ensure a proper fit.

Q3: How many pairs of hiking socks should I pack for a hike? A: It’s recommended to pack at least two to three pairs of hiking socks per day, depending on the duration and intensity of the hike. This allows for fresh socks each day and provides backup in case of unexpected weather changes or wet conditions.

Q4: Can girls hiking socks be used for other outdoor activities? A: Yes, girls hiking socks are versatile and can be used for various outdoor activities such as camping, backpacking, or trail running. They provide comfort, protection, and moisture management for active adventures.

Q5: How often should girls hiking socks be replaced? A: The lifespan of hiking socks depends on factors such as frequency of use, care, and overall wear. Inspect the socks regularly for signs of wear and tear, such as thinning fabric or stretched-out elastic. Replace them when they no longer provide adequate cushioning, support, or moisture-wicking properties.

Q6: Can I machine wash girls hiking socks? A: Yes, most hiking socks can be machine washed. However, it’s important to follow the manufacturer’s care instructions. Use a gentle cycle, mild detergent, and avoid using fabric softeners or bleach. Air drying is recommended to preserve the sock’s integrity and prolong its lifespan.

11. Conclusion

Girls hiking socks are a crucial component of any young adventurer’s hiking gear. They provide comfort, protection, and moisture management, ensuring happy and blister-free feet on the trails. By choosing the right size, considering materials, cushioning, and moisture-wicking properties, you can find the perfect socks to enhance your child’s hiking experience. Remember to invest in high-quality options that offer durability and longevity. So, gear up your young hiker with the best girls hiking socks and let them step into the great outdoors with confidence!

Posted on Leave a comment

BEST Lofoten Hiking Video – Norway

best-lofoten-hiking-video-–-norway

Harmen Hoek was there in Arctic Norway June 2023. Got some fantastic weather.

On day 1 and 2 I hiked the Matmora ridge, day 3 to the frozen lake of Botnvatnet.

On day 4 I made it to Vestvågøya island and hiked towards Leknes via Dalstuva where I camped on top of the mountain.

On day 5 I watched the midnight sun above the clouds at 3am, and the next morning I hiked down to Konsfjordpollen to spend a night inside.

On day 6 I started hiking on Moskenesøya and hiked to Ryten peak, Kvalvika beach and Horseidvika beach.

On day 7 I hiked to Kjerkfjorden and took the ferry to Vindstad.

I finished with climbing Hermannsdalstinden.

On day 8 I got to Å, and spent the night next to Ågvatnet.

On day 9 I climbed over a tricky pass to Gjerdvika and Turtnbakkvika beach where I spent the night.

On day 10 I got back to Å.

Click PLAY or watch it on YouTube.

Posted on Leave a comment

Car Roof Box Secrets You Need to Know

Streamlined car roof box on the car roof

Car Roof Box Secrets You Need to Know: Unleashing the Power of Roof Box Storage

Introduction

As an avid traveller, you must have encountered the challenge of fitting all your gear into your car for an exciting journey. This is where car roof boxes come to the rescue! Car roof boxes, also known as rooftop cargo carriers, offer additional storage space for all your belongings, making road trips and vacations more enjoyable. However, to make the most of these rooftop marvels, you need to be aware of the hidden secrets that can transform your travel experience.

In this article, we will delve deep into the world of car roof boxes, uncovering valuable insights, expert tips, and answers to frequently asked questions. By the end, you’ll be equipped with the knowledge and expertise to unlock the full potential of roof box storage.

Car Roof Box Secrets You Need to Know

Understanding Car Roof Boxes: Types and Designs

Before diving into the nitty-gritty, let’s explore the different types and designs of car roof boxes available in the market. From hard-shell to soft-shell, and aerodynamic to square-shaped, each design comes with its unique set of advantages and drawbacks.

Choosing the Perfect Car Roof Box: Factors to Consider

Selecting the ideal car roof box demands thoughtful contemplation of several crucial factors. From the size and material to the mounting options, each element plays a significant role in determining the perfect fit for your needs. Let’s delve deeper into these essential considerations, as we aim to provide you with valuable guidance to make an informed and satisfactory decision.

1. Size Matters: Assessing Your Storage Requirements

The first step in choosing the right car roof box is evaluating your storage needs. Consider the types of items you usually carry on your trips. Are you packing camping gear, sports equipment, or luggage for the whole family? Understanding your storage requirements will help you determine the appropriate size of the roof box.

Keep in mind that larger roof boxes provide more space but might impact your vehicle’s aerodynamics and fuel efficiency. On the other hand, smaller roof boxes might not be sufficient to accommodate all your essentials. Strike a balance between size and functionality to ensure optimal performance.

2. Material: Balancing Durability and Weight

Car roof boxes come in various materials, each offering distinct advantages. Common materials include:

a. Hard-Shell ABS Plastic

Hard-shell roof boxes, typically made from ABS plastic, provide excellent durability and protection for your belongings. They are resistant to impacts, weather conditions, and UV rays. However, they tend to be heavier than other options, potentially affecting your car’s center of gravity.

b. Soft-Shell Fabric

Soft-shell roof boxes are lighter and more flexible, often made from high-quality fabric materials. They are easier to store when not in use and can be a practical choice for occasional travelers. However, they might offer slightly less protection from external elements compared to hard-shell options.

3. Mounting Options: Compatibility and Convenience

Car roof boxes can be mounted using various systems, and it’s essential to choose one that matches your vehicle’s roof rack and your ease of use.

a. Roof Rail System

If your car is equipped with roof rails, you can opt for roof boxes that attach directly to these rails. This system provides a secure and stable connection, making it a popular choice for many vehicles.

b. Crossbar System

If your car has crossbars instead of roof rails, you’ll need a roof box that can be attached to these bars. This system is versatile and works with different car models.

c. No Roof Rack System

If your car doesn’t have a roof rack, you can explore options that come with their own mounting hardware and can be installed directly to the roof.

4. Aerodynamics and Wind Noise: Consideration for Comfortable Driving

Aerodynamics play a vital role in reducing wind resistance and noise while driving with a roof box. Look for designs with sleek contours and streamlined shapes, as they can minimize drag and enhance fuel efficiency. Additionally, some roof boxes come with features like diffusers or spoilers to further optimize aerodynamics and reduce wind noise.

5. Weight Limit: Safety and Performance

Adhering to the designated weight limit of your car roof box is absolutely crucial for maintaining safety and ensuring a smooth and secure journey. Exceeding the weight capacity can have serious consequences, compromising your vehicle’s stability, handling, and overall safety on the road. To avoid potential hazards and ensure a safe trip, it’s essential to calculate the combined weight of your belongings and make sure it falls well within the specified limit.

1. Start with the Manufacturer’s Weight Rating

Begin by consulting the manufacturer’s specifications or user manual for your roof box. The weight rating provided by the manufacturer indicates the maximum amount of weight that the roof box can safely carry. It includes both the weight of the contents inside the box and the weight of the box itself.

2. Weigh Your Belongings

Gather all the items you plan to load into the roof box and weigh them using a household scale or luggage scale. Be sure to include everything that will be placed inside the roof box, including clothing, gear, equipment, and any other travel essentials.

3. Calculate the Total Weight

Add up the individual weights of all your belongings to calculate the total weight that will be placed inside the roof box. Make sure to account for any loose items, packing materials, or accessories that you plan to load as well.

4. Include the Roof Box Weight

Remember to include the weight of the empty roof box itself in your calculations. This weight is typically listed in the manufacturer’s specifications and should be accounted for when determining the total weight the roof box can handle.

5. Confirm Your Vehicle’s Roof Capacity

Check your vehicle’s user manual or consult the car manufacturer to find the maximum weight capacity for your roof. This capacity includes the weight of the roof box, its contents, and any additional roof-mounted accessories.

6. Distribute Weight Evenly

When loading the roof box, distribute the weight evenly to maintain balance and stability. Placing heavier items towards the center and lighter items towards the sides helps to ensure a well-balanced load.

7. Stay Well Within the Limit

Once you’ve calculated the total weight of your belongings and factored in the weight of the roof box itself, make sure the combined weight falls well within the manufacturer’s specified limit and your vehicle’s roof capacity.

8. Periodic Weight Checks

During longer journeys, periodically check the weight of your roof box and its contents to ensure that no additional items have been added and that the weight remains within the safe range.

9. Keep Important Items Within Reach

Arrange your belongings strategically so that essential items are easily accessible during the trip. This will minimize the need to open the roof box frequently and disturb the load.

10. Prioritize Safety

Remember that safety should always be the top priority. Avoid the temptation to overload the roof box, as exceeding the weight limit can compromise your vehicle’s handling, increase the risk of accidents, and potentially result in fines for violating road safety regulations.

By carefully calculating the weight of your belongings and ensuring it falls within the designated limit, you can enjoy a safe and stress-free journey with your roof box. Prioritizing safety and responsible loading practices will not only protect you and your passengers but also contribute to a positive and enjoyable travel experience.

6. Accessibility: Dual-Side Opening or Single-Side Opening

Consider the accessibility of your roof box. Some models offer dual-side openings, allowing you to access your belongings from either side of the vehicle. This feature can be incredibly convenient, especially in cramped parking spaces or when loading and unloading in tricky situations. However, dual-side opening options might be slightly more expensive than single-side opening ones.

7. Security Features: Protecting Your Belongings

The security of your belongings is paramount. Look for roof boxes with reliable locking mechanisms to safeguard your possessions during travel. Some models come with integrated locks, while others offer additional security options like anti-theft systems and reinforced latches.

8. Brand Reputation and Reviews: Trustworthy Choices

Before making a final decision, research various brands and read customer reviews to gauge the performance and reliability of different car roof boxes. Reputable brands with positive feedback from customers are generally a safer bet, ensuring you invest in a quality product.

By considering these essential elements, you can confidently navigate the world of car roof boxes and select the perfect one to cater to your specific travel needs. A well-informed choice will undoubtedly enhance your travel experiences and open up a world of possibilities for your future adventures.

Roof Box Top Picks

[product_table id=”285885″]

Installing Your Car Roof Box: A Step-by-Step Guide

Proper installation of your car roof box is a critical step to ensure a safe and secure journey. Failing to install the roof box correctly can lead to potential hazards on the road and compromise the stability of your vehicle. To ensure you have your roof box fixed properly before embarking on your adventure, we’ll guide you through a comprehensive step-by-step installation process.

Step 1: Gather the Necessary Tools

Before you begin the installation, gather all the necessary tools and equipment. Most roof boxes come with a mounting kit that includes brackets, bolts, and keys for locking. Additionally, you may need a screwdriver, measuring tape, and a ladder or step stool for easier access to the roof of your vehicle.

Step 2: Clear and Clean the Roof

Thoroughly clean the roof of your car to ensure a clean and stable surface for mounting the roof box. Remove any dirt, debris, or old adhesive residues. This will help create a strong and reliable connection between the roof and the roof box.

Step 3: Assemble the Roof Box

If your roof box comes disassembled, follow the manufacturer’s instructions to put it together. Ensure all the components are securely attached, and any locks or fasteners are in place.

Step 4: Position the Roof Box

Carefully place the roof box on the roof of your car, positioning it according to the mounting instructions provided by the manufacturer. Take note of the alignment and clearance from the edges of the roof to ensure it is cantered properly.

Step 5: Attach the Roof Box to the Roof Rack

If your car has roof rails or crossbars, align the roof box’s mounting brackets with the roof rack system. Slide the U-bolts or clamps through the designated holes on the roof box and secure them onto the roof rack. Tighten the bolts or clamps appropriately, ensuring a snug fit.

Step 6: Check for Stability

After attaching the roof box to the roof rack, give it a gentle shake to check for any wobbling or movement. If you notice any instability, recheck the tightness of the bolts or clamps and adjust as needed until the roof box is firmly secured.

Step 7: Test the Locking Mechanism

If your roof box comes with a locking mechanism, test it to ensure it works smoothly and securely. This will provide an added layer of protection for your belongings during your journey.

Step 8: Load Your Belongings

With the roof box properly installed and secured, begin loading your belongings inside. Distribute the weight evenly and avoid overloading the roof box beyond its specified weight limit.

Step 9: Check for Clearance

Before hitting the road, check for clearance of the roof box with any obstacles, such as the garage door or low-clearance structures. Ensure the roof box does not obstruct the rearview or side mirrors of your vehicle.

Step 10: Recheck the Installation

Before you start driving, take a final walk around your car to recheck the roof box installation. Ensure everything is in place, and there are no loose components.

By following this step-by-step installation guide, you can have the peace of mind that your roof box is securely fixed, and you can embark on your journey with confidence. Remember, a properly installed roof box not only ensures a safe and secure travel experience but also allows you to fully enjoy your road trips and vacations to the fullest.

Best Cycle Carriers

[product_table id=”287081″]

Maximizing Space: Packing Tips and Tricks

Effectively utilizing the space inside your car roof box is an art that can make a significant difference in the success of your journey. A well-packed roof box not only ensures that you can carry all your essentials but also maximizes the available space, keeping your belongings safe and secure throughout the trip. To help you master the art of packing, we’ve compiled the best strategies, organization tips, and hacks to fit everything you need seamlessly into your roof box.

  • Make a Packing Checklist

Before you start packing, create a detailed checklist of all the items you plan to take on your trip. Categorize them into groups like clothing, camping gear, sports equipment, etc. This will not only help you keep track of everything but also ensure you don’t forget any essential items.

  • Optimize the Space with Packing Cubes and Bags

Invest in packing cubes and compression bags to optimize the use of space inside your roof box. These handy organizers allow you to pack clothes and other soft items efficiently, reducing their volume and creating more room for other belongings.

  • Pack Heavy Items at the Bottom

To maintain stability and prevent the roof box from becoming top-heavy, place heavier items at the bottom. This will lower the center of gravity and distribute the weight evenly, ensuring a safer and smoother driving experience.

  • Utilize Every Nook and Cranny

Make use of every available space inside the roof box, including the corners and gaps between larger items. Tuck in smaller items or fill these spaces with rolled-up clothes to make the most of the available room.

  • Follow the Tetris Approach

Packing a roof box is much like playing Tetris – aim to fit items together like puzzle pieces. Stack items of similar shapes and sizes neatly to create a compact and secure arrangement. This method also helps in minimizing shifting during transit.

  • Keep Frequently Used Items on Top

Place items that you might need to access frequently during the trip, such as snacks, a first aid kit, or rain gear, on the top layer for easy reach. This way, you won’t have to unpack the entire roof box to find what you need.

  • Secure Items with Straps or Bungee Cords

Use straps or bungee cords to secure items and prevent them from moving around while driving. This adds an extra layer of protection to fragile items and helps maintain organization inside the roof box.

  • Disassemble Bulky Items

If you have larger items like tents or chairs, consider disassembling them to reduce their size before packing. This not only saves space but also allows you to utilize the roof box more efficiently.

  • Place Fragile Items Carefully

When packing fragile items, use soft padding like clothing or blankets to cushion them. Avoid placing them near the edges or in direct contact with hard surfaces to minimize the risk of damage during transit.

Distribute the weight evenly across the roof box to maintain balance and stability while driving. Avoid overloading one side or corner, as this can affect your car’s handling and increase the risk of accidents.

By employing these packing strategies, organization tips, and clever hacks, you can become a master at fitting all your essentials seamlessly inside your car roof box. Enjoy a stress-free and well-organized journey, knowing that your belongings are securely packed and ready for your adventures ahead.

Safe Driving with a Loaded Roof Box: Precautions and Best Practices

Driving with a rooftop cargo carrier adds an extra dimension to your driving experience, demanding increased attention and adherence to safety guidelines. To ensure a safe and smooth journey, it’s crucial to follow specific precautions and best practices that will help maintain stability and minimize potential risks associated with driving with a rooftop cargo carrier.

  • Reduce Speed and Avoid Sudden Manoeuvres

When driving with a rooftop cargo carrier, it’s essential to reduce your speed and avoid sudden manoeuvres, such as quick lane changes or sharp turns. The additional weight and height of the roof box can affect your car’s centre of gravity, potentially impacting its stability during rapid movements.

  • Be Mindful of Clearance Heights

Always be aware of the clearance heights when driving with a rooftop cargo carrier. The added height may restrict your access to certain areas, such as low-clearance structures or parking garages. Pay attention to signs indicating height restrictions and plan your route accordingly.

  • Adjust Driving Style in Adverse Weather Conditions

Adverse weather conditions, such as rain, snow, or strong winds, can further challenge the stability of your vehicle with a rooftop cargo carrier. Reduce your speed and maintain a safe following distance in these conditions to ensure better control and prevent hydroplaning.

  • Regularly Check Mounting and Securement

Before every journey, double-check the mounting and securement of the rooftop cargo carrier. Ensure that all bolts, clamps, and locks are properly tightened to prevent any loosening during transit. Periodically inspect the roof box and its attachments during long trips to maintain stability.

  • Stay Within Weight Capacity Limits

Adhering to the weight capacity limits of both the rooftop cargo carrier and your vehicle’s roof is crucial for safety. Overloading the roof box can strain the roof rack and affect your car’s handling and braking performance. Refer to the manufacturer’s guidelines and distribute the weight evenly inside the roof box.

  • Minimize Wind Resistance

Driving at high speeds can create wind resistance, which may impact fuel efficiency and stability. Minimize wind resistance by using an aerodynamic roof box and avoiding excessive speed.

  • Use Extra Caution While Changing Lanes

When changing lanes, be extra cautious and use your mirrors effectively to ensure there are no blind spots. The rooftop cargo carrier may obstruct some of your view, so take the necessary time to check your surroundings before making a lane change.

  • Account for Increased Stopping Distance

With the added weight on the roof, your vehicle’s stopping distance may increase. Leave ample space between your car and the vehicle in front to compensate for this change and avoid sudden braking whenever possible.

  • Be Cautious of Height Clearance in Parking Structures

When parking in multi-level parking structures, be mindful of the increased height of your vehicle with the rooftop cargo carrier. Look for spaces with higher clearance and avoid areas with low ceilings that may cause damage to the roof box.

If you won’t be using the rooftop cargo carrier for an extended period, consider removing it from your vehicle. This not only reduces wind resistance and potential fuel consumption but also extends the life of the roof box and its mounting system.

By following these precautions and best practices, you can maintain stability and ensure a smooth drive with your rooftop cargo carrier. Driving responsibly and attentively will not only safeguard your belongings but also enhance the safety and enjoyment of your journey.

Securing Your Valuables: Tips to Prevent Theft

When traveling with a roof box, ensuring the security of your belongings becomes even more crucial. The added convenience of extra storage space can attract unwanted attention from potential thieves. To safeguard your valuables and prevent theft during your travels, follow these essential tips:

Selecting a high-quality roof box with built-in security features is the first step in protecting your belongings. Look for models with sturdy locks, reinforced latches, and tamper-resistant mechanisms. Investing in a reputable and reliable brand will provide an added layer of protection.

  • Park Strategically

When parking your vehicle, choose well-lit and busy areas whenever possible. Thieves are less likely to attempt a break-in in places with high visibility. If you’re staying at a hotel, inquire about secure parking facilities or monitored parking lots.

  • Keep Valuables with You

While the roof box provides ample storage, keep essential and high-value items with you in the passenger compartment. This includes passports, identification, electronic devices, and valuable jewelry. If you make stops during your journey, never leave these items unattended in the vehicle.

  • Use Additional Locks and Straps

Consider using extra security measures, such as cable locks or steel straps, to further secure the roof box. These deterrents can discourage thieves from attempting to open the box, as they add an extra layer of complexity.

Register your roof box with the manufacturer if there is an option to do so. In the event of theft, this registration can assist authorities in tracking and identifying the stolen item.

  • 7. Be Discreet About Your Travel Plans

Avoid discussing your travel itinerary or destination loudly in public places. Be discreet when mentioning your road trip plans to minimize the risk of potential thieves being alerted.

During breaks or rest stops, take a moment to inspect the roof box and ensure it is securely closed and locked. Periodically check the mounting and attachments to confirm everything is in place.

Consider installing a roof box alarm system that alerts you if the box is tampered with or opened without authorization. These alarms can be an effective deterrent against theft attempts.

  • Purchase Travel Insurance

Obtain comprehensive travel insurance that covers theft and loss of personal belongings. In the unfortunate event of theft, having insurance can provide some financial relief and assistance in recovering your losses.

By following these tips and staying vigilant, you can ensure the security of your belongings when using a roof box and enjoy a worry-free and enjoyable journey. Remember, prevention is the best defense against theft, so take the necessary precautions to protect your valuables during your travels.

Weatherproofing Your Roof Box: Keeping Contents Dry and Clean

Don’t let bad weather put a damper on your travel plans! Weatherproofing your car roof box is essential to ensure that your belongings remain safe and dry during adverse weather conditions, such as rain, snow, and dust. Here are some valuable tips on how to weatherproof your roof box and safeguard your belongings:

Investing in a waterproof roof box is the first step in weatherproofing your belongings. Look for models made from durable and water-resistant materials, such as high-quality ABS plastic or coated fabric. Many reputable brands offer roof boxes specifically designed to withstand rain and snow.

Regularly inspect the seals around the edges of the roof box for any signs of wear or damage. Cracked or worn-out seals can compromise the waterproofing of the box, allowing water and dust to seep in. Replace any damaged seals promptly to maintain optimal weatherproofing.

  • Apply Weatherproofing Sealant

Consider applying weatherproofing sealant around the edges and seams of the roof box for an added layer of protection. Choose a high-quality sealant suitable for the material of your roof box, and follow the manufacturer’s instructions for application.

  • Use Waterproof Cargo Bags or Liners

For an extra level of protection, place your belongings inside waterproof cargo bags or liners before loading them into the roof box. These additional barriers will shield your items from moisture and keep them dry even in heavy rain or snow.

  • Organize and Pack Strategically

Organize your belongings in a way that minimizes exposure to potential water entry points. Place items that are sensitive to water damage, such as electronics or clothing, in the center of the roof box and surround them with more water-resistant items.

Consider installing roof box rain guards or deflectors on the front edge of the roof box. These guards redirect rainwater away from the box, reducing the chances of water getting inside.

  • Add Lockable Latches

Upgrade to lockable latches for your roof box to ensure a tight and secure closure. These latches not only prevent theft but also create a tighter seal, keeping rain and dust out.

Make sure the roof box is securely fastened to your car’s roof rack. A well-fitted and tightly secured roof box is less likely to allow water or dust to penetrate inside.

For additional protection, cover the entire roof box with a waterproof cargo net or tarp before setting off on your journey. This extra layer will shield the box from rain, snow, and dust, providing peace of mind during unpredictable weather.

  • Inspect Regularly During Long Trips

If you’re embarking on a long journey, periodically inspect the roof box during breaks or rest stops. Check for any signs of water or dust infiltration, and make adjustments as needed to maintain weatherproofing.

By following these tips and taking the necessary precautions, you can weatherproof your car roof box effectively and ensure that your belongings remain protected from rain, snow, and dust. With a well-protected roof box, you can confidently embrace your travel adventures, knowing that your possessions are safe and dry throughout the journey.

Eco-Friendly Roof Boxes: Advancing Sustainability

As responsible travellers, we have a responsibility to consider the environmental impact of our choices, including the accessories we use for our journeys. Opting for eco-friendly roof box options is an excellent way to contribute to a sustainable future and reduce our carbon footprint. Here are some eco-conscious choices you can make when selecting a roof box:

  • Choose Recycled Materials

Look for roof boxes made from recycled materials. Many manufacturers are now using recycled plastics and other sustainable materials to create their products. By choosing a roof box made from recycled materials, you help reduce the demand for new resources and support the recycling industry.

  • Select Aerodynamic Designs

Opt for roof boxes with aerodynamic designs. Aerodynamic roof boxes reduce wind resistance and drag, which can improve your vehicle’s fuel efficiency. By minimizing air resistance, you’ll be consuming less fuel and reducing greenhouse gas emissions during your travels.

  • Consider Lightweight Models

Choose lightweight roof boxes whenever possible. Lighter roof boxes not only enhance your vehicle’s handling and stability but also contribute to fuel efficiency by reducing the overall weight of your car. Lighter vehicles consume less fuel and have a lower environmental impact.

  • Prioritize Longevity and Durability

Invest in a high-quality, durable roof box that will stand the test of time. A long-lasting roof box means less waste generated over the years, as you won’t need to replace it frequently. Durability is an essential aspect of sustainability.

  • Opt for Locally Manufactured Roof Boxes

Whenever feasible, choose roof boxes that are manufactured locally. Local production reduces transportation-related emissions, as the roof boxes don’t have to travel long distances to reach the market. Supporting local businesses also fosters regional economic growth.

  • Choose Removable Roof Boxes

Consider using removable roof boxes rather than fixed ones. Removable roof boxes can be taken off when not in use, reducing air resistance and fuel consumption during your everyday driving. This flexibility helps minimize the environmental impact of your vehicle.

  • Support Brands with Environmental Initiatives

Research and support brands that have strong environmental initiatives. Look for manufacturers that are committed to reducing their carbon footprint, using sustainable materials, and implementing eco-friendly practices in their production processes.

  • Reduce Single-Use Plastics

When packing your belongings in the roof box, avoid using single-use plastic bags. Instead, opt for reusable packing cubes or bags made from eco-friendly materials.

  • Offset Your Carbon Footprint

Consider offsetting the carbon emissions from your travels by supporting carbon offset projects. These initiatives invest in renewable energy, reforestation, and other activities that help counterbalance the carbon emissions produced during your journey.

By making eco-friendly choices when selecting a roof box and adopting sustainable practices during your travels, you can actively contribute to a greener and more sustainable future. Every small step towards reducing our environmental impact counts, and as responsible travelers, we can lead the way towards a more eco-conscious and mindful approach to exploration. Let’s embark on our journeys with the planet’s well-being in mind, creating a positive impact wherever we go.

Car Roof Box Accessories: Enhancing Convenience

Enhancing your roof box experience can be achieved with the addition of a variety of accessories designed to improve convenience, security, and organization. These accessories are designed to complement your roof box and make your travels even more enjoyable. Here are some essential roof box accessories to consider:

  • Locks and Security Systems

Investing in high-quality locks and security systems is paramount to ensure the safety of your belongings during your travels. Choose lockable latches or integrated lock systems for your roof box to deter theft and keep your items secure during stops and overnight stays.

  • Cargo Nets and Straps

Cargo nets and straps are invaluable accessories for organizing and securing your belongings inside the roof box. These accessories prevent items from shifting during transit, reducing the risk of damage and optimizing the use of available space.

Roof box rain guards, also known as deflectors, are designed to redirect rainwater away from the front edge of the roof box. They help minimize water seepage and keep your belongings dry during rainy weather.

Cargo organizers, such as dividers and storage boxes designed specifically for roof boxes, can help you keep your belongings neatly organized and easily accessible. They prevent items from mixing together and facilitate efficient packing and unpacking.

Consider adding a roof box mat or liner to protect the interior of the roof box from scratches and abrasions. The liner also serves as an extra layer of insulation, protecting your items from extreme temperatures.

Roof box wind fairings are accessories designed to reduce wind resistance and noise while driving with a roof box. They improve aerodynamics and contribute to better fuel efficiency during your journeys.

Roof box lights provide illumination inside the box, making it easier to find your belongings during nighttime stops. LED lights are energy-efficient and perfect for ensuring visibility when accessing your items in the dark.

If you have a large or heavy roof box, consider installing a lift assist system. These accessories make it easier to load and unload your belongings by reducing the weight of the roof box and providing additional support during lifting.

Ensure you have compatible roof racks or crossbars to securely attach your roof box to the roof of your vehicle. Roof racks and crossbars provide a stable foundation for your roof box and ensure a safe and reliable attachment.

For additional protection against water and dust, consider using roof box cargo bags. These water-resistant bags can be placed inside the roof box to provide an extra layer of protection for your belongings.

By incorporating these roof box accessories into your travel setup, you can enhance your roof box experience and make the most of your adventures. From increased security to improved organization, these accessories add convenience and peace of mind to your travels, allowing you to focus on the joy of the journey ahead.

Tips for Storing Your Roof Box During Off-Season

Properly storing your roof box during the off-season is essential for maintaining its condition and extending its lifespan. By following these tips, you can ensure that your rooftop cargo carrier remains in excellent shape and ready for your next adventure:

1. Clean and Dry Thoroughly

Before storing your roof box, make sure to clean it thoroughly. Remove any dirt, dust, or debris from both the interior and exterior surfaces. Use mild soap and water to clean the box, and allow it to dry completely before storing.

2. Remove Contents and Accessories

Empty the roof box of all its contents, including any accessories or organizers you may have used during your travels. Check all compartments and pockets to ensure nothing is left behind.

3. Inspect for Damage

Perform a careful inspection of the roof box for any signs of damage or wear. Check the locks, hinges, and seals to ensure they are in good condition. Address any issues before storing to prevent further deterioration during the off-season.

4. Disassemble if Possible

If your roof box is designed to be disassembled, consider taking it apart for more convenient storage. This reduces the space needed for storing and can make transportation easier.

5. Store in a Cool and Dry Location

Find a cool, dry, and well-ventilated location for storing your roof box. Extreme temperatures, humidity, or direct sunlight can damage the box over time. Consider using a climate-controlled storage area, such as a garage or storage unit, to maintain optimal conditions.

6. Use a Protective Cover

Consider using a protective cover for your roof box to shield it from dust and debris during storage. A cover made from breathable materials will prevent mold or mildew from forming while allowing air circulation.

7. Store in a Horizontal Position

Store the roof box in a horizontal position to prevent warping or distortion. Placing the box on its side or vertically may compromise its structural integrity over time.

8. Elevate the Roof Box

To avoid damage from direct contact with the floor, elevate the roof box slightly by placing it on wooden blocks or pallets. This prevents moisture from seeping into the box and helps maintain its condition.

9. Lubricate Moving Parts

If your roof box has moving parts, such as hinges or locks, consider applying a small amount of lubricant to keep them functioning smoothly during storage.

10. Periodic Checks

During the off-season, perform periodic checks on the roof box to ensure it remains in good condition. Look for any signs of damage, mold, or pest infestation, and address issues promptly.

By following these tips, you can store your roof box properly during the off-season, ensuring that it stays in optimal condition for years to come. Proper storage not only protects your investment but also ensures that your rooftop cargo carrier is ready to accompany you on your future adventures without a hitch. With a well-maintained roof box, you can look forward to many more exciting and hassle-free journeys ahead.

Breaking Down the Cost: Are Roof Boxes Worth It?

Investing in a roof box is indeed a decision that requires careful financial consideration. While roof boxes offer numerous benefits and convenience, it’s essential to break down the costs and assess whether they are worth the investment for your specific needs. Let’s take a closer look at the various costs associated with roof boxes and evaluate their overall value:

1. Initial Cost of the Roof Box

The primary cost of investing in a roof box is the purchase price of the box itself. Roof boxes come in various sizes, materials, and brands, leading to a wide range of prices. The cost may vary from budget-friendly options to higher-end models with advanced features and increased durability.

2. Roof Rack or Crossbars

To install a roof box on your vehicle, you may need to invest in roof racks or crossbars. These serve as the foundation for attaching the roof box securely. If your vehicle already has roof rails, you might only need crossbars, but if not, roof racks might be necessary, adding to the overall investment.

3. Installation and Assembly

If you are not comfortable with DIY installation, there might be additional costs associated with having the roof box professionally installed. However, many roof boxes are designed for easy assembly and can be installed without the need for professional assistance.

4. Fuel Efficiency and Additional Fuel Costs

One aspect to consider is the potential impact on fuel efficiency. Roof boxes increase wind resistance, which can lead to decreased fuel economy, especially at higher speeds. While the impact may vary based on factors such as box design and driving habits, it’s important to be aware of potential additional fuel costs.

5. Maintenance and Repairs

Roof boxes, like any other outdoor equipment, may require maintenance over time. This includes regular cleaning, inspecting seals, and lubricating moving parts. In the event of damage or wear, repairs might also be necessary, potentially incurring additional costs.

6. Storage and Off-Season Costs

During the off-season or when not in use, you’ll need to find suitable storage for your roof box. If you lack adequate space at home, you might have to consider renting storage space, which could be an added expense.

7. Insurance Coverage

Before investing in a roof box, it’s advisable to check your car insurance policy to determine coverage for roof-mounted cargo carriers. Some insurance policies may cover roof boxes, while others might require an additional endorsement or coverage.

8. Value of Convenience and Additional Space

Beyond financial costs, it’s crucial to consider the value of the convenience and additional storage space that a roof box provides. Roof boxes are invaluable for travelers, campers, and outdoor enthusiasts, offering a secure and easily accessible solution for carrying bulky or extra gear.

9. Versatility and Long-Term Use

Roof boxes are versatile accessories that can be used for various purposes, from family vacations to transporting sports equipment. Their long-term use and durability can make them a valuable investment for frequent travellers or those with an active lifestyle.

10. Resale Value

If you anticipate using a roof box for a limited period, consider its potential resale value. High-quality roof boxes in good condition tend to retain their value well, which can offset some initial costs when it’s time to sell or upgrade.

In conclusion, the decision to invest in a roof box depends on individual needs, budget, and travel habits. For those who frequently embark on road trips or outdoor adventures, a roof box can be a valuable addition, providing additional storage and convenience. However, for occasional travelers or those with limited budgets, alternative storage options might be more cost-effective. Before making a decision, carefully assess your requirements and evaluate the long-term benefits of investing in a roof box. With thoughtful consideration, you can make an informed choice that aligns with your travel goals and financial plan.

Overcoming the Challenges of Loading and Unloading

Loading and unloading a roof box can indeed present challenges, especially when dealing with heavy or bulky items. However, with the right techniques and some practical solutions, you can make this process hassle-free and efficient. Here are some tips to help you load and unload your roof box with ease:

1. Organize and Prioritize Items

Before loading your roof box, organize your belongings and prioritize essential items that you may need during your journey. Place frequently used or urgent items at the top or in easily accessible positions to avoid the need to rummage through the entire box while on the road.

2. Use Packing Cubes or Bags

Utilize packing cubes or bags to compartmentalize and organize your items inside the roof box. These containers can help keep similar items together, making it easier to locate what you need without creating a mess.

3. Distribute Weight Evenly

Ensure an even distribution of weight inside the roof box to maintain stability and minimize the impact on your vehicle’s handling. Place heavier items closer to the center of the box and distribute the weight evenly on both sides.

4. Use a Step Stool or Step Ladder

If your vehicle is tall or you have difficulty reaching the roof, consider using a step stool or step ladder to make loading and unloading more accessible. This ensures that you can comfortably reach all areas of the roof box without straining.

5. Load Larger Items First

When loading your roof box, start with larger and bulkier items. Items like camping gear, sleeping bags, or sports equipment can be placed in the box first, creating a solid base for additional items.

6. Secure Loose Items

For loose or smaller items that may shift during transit, use cargo nets, bungee cords, or packing straps to secure them in place. This prevents items from moving around inside the roof box and helps maintain organization.

7. Use Loading Mats or Sliders

Loading mats or sliders can be useful when loading heavy or bulky items into the roof box. These mats reduce friction, making it easier to slide objects into position without straining your back or shoulders.

8. Ask for Assistance

If the roof box is too heavy or cumbersome to handle alone, don’t hesitate to ask for help. Enlist a friend or family member to assist you during the loading and unloading process, ensuring safety and efficiency.

9. Plan Ahead for Unloading

Before arriving at your destination, plan ahead for unloading the roof box. If you need certain items immediately upon arrival, place them on top or in an easily accessible location within the box.

10. Unload with Caution

When unloading the roof box, exercise caution and be mindful of your surroundings. Carefully remove items one by one, checking for any potential hazards such as sharp edges or heavy objects.

By following these practical solutions and techniques, you can make loading and unloading your roof box a hassle-free process. Proper organization, even weight distribution, and the use of helpful tools can greatly simplify the task, allowing you to focus on enjoying your journey without unnecessary stress or strain.

Decoding Weight Capacity and Limitations

Understanding the weight capacity of your roof box is of utmost importance for ensuring a safe and smooth journey. Overloading the roof box can lead to serious safety hazards, affecting your vehicle’s handling, fuel efficiency, and overall stability. To help you decode weight limitations and load your roof box properly, here’s some essential guidance:

1. Check Manufacturer’s Weight Rating

Begin by checking the manufacturer’s weight rating for your specific roof box model. This information can usually be found in the user manual or on the box itself. The weight rating indicates the maximum amount of weight the roof box can safely carry, including both the contents and the box’s weight itself.

2. Consider Your Vehicle’s Roof Capacity

In addition to the roof box’s weight rating, take into account your vehicle’s roof capacity. Your car’s roof, including roof rails or crossbars, has its own weight limit that you should not exceed. The combined weight of the roof box and its contents must not surpass this limit.

3. Calculate the Total Weight

To determine the total weight you can safely load into the roof box, subtract the weight of the empty roof box from the manufacturer’s weight rating. The remaining weight is the maximum capacity available for your belongings.

4. Distribute Weight Evenly

Evenly distribute the weight of your belongings inside the roof box. Placing heavier items in the center and lighter items on the sides ensures better balance and stability during your journey.

5. Follow Weight Distribution Guidelines

Adhere to weight distribution guidelines provided by the manufacturer. Some roof boxes may have specific instructions on where to place certain items to maintain optimal balance and prevent any impact on vehicle handling.

6. Secure Loose Items

Use packing cubes, bags, or dividers to secure loose items and prevent them from shifting during transit. Loose items can not only disrupt weight distribution but also create safety hazards.

7. Avoid Overloading

Resist the temptation to overload the roof box, even if it seems like there’s still some space left. Overloading can lead to structural damage, compromised safety, and potential fines if you violate road safety regulations.

8. Know the Dynamic Load Rating

Be aware of the dynamic load rating of your roof box. This rating refers to the weight the roof box can handle while the vehicle is in motion. It may differ from the static load rating (weight capacity when the vehicle is stationary).

9. Check Roof Box Locks and Latches

Before hitting the road, double-check that all locks and latches on the roof box are properly secured. Loose or faulty closures can lead to items falling out and pose a safety risk to other road users.

10. Avoid High-Speed Driving

While using a roof box, avoid excessive speeds and sudden maneuvers. Higher speeds can increase wind resistance and impact vehicle stability, especially if the roof box is heavily loaded.

By understanding your roof box’s weight capacity and following these guidelines for proper loading, you can ensure a safe and enjoyable journey. Prioritizing safety and responsible loading practices will not only protect you and your passengers but also contribute to a smooth and worry-free travel experience

.

FAQ’s (Frequently Asked Questions)

Q: Can I leave my car roof box on all year round?

A: While it’s possible, we recommend removing the roof box when not in use to prolong its lifespan and prevent unnecessary wear.

Q: Do roof boxes affect vehicle handling?

A: When installed correctly and within weight limits, roof boxes should not significantly impact vehicle handling.

Q: Can I paint my roof box to match my car’s colour?

A: While it’s technically possible, painting the roof box may void the warranty and could affect its performance. It’s best to check with the manufacturer first.

Q: How do I clean my roof box?

A: Clean your roof box with mild soap and water, and avoid harsh chemicals that could damage the material.

Q: Are roof boxes waterproof?

A: Most roof boxes are designed to be water-resistant, but not fully waterproof. It’s recommended to use waterproof covers for added protection during heavy rainfall.

Q: Can I stack items inside the roof box?

A: Stacking items is acceptable, but ensure they are packed securely to prevent shifting during transit.

Conclusion

Car roof boxes are an invaluable addition to any traveler’s arsenal, elevating the convenience and enjoyment of road trips and vacations. By understanding the secrets and best practices, you can make the most of this practical storage solution. From choosing the right roof box to packing efficiently and ensuring safety, these tips will enhance your travel experiences and make every journey unforgettable.

So, get ready to embark on extraordinary adventures with your car roof box and unlock the true potential of rooftop storage!

Posted on Leave a comment

Ultimate Guide to Camping Coolers and Cool Bags

couple camping with a cool box to keep their food and drink cool

Ultimate Guide to Camping Coolers and Cool Bags

Introduction: Stay Cool and Refreshed During Camping Trips

When embarking on a camping adventure, one essential aspect that contributes significantly to the overall experience is staying cool and refreshed. Whether you’re camping in the scorching summer heat or enjoying a weekend getaway in nature, having the right camping cooler and cool bag can make all the difference. In this comprehensive guide, we will explore everything you need to know about camping coolers and cool bags to ensure a seamless and enjoyable camping experience.

Cool Boxes

[product_table id=”285869″]


Ultimate Guide to Camping Coolers and Cool Bags

Campers, outdoor enthusiasts, and nature lovers will appreciate the convenience and importance of a well-equipped camping cooler and cool bag. Let’s dive into the ultimate guide, covering everything from choosing the right cooler to tips for maximizing its efficiency.

1. The Types of Camping Coolers and Cool Bags

Understanding the various types of camping coolers and cool bags available in the market is crucial for making an informed decision and ensuring a successful camping trip. Let’s explore the different types of coolers and cool bags, along with their respective pros and cons, to help you choose the most suitable option for your camping needs.

1. Hard-Sided Coolers

Description: Hard-sided coolers are sturdy, robust, and often made from durable materials like plastic or metal. They typically have rigid walls and a hinged lid that locks securely, providing excellent insulation for keeping your items cool.

Pros:

  • Superior Insulation: Hard-sided coolers offer excellent insulation, ensuring that your food and beverages stay cold for an extended period, even in hot weather conditions.
  • Durability: These coolers are built to withstand rough handling and outdoor elements, making them ideal for rugged camping trips.
  • Security: The locking lids provide enhanced security, preventing animals or curious critters from accessing your supplies.

Cons:

  • Heavy and Bulky: Hard-sided coolers can be heavy and bulky, making them less portable and challenging to transport, especially for long hikes.
  • Higher Price: Due to their durability and superior insulation, hard-sided coolers tend to be more expensive than other options.

2. Soft-Sided Cool Bags

Description: Soft-sided cool bags, also known as soft coolers, are lightweight and flexible. They are usually made from materials like nylon or polyester and feature insulated walls to keep items cool.

Pros:

  • Portability: Soft coolers are lightweight and come with comfortable carrying handles or shoulder straps, making them easy to carry around, even for extended periods.
  • Space-Efficient: These cool bags are collapsible when empty, saving valuable space during transportation and storage.
  • Affordability: Soft coolers are generally more budget-friendly compared to hard-sided coolers.

Cons:

  • Limited Insulation: Soft coolers offer good insulation but may not keep items cold for as long as hard-sided coolers.
  • Less Durable: The materials used in soft coolers may be less durable than hard-sided coolers, and they may be prone to tears or punctures if not handled carefully.

3. Electric Coolers

Description: Electric coolers, also known as thermoelectric coolers, operate on electricity or can be plugged into a car’s power outlet (DC) or standard wall outlet (AC). They use a thermoelectric cooling system to maintain a cold temperature inside.

Pros:

  • Convenience: Electric coolers don’t require ice, making them convenient for longer trips or situations where ice is not readily available.
  • Temperature Control: Some electric coolers have adjustable temperature settings, allowing you to cool or even warm your items as needed.
  • Less Mess: Without the need for ice, you won’t have to deal with melted icewater, keeping your supplies dry.

Cons:

  • Power Source Dependency: Electric coolers rely on a power source, making them less suitable for remote camping trips or locations without electricity.
  • Limited Cooling Capacity: Electric coolers may not cool as efficiently as traditional coolers, especially in extremely hot conditions.
  • Noise: Some electric coolers can be noisy while running, which may be bothersome in quiet camping environments.

Now that you’re familiar with the different types of camping coolers and cool bags, you can assess your camping needs, the duration of your trip, and the specific features you require. Whether you prioritize durability, portability, or convenience, making the right choice will ensure you have the perfect cooling companion for your camping adventures. So, before you set out on your next outdoor journey, equip yourself with the ideal cooler or cool bag, and enjoy the refreshing rewards it brings to your camping experience.

2. How to Choose the Perfect Camping Cooler

Finding the perfect camping cooler is a critical step in ensuring that your food and beverages stay fresh and enjoyable throughout your entire camping trip. To make the best choice, you need to consider several important factors that will directly impact the cooler’s performance and suitability for your specific needs. Let’s delve into these essential considerations to help you select the ideal cooler for your camping adventures.

  • 1. Capacity

Assess Your Needs: Start by evaluating the number of people and the duration of your camping trip. Determine how much food and beverages you need to store in the cooler. Having a clear idea of your requirements will help you choose the right cooler size.

Consider Cooler Volume: Cooler capacity is usually measured in quarts or liters. Opt for a cooler with enough volume to accommodate your supplies comfortably. Remember that larger coolers might be heavier and bulkier, so find the right balance between capacity and manageability.

  • 2. Insulation

Insulation Quality: The primary purpose of a camping cooler is to keep its contents cold. Look for coolers with excellent insulation that can maintain low temperatures for an extended period. High-quality insulation will prevent ice from melting quickly, ensuring your food stays fresh throughout your trip.

Insulation Material: Common insulation materials include foam, polyurethane, or a combination of both. Foam insulation offers better temperature retention, but polyurethane provides added durability and efficiency.

  • 3. Portability

Weight and Size: Depending on your camping style, consider the cooler’s weight and dimensions. If you’re planning on hiking to your campsite or need to transport the cooler frequently, choose a lightweight and compact model that won’t be cumbersome to carry.

Carrying Options: Look for coolers with comfortable handles or shoulder straps. Some models even have wheels, making them easier to pull along like a suitcase.

  • 4. Additional Features

Lid Type: Cooler lids come in different designs, such as hinged, removable, or zippered. Hinged lids are convenient as they stay attached to the cooler, while removable and zippered lids offer easy access to contents.

Drainage System: A reliable drainage system is essential for getting rid of melted ice and water. Check for large and easy-to-use drainage plugs or spouts that allow quick and efficient water removal.

Dividers and Organizers: Some coolers come with dividers or internal organizers, allowing you to separate items and keep them organized. This feature can be handy for longer trips with various food items.

Cup Holders and Trays: Coolers with built-in cup holders or trays on the lid provide added convenience, offering a stable surface to place drinks or snacks.

  • 5. Durability and Build Quality

Material: Choose a cooler made from durable and rugged materials that can withstand outdoor elements and rough handling. Rotomolded coolers, in particular, are known for their superior durability.

Bear-Resistant Design: If you’re camping in bear country, consider investing in a bear-resistant cooler that meets approved standards to keep your supplies safe from curious wildlife.

By considering these crucial factors, you can confidently select the perfect camping cooler that aligns with your specific needs and preferences. A well-chosen cooler will not only keep your food and beverages fresh but also enhance your overall camping experience, allowing you to focus on the joys of nature and outdoor adventure. So, prepare to embark on a memorable camping journey with the ideal cooler companion by your side.

3. Keeping Your Cool: Tips for Proper Cooler Packing

Efficiently packing your camping cooler is a skill that can make a significant difference in maintaining a consistent temperature and optimizing its cooling potential throughout your entire camping trip. With the right techniques and strategies, you can ensure that your food stays fresh, drinks remain chilled, and perishables stay safe. Here are some expert tips on how to pack your cooler efficiently:

  • 1. Pre-Cool Your Cooler

Before packing any food or beverages, pre-cool your cooler to lower its internal temperature. You can do this by adding a layer of ice or frozen gel packs and leaving them in the cooler for a while before loading it with your supplies. This step helps create an initial cooling environment and improves the overall cooling efficiency of the cooler.

  • 2. Use Ice Blocks or Large Ice Packs

Instead of using loose ice, opt for ice blocks or large ice packs. They tend to melt more slowly and last longer, keeping your items cold for an extended period. Additionally, using ice blocks reduces the chances of your food items getting soaked as the ice melts.

  • 3. Layering Technique

Practice layering your cooler strategically to maintain a consistent temperature. Place a layer of ice blocks or large ice packs at the bottom of the cooler as a foundation. On top of this layer, add perishables like meat, dairy, and other items that need to stay coldest. Surround these items with more ice blocks to create a cooling barrier.

  • 4. Group Similar Items Together

Grouping similar items together can help you access what you need quickly and minimize the time the cooler is open. Keep drinks in one section, fruits in another, and so on. This way, you can retrieve what you need without exposing the entire cooler’s contents to warm air.

  • 5. Utilize Cooler Dividers or Baskets

If your cooler comes with dividers or internal baskets, use them to separate different categories of food and beverages. Dividers help in keeping the cooler organized and prevent cross-contamination.

  • 6. Top It Off with Ice

After placing all your perishables in the cooler, top it off with a layer of ice blocks or packs. Make sure the ice covers all the items in the cooler. A full cooler retains cold better than one with empty spaces.

  • 7. Limit Cooler Openings

Limit the number of times you open the cooler to maintain the cold temperature inside. Plan ahead and retrieve all the items you’ll need at once, if possible. Each time you open the cooler, warm air enters, and the cooling efficiency decreases.

  • 8. Keep Non-Perishables Separate

Non-perishable items like condiments, snacks, and dry goods can be packed separately in a separate container or bag. This way, you can access them without opening the main cooler frequently.

  • 9. Store Cooler in Shade

Position your cooler in the shade or use a reflective cover to shield it from direct sunlight. Sunlight can accelerate ice melting and raise the internal temperature of the cooler.

By following these expert tips and tricks, you can ensure that your camping cooler remains efficient throughout your trip, keeping your food and beverages cool and safe. With a well-organized cooler and smart packing techniques, you’ll enjoy fresh and refreshing treats during your camping adventures, making your outdoor experience all the more enjoyable.

4. DIY Cooler Hacks: Improvising in the Outdoors

Exploring innovative and resourceful DIY cooler hacks can be a game-changer when you’re camping in the wilderness, far from modern conveniences. These clever techniques will help you extend the cooling capabilities of your camping cooler and keep your supplies fresh for longer. Here are some creative cooling solutions using everyday items found in nature:

  • 1. Natural Ice Packs

When you’re in the wilderness, finding ice might be a challenge. However, you can create natural ice packs using frozen water bottles or containers. Before your camping trip, fill empty plastic water bottles or containers with water and freeze them at home. Once frozen, these natural ice packs can keep your cooler cold for days without the need for traditional ice.

  • 2. Insulation Improvements

Improve the insulation of your cooler by using materials found in nature. Surround your cooler with layers of natural insulators like leaves, grass, or even pine needles. These organic materials create an additional barrier of insulation, preventing external heat from penetrating your cooler and maintaining a consistent temperature inside.

  • 3. Evaporative Cooling Technique

Harness the power of evaporation to create a natural cooling effect. Wet a cloth or bandana with water and wrap it around your cooler. As the water evaporates, it cools the surface of the cooler, reducing the internal temperature. Repeat this process periodically to keep the cooling effect going.

  • 4. Digging a Cooler Pit

If you’re camping for an extended period in one location, consider digging a shallow pit to bury your cooler partially. The earth’s natural insulation will help keep the cooler cooler for a more extended period, especially if the ground is moist. Ensure the lid remains accessible and level with the surrounding ground for easy access.

  • 5. Use a Wet Towel as a Cooler Cover

Keep your cooler cool by draping a wet towel over it during hot hours of the day. The evaporating water from the towel will cool the cooler’s surface, helping to maintain the internal temperature.

5. The Art of Campsite Refrigeration

Campsite refrigeration is indeed an art that experienced campers have perfected over time. When you’re out in the wilderness, far from modern conveniences, creating a makeshift campsite refrigerator can be a game-changer, ensuring you have cold drinks and fresh food throughout your camping trip. Let’s explore the best practices for campsite refrigeration using simple techniques and everyday items:

  • 1. Utilize a Nearby Stream or River

If you’ve set up your campsite near a stream or river, take advantage of the natural cooling properties of running water. Submerge your sealed food items and beverages in a waterproof container and anchor it in the stream. The flowing water will keep the container cool, acting as a makeshift refrigerator.

  • 2. Dig a Cooling Pit

Dig a shallow pit in the ground and line it with a waterproof material such as a tarp or plastic sheet. Place your food and drinks inside sealed containers and lower them into the pit. Cover the pit with more waterproof material and bury it with soil. The earth’s natural insulation will help maintain a cool temperature inside the pit, preserving your supplies.

  • 3. Use a Wet Cloth Cooler

Wrap your food and drinks with a wet cloth or bandana and hang it in a shaded area. As the water evaporates from the cloth, it creates a cooling effect, similar to a swamp cooler, keeping the items cool without the need for ice.

  • 4. Snow or Ice from Higher Elevations

If you’re camping in a mountainous area with snow-capped peaks, you can gather snow or ice from higher elevations. Pack the snow or ice around your food and drinks, creating a natural cooling chamber. Just be sure to use a waterproof container to prevent melted ice from leaking.

  • 5. Overnight Cooling with Low Temperatures

Take advantage of colder night-time temperatures by leaving your food and drinks outside during the night. Ensure they are securely sealed and protected from animals. The chilly night air will act as a natural refrigerator, keeping your supplies cool until the morning.

  • 6. Utilize Insulated Containers

Bring along insulated containers or thermoses for items like milk, juice, or perishable food. Insulated containers help maintain the temperature of their contents, keeping them cold for more extended periods without relying on ice.

  • 7. Freeze Foods in Advance

Before your camping trip, pre-freeze some of your food items, such as meats, fruits, and even pre-cooked meals. These frozen items can act as makeshift ice packs in your cooler, keeping other perishables cool as they thaw.

  • 8. Keep Cooler in the Shade

Place your cooler in a shaded area, away from direct sunlight. Direct sunlight can quickly raise the internal temperature of the cooler, affecting its cooling efficiency.

  • 9. Organize Cooler Efficiently

Organize your cooler smartly to reduce the need to open it frequently. Group items together, with the ones you’ll need most often placed on top. Limiting cooler openings helps maintain a consistent temperature inside.

By adopting these best practices for campsite refrigeration, you’ll be able to master the art of preserving your food and drinks without the need for advanced equipment. These simple yet effective techniques will enhance your camping experience, allowing you to enjoy cold beverages and fresh food while immersing yourself in the beauty of the great outdoors.

6. Maintaining Your Camping Cooler: Cleaning and Storage

Proper maintenance is key to ensuring your camping cooler remains in top-notch condition, guaranteeing its longevity and optimal performance throughout your future camping trips. By following a few simple yet effective cleaning, sanitizing, and storage practices, you can keep your cooler functioning at its best. Let’s explore these essential steps for maintaining your camping cooler:

  • 1. Regular Cleaning

After each camping trip, make it a habit to clean your cooler thoroughly. Start by removing all remaining food, beverages, and ice from the cooler. Dispose of any perishable items properly to prevent odour and bacterial growth.

  • 2. Use Mild Soap and Warm Water

Clean the interior and exterior of the cooler with a solution of mild soap and warm water. Use a sponge or cloth to scrub away any dirt, spills, or residue. Pay close attention to any areas that may have come into contact with food or liquids.

  • 3. Rinse Thoroughly

After cleaning, rinse the cooler thoroughly with clean water. Ensure all soap residues are removed to prevent any unwanted flavors or odors in your cooler during the next use.

  • 4. Sanitize the Cooler

Sanitizing your cooler is essential to eliminate any remaining bacteria or germs. Create a sanitizing solution using equal parts water and white vinegar or a food-safe cleaning solution. Wipe down the interior and exterior of the cooler with this solution and let it sit for a few minutes before rinsing again.

  • 5. Air Dry Completely

After cleaning and sanitizing, allow your cooler to air dry completely. Open the lid and let it dry naturally, preferably in a shaded and well-ventilated area. Avoid putting the cooler away while it is still damp, as moisture can promote mould and mildew growth.

  • 6. Prevent Odours

To prevent odours from developing, place a box of baking soda or a few activated charcoal packets inside the cooler when storing it. These natural odour absorbers will help keep the interior smelling fresh and clean.

  • 7. Store with the Lid Slightly Open

When not in use, store your cooler with the lid slightly open. This allows for proper ventilation and prevents any trapped odors or moisture from building up inside.

  • 8. Inspect and Repair

Regularly inspect your cooler for any signs of wear and tear. Check for cracks, leaks, or damaged seals that may compromise its insulation. If you notice any issues, repair or replace the damaged parts to maintain the cooler’s efficiency.

  • 9. Avoid Extreme Temperatures

Avoid exposing your cooler to extreme temperatures when not in use. Keep it away from direct sunlight or freezing temperatures, as these conditions can affect the cooler’s materials and performance.

By adhering to these proper maintenance practices, you can ensure that your camping cooler remains in excellent condition for years to come. A well-maintained cooler not only prolongs its lifespan but also guarantees that it will continue to keep your food and beverages cool and fresh during all your future camping adventures. With a little care and attention, your camping cooler will be a reliable companion for many memorable outdoor experiences.

7. Cool Bags: The Portable Cooling Solution

Cool bags provide a versatile and lightweight alternative to traditional camping coolers, offering a range of benefits for outdoor enthusiasts. These portable and convenient cooling solutions have become increasingly popular among campers, hikers, and picnickers alike. Let’s explore the advantages of using cool bags, the different types available, and some efficient packing tips for your outdoor escapades.

Benefits of Cool Bags

  1. Portability: Cool bags are lightweight and easy to carry, making them ideal for outdoor adventures where weight and mobility are essential factors.
  2. Space-Efficient: When not in use, cool bags can be collapsed or folded, saving valuable space during transportation and storage.
  3. Versatility: Cool bags are not limited to camping trips alone. They are perfect for picnics, beach outings, road trips, and other activities where you need to keep food and drinks cool.
  4. Easy Cleaning: Most cool bags have a wipeable interior, simplifying the cleaning process and ensuring hygiene for your next outing.
  5. No Need for Ice: Unlike traditional coolers that require ice or ice packs, cool bags often come with built-in gel packs or thermal linings, eliminating the need for additional cooling agents.

Types of Cool Bags

  1. Soft-Sided Cool Bags: These are the most common type of cool bags, featuring a flexible design with insulated walls to keep contents cool. They come in various sizes and styles, suitable for different occasions.
  2. Shoulder Cool Bags: These cool bags have long shoulder straps, allowing you to carry them comfortably over your shoulder while keeping your hands free.
  3. Backpack Cool Bags: Designed like backpacks, these cool bags are perfect for hiking and camping trips, offering both cooling capabilities and storage space for other essentials.
  4. Trolley Cool Bags: Equipped with wheels and a retractable handle, trolley cool bags are easy to roll along, making them a convenient choice for longer trips or heavy loads.

Efficient Packing Tips for Cool Bags

  1. Pre-Chill the Bag: Before packing, place the cool bag in the refrigerator or freezer for a short while to pre-chill it. This helps to enhance its cooling capabilities.
  2. Organize Items: Group similar items together and place them in separate compartments or containers within the cool bag. This organization makes it easy to find what you need without disrupting the cool bag’s overall temperature.
  3. Use Frozen Items: Utilize frozen food or beverages as cooling agents within the cool bag. They act as makeshift ice packs and gradually thaw to provide refreshments during your trip.
  4. Pack Efficiently: Start by placing heavier items at the bottom of the cool bag, followed by lighter ones on top. This distribution helps in maintaining the cool bag’s balance and cooling efficiency.
  5. Minimize Air Gaps: Fill any empty spaces in the cool bag with towels, blankets, or extra clothing to minimize air gaps. Reducing air circulation helps in preserving the cool bag’s cooling temperature.
  6. Keep the Cool Bag Sealed: Limit the frequency of opening the cool bag to retain the cold air inside. Only open it when necessary and close it promptly.

By embracing the benefits of cool bags, understanding the various types available, and employing efficient packing techniques, you can enjoy cool and refreshing treats during your outdoor escapades. These portable and practical cooling solutions make your camping and outdoor experiences more enjoyable, allowing you to focus on the beauty of nature and create lasting memories with family and friends.

8. Staying Cool on the Move: Portable Electric Coolers

For campers who seek a more modern and convenient approach to cooling, portable electric coolers are an excellent option. These innovative cooling devices have gained popularity among outdoor enthusiasts for their ability to keep food and drinks cool without the need for ice. Let’s explore the advantages of electric coolers and provide tips for using them effectively during your camping adventures.

Advantages of Electric Coolers

  1. Efficient Cooling: Electric coolers use thermoelectric technology to maintain low temperatures inside. They can cool their contents to a range of temperatures, offering precise control over cooling settings.
  2. No Ice Required: One of the significant advantages of electric coolers is that they eliminate the need for ice or ice packs. This means you don’t have to worry about ice melting and water seeping into your food or drinks.
  3. Quiet Operation: Unlike some traditional camping coolers that can be noisy due to moving parts, electric coolers operate quietly, making them ideal for maintaining a peaceful camping environment.
  4. Versatility: Electric coolers can work as both coolers and warmers. You can use them to keep beverages chilled or to keep food warm for picnics or hot meals.
  5. Less Mess: With no ice involved, electric coolers prevent the typical mess of dealing with melted ice and water. This cleaner solution makes packing and cleaning up a breeze.

Tips for Using Electric Coolers Effectively

  1. Power Source Planning: Electric coolers require a power source to operate. If you’re camping at a site with electricity hookups, ensure you have access to power. For remote camping, consider using a portable power generator or a car’s power outlet (DC) if your cooler has this capability.
  2. Monitor Power Consumption: Be mindful of your electric cooler’s power consumption, especially if you’re using a portable power source. Keep an eye on the cooler’s energy usage to ensure you don’t drain your power supply too quickly.
  3. Pre-Chill Contents: For maximum efficiency, pre-chill your food and beverages before placing them in the electric cooler. This will reduce the cooler’s workload and help it maintain a consistently low temperature.
  4. Pack Smartly: Organize your cooler’s contents efficiently. Place frequently used items at the top to minimize opening the cooler frequently. Ensure there’s enough space around items for proper air circulation.
  5. Keep It Ventilated: Allow sufficient airflow around the electric cooler to prevent overheating. Avoid placing the cooler in direct sunlight or confined spaces where ventilation is limited.
  6. Use a Cooler Insulator: Consider using a cooler insulator or cover to enhance the cooler’s efficiency. Insulation helps retain the cooler’s internal temperature, reducing the workload on the cooling system.
  7. Keep the Lid Closed: Just like traditional coolers, keeping the electric cooler’s lid closed as much as possible is essential to maintaining consistent cooling. Limiting lid openings helps preserve the cool air inside.
  8. Safety Measures: Adhere to safety guidelines and manufacturer’s instructions when using the electric cooler. Avoid overloading it or using it in extreme temperatures beyond its specified range.

Electric coolers offer a modern and efficient way to keep your camping supplies cool and fresh without the need for ice. By following these tips and using them effectively, you can fully embrace the convenience of electric cooling during your camping adventures. Enjoy the ease and reliability of your electric cooler while relishing the great outdoors and creating cherished memories with your fellow campers.

9. Choosing the Right Ice Packs for Camping

The choice of ice packs can indeed have a significant impact on the cooling efficiency of your camping cooler. Selecting the right type of ice packs can ensure that your food and beverages stay cold and fresh throughout your camping trip. Let’s explore the different types of ice packs available and determine which ones are best suited for various camping scenarios.

1. Gel Ice Packs:

Gel ice packs are a popular choice for camping coolers due to their flexibility and reusability. They are filled with a gel-like substance that freezes into a cold, malleable pack. Gel ice packs are relatively affordable and come in various sizes, making them easy to fit into different cooler spaces. They are best for general use, keeping your camping essentials cool and fresh for moderate periods.

2. Ice Bricks:

Ice bricks are solid blocks made of water that freeze to form a solid mass. They provide excellent cooling power and can maintain a low temperature for an extended period. Ice bricks are ideal for longer camping trips, especially when you need to keep your cooler cold for several days. They are sturdy and reliable, and some models have dividers to prevent foods from sticking together.

3. Dry Ice:

Dry ice is frozen carbon dioxide, and it offers an incredibly low temperature of around -78 degrees Celsius (-109 degrees Fahrenheit). While dry ice provides excellent cooling power, it requires careful handling. Always use gloves when handling dry ice, and never seal it tightly in a cooler, as the released carbon dioxide can create pressure. Dry ice is best for long camping trips or when you need to keep items frozen for an extended period.

4. Instant Ice Packs:

Instant ice packs are single-use packs that generate cold temperatures when activated. You simply squeeze or shake the pack to initiate the cooling process. Instant ice packs are convenient for short camping trips or when you need a quick cooling solution. However, they are not reusable and may not provide long-lasting cooling power.

5. Reusable Ice Packs with Freezable Gel:

These ice packs contain a freezable gel similar to gel ice packs but are designed to be reused multiple times. They are flexible, making them easy to fit into different cooler spaces, and are suitable for various camping scenarios. Reusable ice packs are an eco-friendly option since they can be used multiple times before disposal.

6. Frozen Water Bottles:

In a pinch, frozen water bottles can serve as makeshift ice packs. Fill water bottles with water and freeze them before your camping trip. Once frozen, place the bottles in your cooler to keep your supplies cold. As the ice melts, you’ll have cold water to drink.

7. Frozen Food Items:

If you’re bringing perishable foods like meat, vegetables, or fruits, consider freezing them before your camping trip. These frozen food items can act as ice packs, keeping other items in the cooler cold as they thaw.

Considerations:

  • Assess the duration of your camping trip to determine the type and quantity of ice packs you’ll need.
  • Remember that the more ice packs you add to the cooler, the less space you have for food and drinks, so plan accordingly.
  • Always handle dry ice with care and follow safety guidelines to avoid any hazards.

Choosing the right ice packs for your camping cooler ensures efficient cooling and freshness for your food and drinks during your outdoor adventures. With the right ice packs on hand, you can fully enjoy the beauty of nature while indulging in cool and refreshing treats during your camping journey.

Conclusion: Embrace the Cool Camping Experience

Congratulations! You’ve reached the end of the Ultimate Guide to Camping Coolers and Cool Bags. Armed with expert insights, tips, and knowledge, you’re now equipped to make the best choices for your camping cooler needs. Embrace the cool camping experience with the right gear and preparation, and create lasting memories in the great outdoors.

FAQs:

  1. Are cool bags as effective as traditional camping coolers? Cool bags are a viable alternative to traditional coolers, especially for short trips and outings. They are lightweight, portable, and can keep your items cool for several hours. However, for extended camping trips or situations requiring prolonged cooling, traditional camping coolers with better insulation might be more suitable.
  2. How do I clean and sanitize my camping cooler? Cleaning and sanitizing your camping cooler are essential for maintaining its functionality and hygiene. To clean, use mild soap, warm water, and a sponge or cloth. Rinse thoroughly and let it air dry. For sanitizing, use a mixture of water and white vinegar or a food-safe cleaning solution. Rinse again and let it dry completely.
  3. What is the best way to organize items in my camping cooler? To optimize cooling efficiency, place perishable items that need to stay the coldest at the bottom of the cooler. Layer ice packs or ice on top, followed by less perishable items. Keep frequently used items at the top for easy access without opening the cooler too often.
  4. Can I use dry ice in my camping cooler? While dry ice can keep items colder for longer periods, it requires special handling due to its extremely low temperature. Always use gloves when handling dry ice, and never place it directly on food. Use regular ice packs or ice as a safer alternative.
  5. What is the best way to secure my camping cooler from wildlife? To protect your cooler from wildlife, store it in a bear-resistant container if available. Otherwise, place it in a locked vehicle or secure it with bungee cords to heavy objects, like a tree, to prevent animals from accessing it.
  6. Can I use a camping cooler for hot food? Camping coolers are designed for maintaining low temperatures, so they are not suitable for keeping hot food warm. For hot meals, consider using insulated containers or thermoses to retain heat.