Posted on Leave a comment

Sore Feet After Hiking: Causes, Prevention, and Relief

Hiker takes a break to rub his sore foot

Sore Feet After Hiking: Causes, Prevention, and Relief

Introduction

Hiking is an exhilarating activity that allows you to connect with nature, challenge yourself physically, and enjoy breathtaking views. However, one common issue that many hikers face is sore feet after hiking. This discomfort can be a significant deterrent, preventing you from fully enjoying your outdoor adventures. In this comprehensive guide, we will explore the causes of sore feet after hiking, discuss preventive measures, and provide effective relief strategies to ensure that you have a pain-free hiking experience.

Sore Feet After Hiking: The Culprits

1. Ill-Fitting Footwear

Wearing improper footwear is a leading cause of sore feet after hiking. When your shoes or boots do not fit well, they can rub against your feet, causing blisters, hot spots, and general discomfort. It’s crucial to invest in high-quality hiking shoes that provide proper support, cushioning, and a snug fit to minimize the risk of foot pain.

2. Insufficient Arch Support

Another common culprit behind sore feet is insufficient arch support. Your arches act as shock absorbers, distributing the impact of each step evenly. When your shoes lack proper arch support, the strain on your feet increases, leading to pain and fatigue. Consider using orthotic inserts or specialized hiking insoles that provide adequate arch support for a more comfortable hiking experience.

3. Overexertion

Pushing your limits and hiking for extended periods without adequate rest can result in sore feet. Overexertion causes excessive strain on your muscles, tendons, and ligaments, leading to inflammation and discomfort. It’s crucial to listen to your body’s signals and take regular breaks during your hikes to give your feet time to recover.

4. Terrain and Elevation Changes

The terrain you hike on plays a significant role in foot discomfort. Uneven surfaces, rocky trails, and steep inclines can put excessive pressure on certain areas of your feet, leading to soreness. Gradually increasing the difficulty of your hikes and choosing appropriate trails for your skill level can help minimize foot pain.

5. Inadequate Foot Care

Neglecting foot care before, during, and after hiking can contribute to sore feet. Failing to trim your toenails properly, not wearing moisture-wicking socks, and ignoring blisters can lead to discomfort and pain. Proper foot hygiene, regular toenail maintenance, and addressing any foot issues promptly are essential for preventing sore feet.

Preventing Sore Feet: Tips and Techniques

1. Choose the Right Footwear

Investing in high-quality hiking shoes or boots that fit properly is paramount. Visit a specialized outdoor retailer to get professionally fitted, ensuring that your footwear provides ample support, protection, and comfort. Additionally, consider wearing moisture-wicking socks made of synthetic or wool materials to keep your feet dry and blister-free.

2. Gradually Increase Your Hiking Intensity

Avoid overexertion by gradually increasing the intensity and duration of your hikes. Start with shorter, less strenuous trails, and gradually work your way up to more challenging terrain. This approach allows your feet and muscles to adapt and build endurance, reducing the risk of soreness.

3. Strengthen Your Feet and Ankles

Performing specific exercises to strengthen your feet and ankles can help prevent soreness and injuries. Simple exercises like toe curls, calf raises, and ankle rotations can improve stability and enhance the overall strength of your lower extremities.

4. Take Regular Breaks

Allowing your feet time to rest and recover during your hikes is crucial. Take short breaks every hour or so to remove your shoes, stretch your feet and calves, and massage them gently. This practice helps improve blood circulation and prevents fatigue and soreness.

5. Maintain Proper Foot Hygiene

Before heading out on a hike, trim your toenails straight across to prevent ingrown nails and discomfort. Apply a generous amount of foot powder or anti-chafing balm to minimize friction. After your hike, clean and dry your feet thoroughly, paying attention to areas prone to blisters.

Relief Strategies for Sore Feet

1. Rest and Elevate

If you experience sore feet after hiking, it’s essential to rest and elevate them. Lie down and prop your feet up on a pillow to reduce swelling and encourage blood flow back to your heart. This simple remedy can provide significant relief and aid in the recovery process.

2. Apply Ice

Icing your feet can help alleviate pain and reduce inflammation. Wrap an ice pack or a bag of frozen peas in a thin towel and apply it to the sore areas for 15-20 minutes at a time. Repeat this several times a day to promote healing.

3. Use Epsom Salt Soaks

Epsom salt soaks are a popular remedy for soothing sore feet. Add a cup of Epsom salt to warm water and soak your feet for 15-20 minutes. The magnesium in the Epsom salt aids in muscle relaxation and reduces inflammation, providing relief from soreness.

4. Massage Your Feet

Gently massaging your feet with your hands or a tennis ball can help alleviate tension and promote blood circulation. Apply moderate pressure to the sore areas and use circular motions to knead the muscles. A soothing foot massage can bring significant relief and relaxation.

5. Try Over-the-Counter Pain Relievers

Over-the-counter pain relievers such as ibuprofen or acetaminophen can help alleviate foot pain and reduce inflammation. Follow the instructions on the packaging and consult your healthcare provider if you have any underlying medical conditions or concerns.

Other Pain Relievers

Showing 1 – 5 of 16 results Showing all 16 results Showing the single result No results found
Sort by Popularity
Filters Sort results
Reset Apply
Image
Name
Description
Price
Quantity
Add to cart
Voltarol Back And Muscle Pain Relief Gel With No Mess…
£12.49
Max:
Min: 1
Step: 1
Twin Pack Pain Gone - Ideal to have a spare…
£39.76£44.95
Max:
Min: 1
Step: 1
Effective soothing relief from tension headaches.Soothing fragrance.Non-greasy.
£5.99
Max:
Min: 1
Step: 1
Experience extended relief with these quick-acting and flexible heat patches…
£9.18
Max:
Min: 1
Step: 1
Maximum strength formula for quick and rapid relief of muscular…
£5.06
Max:
Min: 1
Step: 1
124

FAQs About Sore Feet After Hiking

1. Why do my feet hurt after hiking?

Hiking puts a significant strain on your feet, especially if you’re wearing improper footwear or overexerting yourself. The repetitive motion, uneven terrain, and lack of proper support can lead to foot pain and soreness.

2. How can I prevent blisters while hiking?

To prevent blisters while hiking, make sure your shoes fit properly, wear moisture-wicking socks, and apply foot powder or anti-chafing balm to minimize friction. Additionally, promptly address any hot spots or discomfort to prevent blisters from forming.

3. Can hiking cause long-term damage to my feet?

While hiking is generally a safe activity, improper footwear, overexertion, and inadequate foot care can lead to long-term foot damage. It’s essential to take preventive measures, listen to your body, and seek medical attention if you experience persistent pain or discomfort.

4. How long does it take for sore feet to heal after hiking?

The recovery time for sore feet after hiking can vary depending on the severity of the discomfort and your body’s ability to heal. With proper rest, elevation, and care, most cases of sore feet resolve within a few days to a week.

5. When should I seek medical help for sore feet after hiking?

If your foot pain persists or worsens despite home remedies, or if you experience symptoms such as severe swelling, redness, or difficulty walking, it’s advisable to seek medical attention. A healthcare professional can evaluate your condition and provide appropriate treatment.

6. Can I continue hiking with sore feet?

It’s generally recommended to allow your feet to rest and recover before resuming hiking with sore feet. Pushing through the pain can exacerbate the issue and lead to further damage. Give yourself adequate time to heal before embarking on your next adventure.

Conclusion

Sore feet after hiking can put a damper on your outdoor experience, but with the right knowledge and preventive measures, you can minimize discomfort and enjoy your hikes to the fullest. Remember to choose suitable footwear, take breaks, practice proper foot hygiene, and listen to your body. By implementing these strategies, you’ll be able to prevent sore feet and embark on exciting hiking adventures with confidence.

Posted on Leave a comment

Hiking Val Gardena, Italy

hiking-val-gardena,-italy

Trip report by BestHike editor Rick McCharles

Val Gardena is a valley in northern Italy, in the Dolomites, one of our top 10 hiking regions of the world..

The 3 alpine towns are UrtijëiSëlva, and Santa Cristina.

Click PLAY or get a glimpse of my 3 days in the valley on YouTube.

There are no bad hikes out of Val Gardena. But the highlight for me was getting to the famed ridge vista of the Odles/Geisler Group from Secede (2518m).

I hiked up early, the first person to reach the ridge on this morning. I wanted to beat the cable car day hikers. That expensive lift started up at 8:30am in 2023.

Here’s that famed vista on a clear day.

Amazing views in the Dolomites mountains. Views from Seceda over the Odle mountains are spectacular.

Another good option is to stay late in the day, after the cablecar stops at 5:30pm.

Of course it’s a long steep descent. ????

There’s heated debate in the Dolomites whether or not you should use the cable cars. Personally, I’m OK with them — if you have the money.

But on this one I climbed down over a vertical kilometre back to the valley. Step by step.

I fuelled up with a couple of thousand calories at the Daniel Hut restaurant.

I’d started with a plan. BUT — as usual in the Dolomites — I ended up changing it en route. Easy to do when there are so many clearly marked alternatives.

Another day I took the cablecar from Ortisei to the Alpe di Siusi up to what’s claimed to be the largest high altitude Alpine meadow in Europe. It is high, huge, and green.

You can’t lose hiking Val Gardena. It’s fantastic.

Be ready for afternoon thunder and lightning, however. Don’t get stuck up high in a storm.

Posted on Leave a comment

#5 best hiking region in the world is the …

#5-best-hiking-region-in-the-world-is-the-…

Central Andes

Ecuador, Peru and Bolivia

Hiking holidays in Peru are hot right now. More popular than ever. Political stability since the leader of the Shining Path terrorist group was captured in 1992 resulted in a booming tourist industry.

The second highest mountain range on Earth is fantastic. Broad valleys and endless vistas. You are always above the tree line. Arid desert to the west, Amazon jungle to the east.

Our contributors have hiked most of the major treks in Peru the past few years. The peaks, glaciers and canyons are outrageous. Everyone is thrilled with the Andes.

Unfortunately, management of treks is atrocious, the Peruvian government seemingly bent on ruining their fantastic tourist draw. Do your homework before booking a flight to Lima. Or sign on with a trekking company with which you have had a strong, recent recommendation.

Ruminahui in Cotopaxi National Park, Ecuador

The weather in the Andes can be deadly, of course, but sometimes you get weeks of sunny blue skies, especially in the Cordillera Blanca out of Huaraz, Peru. The best weather for the high peaks out of Huaraz (the best jumping off point for hikers in the Central Andes) is the drier “Andean summer”: May-Sept.

In fact, there are good hikes somewhere in this region year round.

More information on our new Central Andes information page.

Our favourite hike in the Central Andes is the little known Ausangate Circuit in Peru, our #4 best hike in the world. Quite a few trekkers have decided on Ausangate (instead of the over-hyped Inca Trail) based on our recommendation. And all have been happy with that decision.

See our Ausangate Circuit Information page.

The best guidebook for the Central Andes, by far, is Lonely Planet:

Lonely Planet Trekking in the Central Andes

Lonely Planet Trekking in the Central Andes

Note that Bolivia is not nearly as popular as it should be due to lack of infrastructure for tourism, security concerns and political instability. Honestly, unless you know the language and culture well, it’s better to hike Peru. Or much neglected Ecuador.

Posted on Leave a comment

Best Hot Weather Hiking Tips

photo of the sun

Best Hot Weather Hiking Tips

Introduction

Hiking in hot weather requires special attention to ensure your safety and enjoyment on the trails. The scorching sun, high temperatures, and intense humidity can pose challenges and risks if you’re unprepared. In this comprehensive guide, we will provide you with the best hot weather hiking tips to keep you cool, hydrated, and protected during your outdoor adventures. From gear and clothing choices to hydration strategies and sun protection, we’ve got you covered. So, let’s dive in and discover how to make the most of your hot weather hikes!

Choosing the Right Clothing for Hot Weather Hiking

When it comes to hiking in hot weather, choosing the right gear and clothing is essential. Here are some tips to keep in mind:

  1. Opt for lightweight and breathable materials: Look for hiking clothes made from moisture-wicking fabrics that allow air circulation and quick drying. This helps to keep you cool and comfortable throughout the hike.
  2. Wear a wide-brimmed hat: A hat with a broad brim provides shade for your face, neck, and ears, shielding them from direct sunlight. It also helps to prevent overheating and sunburn.
  3. Invest in good-quality sunglasses: Protect your eyes from harmful UV rays by wearing sunglasses with UV protection. This reduces glare and enhances your visibility on the trail.
  4. Choose light-colored clothing: Light colors reflect sunlight and heat, keeping you cooler compared to dark-colored garments that absorb heat.
  5. Wear moisture-wicking socks and breathable hiking shoes: Keep your feet dry and comfortable by wearing moisture-wicking socks that help prevent blisters. Choose breathable hiking shoes that provide ventilation to avoid excessive sweating and discomfort.

Importance of Hydration

Staying properly hydrated is crucial for hiking in hot weather. Follow these hydration strategies to prevent dehydration and ensure optimal performance:

  1. Drink plenty of water: Start hydrating even before your hike begins. Carry an adequate amount of water based on the duration and intensity of your hike. A general guideline is to have at least one litre of water per hour of hiking. Adjust the quantity based on personal factors such as sweat rate and individual hydration needs.
  2. Use a hydration reservoir or water bladder: Consider using a hydration reservoir or a water bladder that fits inside your backpack. This allows for easy access to water without constantly stopping to reach for a water bottle.
  3. Replenish electrolytes: To replenish electrolytes lost through sweat, include electrolyte-rich drinks or snacks in your pack. Sports drinks, electrolyte tablets, and fruits with high water content are great options.

Planning Your Hike in Advance

Proper planning is essential for a safe and enjoyable hot weather hike. Consider the following tips:

  • Check the weather forecast before heading out. Avoid hiking during extreme heat or when heat advisories are in effect.
  • Start your hike early in the morning or later in the afternoon when temperatures are cooler. This minimizes exposure to the hottest part of the day.
  • Choose trails with shade, water sources, or swimming holes along the way. These features provide opportunities to cool down and stay refreshed.
  • Inform someone about your hiking plans, including your intended route and estimated return time. This ensures that someone knows where you are in case of an emergency.

Proper Sun Protection

Protecting yourself from the sun’s harmful rays is crucial during hot weather hikes. Follow these sun protection tips:

  1. Apply sunscreen: Apply a broad-spectrum sunscreen with a high SPF (Sun Protection Factor) to all exposed skin. Reapply regularly, especially after sweating or swimming.
  2. Wear a hat and sunglasses: In addition to sunscreen, wear a wide-brimmed hat to protect your face and neck from direct sunlight. Wear sunglasses with UV protection to shield your eyes from the sun’s glare and harmful UV rays.
  3. Use lip balm with SPF: Protect your lips from getting dry and sunburned by using lip balm with SPF.
  4. Consider UV-protective clothing: Consider wearing UV-protective clothing or lightweight long-sleeved shirts and pants to provide an extra layer of sun protection.

Sun Protection Products

Showing 1 – 5 of 23 results Showing all 23 results Showing the single result No results found
Sort by Popularity
Filters Sort results
Reset Apply
Image
Name
Description
Price
Quantity
Add to cart
Max:
Min: 1
Step: 1
High protection - The Nivea Sun spray impresses with a…
£14.46-£17.48
Max:
Min: 1
Step: 1
Body sun cream offering very high protection with SPF 50…
£17.10-£21.43
Max:
Min: 1
Step: 1
The information below applies to each unit in the packEffective…
£6.97£10.75
Max:
Min: 1
Step: 1
£18.00
Max:
Min: 1
Step: 1
125

Taking Advantage of Shade

Seeking shade along the trail can significantly help in managing the heat. Here’s how you can take advantage of shade during your hot weather hikes:

  1. Plan your hike strategically: Start your hike early in the morning or later in the afternoon when the sun’s intensity is lower. This allows you to enjoy cooler temperatures and more shade.
  2. Identify shaded areas on the trail: Before heading out, study the trail map or do some research to identify sections of the trail that offer shade. Plan your breaks and rest stops accordingly.
  3. Take frequent breaks in shaded areas: Whenever you come across shaded areas, take the opportunity to rest, cool down, and rehydrate. This helps to regulate your body temperature and prevent overheating.

Trail Etiquette and Safety

Being mindful of trail etiquette and safety practices ensures a positive hiking experience for everyone. Consider the following guidelines:

  • Stay on marked trails to avoid trampling fragile vegetation and disturbing wildlife habitats.
  • Yield to uphill hikers and give way to faster-moving hikers or trail runners.
  • Pack out all your trash and leave no trace of your visit. Keep nature pristine and beautiful for future hikers.
  • Carry a first aid kit and be familiar with basic first aid techniques. This allows you to handle minor injuries or provide assistance until help arrives.

Maintaining Energy Levels

Hiking in hot weather can be physically demanding. Here are some tips to maintain your energy levels throughout the hike:

  • Fuel your body with nutritious snacks that provide sustained energy, such as trail mix, energy bars, fresh fruit, or jerky.
  • Consume small, frequent meals rather than heavy meals that can make you feel lethargic.
  • Avoid sugary drinks and foods that can cause energy crashes. Opt for natural sources of sugar like fruits or honey.
  • Take short breaks to rest and refuel. Find a shady spot, sit down, and enjoy a snack to recharge.

Popular Energy Snacks

Showing 1 – 5 of 40 results Showing all 40 results Showing the single result No results found
Sort by Popularity
Filters Sort results
Reset Apply
Image
Name
Description
Price
Quantity
Add to cart
£33.00-£39.49
Max:
Min: 1
Step: 1
NUT FREE ENERGY BARS - Our delicious nut & gluten free…
£19.97
Max:
Min: 1
Step: 1
Protein snack bar, ideal for on-the-go snacks or a post…
£5.99-£9.15
Max:
Min: 1
Step: 1
Are you bored of poor tasting protein bars? Are you…
£21.66-£32.99
Max:
Min: 1
Step: 1
With carbohydrates and 10 g of high-quality protein per servingWith…
£20.17-£23.69
Max:
Min: 1
Step: 1
128

FAQs

What should I wear for hot weather hiking?

When it comes to hot weather hiking, wearing the right clothing can make a significant difference in your comfort level on the trails. Here are some tips to help you choose the best clothing for hot weather hikes:

  • Opt for lightweight and breathable materials: Select clothing made of moisture-wicking materials such as synthetic blends or merino wool. These fabrics are designed to pull sweat away from your skin and evaporate it quickly, keeping you dry and cool.
  • Choose loose-fitting garments: Loose-fitting clothing allows for better airflow, promoting ventilation and preventing overheating. Avoid tight-fitting clothes that can trap heat and restrict your movement.
  • Look for UPF-rated clothing: UPF (Ultraviolet Protection Factor) clothing is specifically designed to block harmful UV rays from the sun. It provides an added layer of protection against sunburn and reduces the risk of skin damage. Seek clothing items with a high UPF rating for optimal sun protection.
  • Opt for light-coloured clothing: Light-coloured clothing reflects sunlight, helping to keep you cooler compared to dark-coloured garments that absorb heat. Light shades such as white, pastels, and light greys are ideal choices for hot weather hikes.
  • Consider clothing with ventilation features: Look for clothing with built-in ventilation features such as mesh panels, vents, or zippered openings. These additions enhance airflow and allow heat to escape, keeping you more comfortable during your hike.
  • Don’t forget about headwear: Along with your clothing, wearing a hat is essential for protecting your head and face from direct sunlight. Opt for a wide-brimmed hat made of breathable material to shield your face, neck, and ears from the sun’s rays. This can help prevent sunburn and keep you cooler.

Remember, the goal is to choose clothing that promotes airflow, wicks away moisture, and provides protection from the sun. By wearing lightweight and breathable garments made of moisture-wicking materials, you can stay comfortable and cool even in the hottest of conditions during your hiking adventures.

How much water should I bring on a hot weather hike?

Staying hydrated is crucial when hiking in hot weather to prevent dehydration and heat-related illnesses. Here are some tips to help you determine how much water to bring:

  • Consider the duration and intensity of your hike: Longer and more strenuous hikes will require more water to replenish fluids lost through sweating. Assess the estimated duration and difficulty level of your hike to gauge your hydration needs.
  • Follow the one-litre-per-hour guideline: As a general rule of thumb, aim to carry at least one litre of water per hour of hiking. This guideline provides a starting point for hydration planning.
  • Take personal factors into account: Everyone’s hydration needs differ, so consider your sweat rate, body size, and personal preferences. If you tend to sweat heavily or have a larger body size, you may need to increase your water intake. Likewise, if you know from past experience that you require more fluids, adjust accordingly.
  • Plan for refilling opportunities: Depending on the length of your hike and the availability of water sources along the trail, plan for opportunities to refill your water supply. Research the trail beforehand or speak to local authorities to identify reliable water sources or refill stations.
  • Monitor your hydration status: Pay attention to your body’s hydration signals during the hike. If you feel thirsty, it’s a sign that you need to drink more water. Keep an eye out for other signs of dehydration, such as dry mouth, dizziness, or dark-colored urine. If any of these symptoms arise, take a break, find shade, and rehydrate.
  • Consider electrolyte replenishment: In addition to water, your body also loses electrolytes through sweating. Consider bringing electrolyte-rich drinks or snacks to replenish these essential minerals. Sports drinks, electrolyte tablets, or electrolyte-infused snacks can help maintain electrolyte balance during prolonged hikes.

Remember, it’s better to carry more water than less, especially when hiking in hot weather. Dehydration can lead to serious health risks, so prioritize hydration and plan accordingly to ensure you have an adequate water supply for your hike.

Are there any specific precautions for hiking in hot weather?

When embarking on a hike in hot weather, it’s essential to take precautions to protect yourself from the intense heat and sun. Here are some valuable tips to consider:

  • Time your hike wisely: Plan your hike during the cooler parts of the day, either early in the morning or late in the afternoon. This allows you to avoid the peak heat hours and reduces your exposure to extreme temperatures.
  • Seek shade whenever possible: Take advantage of natural shade provided by trees, rock formations, or other structures along the trail. Resting in shaded areas helps lower your body temperature and provides relief from the direct sun.
  • Wear proper sun protection: Shield yourself from harmful UV rays by wearing a wide-brimmed hat, sunglasses with UV protection, and sunscreen with a high SPF rating. Apply sunscreen generously to all exposed skin, including your face, neck, arms, and legs. Reapply sunscreen regularly, especially if you’re sweating profusely or spending extended periods outdoors.
  • Dress appropriately: Choose lightweight and breathable clothing that covers your skin to minimize sun exposure. Opt for long-sleeved shirts, pants, or skirts made of moisture-wicking materials that offer UPF (Ultraviolet Protection Factor) for added sun protection. Light-coloured clothing reflects sunlight and helps keep you cooler than dark colours.
  • Stay hydrated: Drink water regularly to maintain proper hydration. Carry an adequate supply of water and drink at regular intervals, even if you don’t feel thirsty. Remember that thirst is not always an accurate indicator of your hydration status. Keep a reusable water bottle handy and consider using a hydration bladder for easy access to water while hiking.
  • Take breaks and rest: Listen to your body and take breaks as needed. Find shaded areas or sit on a rock or log to rest and cool down. Use this time to rehydrate, eat snacks, and allow your body to recover from the exertion and heat.

By following these tips, you can mitigate the risks of hiking in hot weather and ensure a safer and more enjoyable experience on the trails. Remember, your health and well-being should always be a priority, so take the necessary precautions to protect yourself from the heat and sun.

What are the signs of heat exhaustion and heat stroke?

It’s crucial to be aware of the signs of heat-related illnesses while hiking in hot weather. Recognizing the symptoms allows you to take prompt action and seek help if necessary. Here are some common signs to watch out for:

  1. Heat Exhaustion: This is a milder form of heat-related illness. Symptoms may include:
    • Heavy sweating
    • Dizziness or light-headedness
    • Nausea or vomiting
    • Headache
    • Muscle cramps
    • Weakness or fatigue
    • Cool, moist skin with goosebumps

    If you or someone in your group experiences these symptoms, it’s essential to take immediate measures to cool down and rehydrate. Find shade, remove excessive clothing, drink cool fluids, and rest. If the symptoms worsen or persist, seek medical attention.

  2. Heat Stroke: Heat stroke is a severe condition that requires immediate medical attention. It is characterized by the body’s inability to regulate its temperature, resulting in a dangerously high body temperature. Symptoms of heat stroke may include:
    • High body temperature (above 103°F/39.4°C)
    • Confusion or disorientation
    • Rapid heartbeat or pulse
    • Flushed, hot, and dry skin
    • Lack of sweating, despite the heat
    • Rapid, shallow breathing
    • Throbbing headache
    • Nausea or vomiting
    • Loss of consciousness or seizures

    If someone exhibits signs of heat stroke, it is crucial to act quickly. Call emergency services immediately and take immediate steps to cool the person down while waiting for help. Move them to a shaded area, remove excess clothing, and cool their body using damp towels or by pouring cool water on their skin.

Remember, heat-related illnesses can be life-threatening, and prompt medical attention is essential for heat stroke cases. It’s important to stay vigilant, take regular breaks, stay hydrated, and listen to your body’s signals while hiking in hot weather. By being aware of the signs and taking appropriate measures, you can ensure your safety and that of your fellow hikers.

Can I hike during the hottest hours of the day?

When hiking in hot weather, it’s advisable to plan your hiking schedule wisely. The hottest hours of the day, typically between 10 a.m. and 4 p.m., can expose you to intense heat and potentially increase the risk of heat-related issues. Whenever possible, it’s best to avoid hiking during these peak hours.

However, if your hiking plans necessitate being on the trail during the hottest part of the day, it’s crucial to take extra precautions to protect yourself from the sun’s harmful rays and minimize the risk of heat-related illnesses. Here are some essential tips to keep in mind:

  • Wear Appropriate Sun Protection: Shielding yourself from the sun is crucial to prevent sunburn and reduce the risk of heat-related issues. Apply a broad-spectrum sunscreen with a high SPF rating (at least 30) to all exposed skin, including your face, neck, arms, and legs. Wear a wide-brimmed hat or a cap with a neck flap to protect your face and neck from direct sunlight. Don’t forget to wear sunglasses to safeguard your eyes from harmful UV rays.
  • Stay Well-Hydrated: Hydration is key when hiking in hot weather. Drink plenty of fluids before, during, and after your hike. Water is the best choice, but you can also consider electrolyte-rich drinks to replenish essential minerals lost through sweating. Remember to bring an adequate supply of water and a water purification method if necessary. Aim to drink regularly, even if you don’t feel excessively thirsty, as thirst is not always a reliable indicator of hydration needs.
  • Seek Shade Frequently: Whenever possible, take advantage of shaded areas along the trail. Resting in shaded spots can provide temporary relief from the direct heat of the sun and help regulate your body temperature. Look for trees, rock formations, or any other natural shelters to take short breaks and allow your body to cool down.

By avoiding the hottest hours, practicing sun protection measures, staying hydrated, and seeking shade when needed, you can minimize the risk of heat-related issues during your hot weather hikes. Remember to listen to your body, pace yourself, and adjust your plans accordingly to ensure a safe and enjoyable hiking experience.

What are some tips for staying cool during a hot weather hike?

To beat the heat and stay cool during a hot weather hike, it’s important to take proactive measures to regulate your body temperature. Here are some valuable tips to help you stay comfortable on the trail:

  • Wear Breathable Clothing: Choose lightweight and breathable clothing made from moisture-wicking materials. These fabrics are designed to pull sweat away from your body, allowing it to evaporate quickly and keeping you cool. Opt for loose-fitting garments that promote airflow and consider wearing light-colored clothing to reflect the sunlight and reduce heat absorption.
  • Use Sun Protection: Protecting yourself from the sun’s rays is crucial in hot weather. Wear a wide-brimmed hat or a cap with a neck flap to shield your face and neck from direct sunlight. Apply sunscreen with a high SPF rating to exposed skin, and reapply it regularly according to the product’s instructions. Don’t forget to protect your eyes with sunglasses that provide UV protection.
  • Stay Hydrated: Hydration is key to maintaining your body’s temperature and overall well-being during a hot weather hike. Drink plenty of water before, during, and after your hike. Carry a sufficient amount of water with you and sip regularly to stay hydrated. If you anticipate a long hike, consider bringing a hydration bladder or water filter to replenish your water supply along the trail.
  • Seek Shade and Rest: When the sun’s intensity becomes overwhelming, take advantage of shaded areas along the trail. Look for trees, rock formations, or any other natural shelters where you can rest and cool down. Take short breaks in these shaded spots to allow your body to recover from the heat.
  • Consider Cooling Accessories: Cooling accessories can provide instant relief during hot weather hikes. Carry a bandana that you can soak in cold water and wrap around your neck or forehead. This can help cool your body temperature through evaporation. Alternatively, you can use a cooling towel that retains water and stays cool for an extended period. Simply wet the towel, wring out the excess water, and drape it around your neck or over your head to enjoy the refreshing sensation.

By following these tips, you’ll be better equipped to stay cool and comfortable during your hot weather hikes. Remember to listen to your body, pace yourself, and take necessary breaks to ensure a safe and enjoyable hiking experience.

Conclusion

With the right knowledge and preparation, hiking in hot weather can be an enjoyable and rewarding experience. Remember to choose appropriate clothing, stay hydrated, plan your hike wisely, protect yourself from the sun, take advantage of shade, and practice trail etiquette and safety. By following these best hot weather hiking tips, you’ll stay comfortable, safe, and ready to explore the beauty of the great outdoors even in the hottest conditions.


Posted on Leave a comment

How to Prevent Toe Squeeze in Your Hiking Shoes While Hiking Downhill

female hiker using trekking poles walking down a steep slope

How to Prevent Toe Squeeze in Your Hiking Shoes While Hiking Downhill

Introduction

Hiking is a wonderful outdoor activity that allows you to connect with nature, challenge yourself physically, and enjoy breathtaking views. However, when hiking downhill, one common issue hikers face is the discomfort and potential pain caused by their toes getting squeezed against the tip of their hiking shoes. This phenomenon, known as toe squeeze, can make the descent unpleasant and even lead to blisters or other foot problems. In this article, we will explore various techniques and tips to help you prevent toe squeeze while hiking downhill, ensuring a comfortable and enjoyable hiking experience.

1. Understanding Toe Squeeze: Causes and Consequences

Toe squeeze can be a bothersome issue that hikers encounter during downhill descents. When your toes are compressed against the front of your hiking shoes, it can lead to discomfort, pain, and potential foot problems. Understanding the underlying causes of toe squeeze is essential in order to prevent it and ensure a comfortable hiking experience. Several factors contribute to toe squeeze, including shoe fit, toe alignment, lacing techniques, and the type of terrain you’re traversing.

First and foremost, the fit of your hiking shoes is paramount in preventing toe squeeze. Ill-fitting shoes, whether they are too tight or too loose, can contribute to this problem. When selecting hiking shoes, ensure that they provide adequate room in the toe box, allowing your toes to move freely without restriction. Your toes should be able to wiggle comfortably, and there should be enough space to accommodate any swelling that may occur during long hikes. It’s recommended to try on shoes with the socks you intend to wear while hiking to get an accurate fit.

Toe alignment is another crucial aspect to consider. Each person’s toes have a natural alignment, and it’s important to find shoes that accommodate this alignment. Some individuals may have toes that are more splayed or have a wider forefoot, and choosing shoes with a wider toe box can alleviate toe squeeze.

Proper lacing techniques can also make a difference in preventing toe squeeze. Experiment with different lacing methods to find the one that works best for you. Some hikers find that using a “heel lock” lacing technique, where the laces are tightened around the ankle area, helps to secure the heel and prevent excess movement, reducing the chances of toe squeeze.

The type of terrain you encounter during your hikes can also contribute to toe squeeze. Downhill descents put additional pressure on the toes as your feet slide forward in the shoes. To mitigate this, consider adjusting your hiking technique by using shorter strides and placing more weight on your heels rather than the balls of your feet. This can help alleviate the pressure on your toes and reduce the likelihood of toe squeeze.

In addition to these preventive measures, it’s crucial to pay attention to any discomfort or pain in your toes while hiking. If you feel your toes getting squeezed or notice any hot spots or friction points, take a break and readjust your shoes or socks. Applying moleskin or using toe protectors can provide temporary relief and protect your toes from further irritation.

By ensuring proper shoe fit, considering toe alignment, using appropriate lacing techniques, and adjusting your hiking technique on downhill descents, you can effectively prevent toe squeeze and enjoy a more comfortable hiking experience. Taking proactive measures to protect your toes will enable you to focus on the beauty of nature and the joy of hiking without the distraction of foot discomfort.

2. Choosing the Right Hiking Shoes for Downhill Descents

Selecting the right hiking shoes is paramount to prevent toe squeeze while hiking downhill. When searching for the perfect pair, prioritize shoes that offer ample toe box space. The toe box is the front part of the shoe where your toes rest, and having enough room in this area is crucial for avoiding unnecessary compression and discomfort.

Choose hiking shoes that allow your toes to splay naturally within the toe box. This freedom of movement helps distribute the pressure more evenly and reduces the risk of your toes getting squeezed against the tip of the shoes. When trying on shoes, wiggle your toes to ensure there is sufficient space for movement.

Another important factor to consider is the sole of the shoe, especially for downhill hikes. Look for shoes with a sturdy and supportive sole that offers ample cushioning and protection. A well-cushioned sole can help absorb the impact of each step, reducing the pressure on your toes and preventing discomfort.

Furthermore, prioritize shoes made from breathable and moisture-wicking materials. Hiking often involves strenuous physical activity, leading to perspiration. Shoes with breathable materials allow air to circulate, keeping your feet cool and helping to prevent excessive moisture build-up. Moisture-wicking properties help draw sweat away from your feet, reducing the likelihood of blisters and discomfort.

It’s also worth considering shoes with additional features such as reinforced toe caps or rubber toe bumpers. These provide added protection to the front of the shoe, reducing the risk of accidental impacts and offering extra defence against toe squeeze.

Remember to try on hiking shoes with the socks you plan to wear during your hikes. This ensures an accurate fit, accounting for any additional volume created by the socks. Walk around in the shoes to assess their comfort and stability, paying attention to any areas of tightness or discomfort that may indicate potential toe squeeze.

By selecting hiking shoes with ample toe box space, a supportive sole, breathable materials, and a proper fit, you can greatly reduce the chances of experiencing toe squeeze while hiking downhill. Prioritizing your comfort and foot health will allow you to fully enjoy your outdoor adventures without the discomfort and pain of squeezed toes.

3. Proper Footwear Fit: The Key to Preventing Toe Squeeze

To avoid toe squeeze during hiking, achieving the correct fit for your hiking shoes is crucial. When trying on shoes, pay close attention to the toe box—the front part of the shoe where your toes rest. It’s important to have enough room in the toe box to allow your toes to wiggle comfortably. This extra space is particularly essential during long hikes when your feet may swell.

When selecting hiking shoes, keep in mind that your feet can expand and swell due to prolonged activity and heat. Therefore, choose shoes that provide ample room for potential foot expansion without constricting your toes. Shoes that are too tight can compress your toes against the tip of the shoe, leading to discomfort and toe squeeze. On the other hand, shoes that are too loose may cause your feet to slide forward, increasing the risk of toe squeeze as well.

To ensure a proper fit, try on hiking shoes at the end of the day when your feet are slightly swollen, similar to how they would be during a hike. This allows you to gauge the fit accurately. When trying on shoes, stand up and walk around to assess the comfort and fit. Your toes should have enough space to move freely without feeling cramped or restricted.

Another important consideration is to wear the same type of socks you would wear during hiking when trying on shoes. This helps replicate the actual conditions and ensures that the fit accommodates the additional volume provided by the socks.

Keep in mind that different shoe brands and models may have slightly different sizing and fit. It’s recommended to try on multiple pairs from various brands to find the one that offers the best fit for your feet. Each foot is unique, so what works for others may not necessarily be the best option for you.

By prioritizing the correct fit, you can significantly reduce the risk of toe squeeze and discomfort during hiking. A well-fitting pair of hiking shoes will allow your toes to have adequate space, providing the necessary comfort and support for an enjoyable hiking experience.

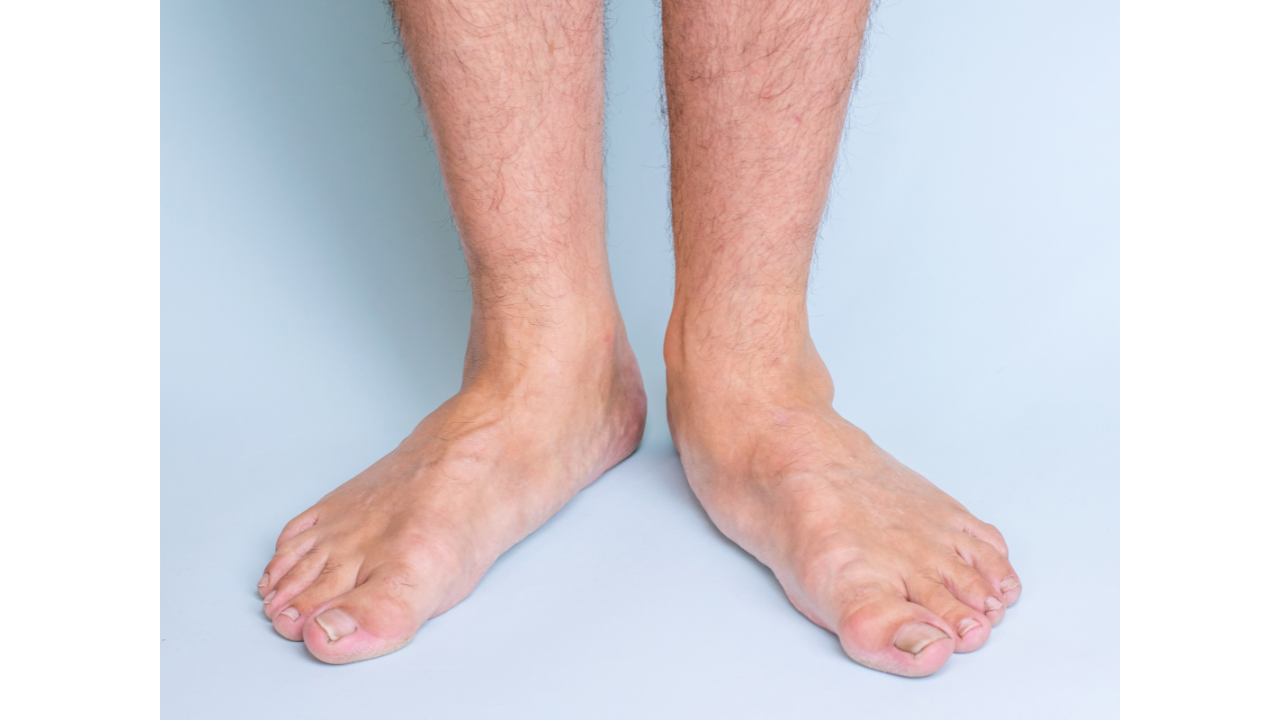
4. Importance of Proper Toe Alignment

To prevent toe squeeze while hiking downhill, it is crucial to maintain proper toe alignment. Ensuring that your shoes allow your toes to rest in a natural position is essential in avoiding unnecessary compression and discomfort. The alignment of your toes should be straight, with the big toe aligned with the long axis of your foot.

When selecting hiking shoes, opt for models that provide ample room for your toes to spread out comfortably. Avoid shoes that excessively point or squeeze your toes together, as this can increase the likelihood of toe squeeze. Look for shoes with a wider toe box that allows your toes to maintain their natural alignment without being forced into an unnatural angle.

When trying on hiking shoes, pay attention to how your toes feel inside the shoes. They should have enough space to wiggle and move freely without any restriction. If you notice any discomfort or pressure on your toes, it’s a sign that the shoes may not be the right fit for you.

Proper toe alignment not only helps in preventing toe squeeze but also ensures better stability and balance while hiking downhill. When your toes are in their natural position, your feet can distribute weight more evenly, reducing the strain on specific areas of the foot.

In addition to selecting shoes with the right toe box, it’s also important to consider the overall fit of the shoes. Make sure the shoes provide adequate support and a secure fit without being too tight or too loose. Your feet should feel comfortably supported throughout the entire hike.

By maintaining proper toe alignment and choosing shoes that allow your toes to rest in their natural position, you can significantly reduce the risk of toe squeeze while hiking downhill. Taking care of your feet and ensuring their comfort will enhance your overall hiking experience and allow you to fully enjoy the beauty of the outdoors.

Using the right lacing technique can significantly help in preventing toe squeeze. One effective method is the “heel lock” or “lace lock” technique. To perform this, start by threading the laces through the topmost eyelets of your shoes, crossing them over and creating a loop on each side. Then, crisscross the laces through the loops and tighten them securely. This technique creates a secure fit, reducing the chance of your toes sliding forward and getting squeezed.

6. The Role of Socks in Preventing Toe Squeeze

When it comes to preventing toe squeeze during hiking, it’s essential not to overlook the significance of the right socks. Choosing the appropriate socks can greatly contribute to keeping your feet comfortable and reducing the risk of toe compression. Here are some tips to consider:

  • Opt for moisture-wicking materials: Select socks made from moisture-wicking fabrics such as merino wool or synthetic blends. These materials help to keep your feet dry by efficiently absorbing and evaporating moisture. Dry feet reduce the likelihood of friction and blisters, which can exacerbate toe squeeze.
  • Consider toe socks: Toe socks, also known as toe liners, have individual compartments for each toe. These specialized socks allow your toes to move independently and reduce the chances of them being squeezed together. By providing space and preventing friction between the toes, toe socks can help alleviate toe squeeze and enhance overall foot comfort.
  • Ensure proper sock fit: Choose socks that fit well and provide a snug, yet comfortable, fit around your feet. Avoid socks that are too loose, as they can create folds or bunches, leading to pressure points and potential toe discomfort. Similarly, socks that are too tight can restrict circulation and contribute to toe squeeze. Finding the right balance in sock fit is crucial for maintaining foot comfort.
  • Pay attention to sock thickness: Consider the thickness of the socks based on the weather conditions and the type of hiking shoes you’re wearing. Thicker socks provide additional cushioning and can help absorb impact during downhill descents. However, make sure they don’t add too much bulk, as this can potentially increase pressure on the toes.
  • Minimize seams and rough areas: Look for socks with minimal seams and avoid socks with rough areas or bunched-up fabric near the toe region. These features can create friction points and increase the risk of toe squeeze. Smooth and seamless socks are preferable for a more comfortable hiking experience.

Remember, the combination of well-fitting hiking shoes and the right socks is crucial in preventing toe squeeze. Don’t underestimate the role of socks in maintaining foot comfort and protecting your toes during downhill hikes. By choosing moisture-wicking materials, considering toe socks, ensuring proper fit, and minimizing seams and rough areas, you can optimize your sock selection and enhance your overall hiking experience.

Hiking Socks

Showing 1 – 5 of 31 results Showing all 31 results Showing the single result No results found
Sort by Popularity
Filters Sort results
Reset Apply
Image
Name
Description
Price
Quantity
Add to cart
83.5% Cotton, 15% Polyamide fibre, 1.5% Spandex. Large fits women's…
£21.95-£33.60
Max:
Min: 1
Step: 1
CityComfort Womens Socks, Cotton Ladies Socks size 4, 5, 6, 7, Socks
£7.99
Max:
Min: 1
Step: 1
MERINO WOOL COMFORT: Our socks with thermoregulating merino wool and…
£21.67-£34.95
Max:
Min: 1
Step: 1
YUEDGE Women's 5 Pairs: Your Feet's New Best Friends! BREATHABLE FABRIC…
£14.77-£21.99
Max:
Min: 1
Step: 1
Waterproof - three layer construction for warmth, durability and waterproofingFoot…
£32.99
Max:
Min: 1
Step: 1
127

7. Utilizing Insoles and Inserts for Added Comfort

Insoles or inserts can be valuable tools in preventing toe squeeze while hiking. By providing additional cushioning and support, they help reduce the pressure and impact on your feet, ultimately minimizing the risk of toe compression. Here are some considerations when using insoles or inserts to prevent toe squeeze:

  • Choose hiking-specific products: Look for insoles or inserts specifically designed for hiking. These products are often engineered with features that cater to the demands of outdoor activities. Hiking-specific insoles are typically designed to offer arch support, shock absorption, and targeted padding in areas prone to discomfort, including the toe region.
  • Optimize arch support: Proper arch support is crucial in maintaining foot alignment and reducing excessive pressure on the toes. When selecting insoles or inserts, consider those that provide adequate arch support. This helps to distribute your body weight more evenly and prevents your feet from collapsing inward, which can contribute to toe squeeze.
  • Seek shock absorption properties: Downhill descents can generate significant impact on your feet. Look for insoles or inserts with shock-absorbing properties to help minimize the stress on your toes. These cushioning features absorb the impact of each step, reducing the strain on your feet and lessening the chances of toe compression.
  • Extra padding in the toe area: To provide targeted protection and cushioning for your toes, consider insoles or inserts that offer extra padding in the toe region. This added layer of cushioning helps to create a buffer between your toes and the front of your hiking shoes, reducing the risk of toe squeeze and increasing overall comfort.
  • Ensure proper fit: When using insoles or inserts, ensure they fit properly within your hiking shoes. They should not cause any crowding or discomfort, and there should be enough space for your toes to move naturally. Insoles or inserts that are too large can cause an improper fit, leading to potential toe squeeze issues.

By incorporating insoles or inserts into your hiking footwear, you can enhance the cushioning, support, and overall comfort of your shoes. This, in turn, helps to reduce the likelihood of toe squeeze during downhill descents. Remember to select hiking-specific products that offer arch support, shock absorption, and extra padding in the toe area. Properly fitted insoles or inserts can be valuable allies in maintaining foot health and ensuring an enjoyable hiking experience.

8. Taking Breaks and Adjusting Your Shoes

During long hikes, it’s important to prioritize regular breaks and make adjustments to your shoes if needed. If you begin to feel your toes getting squeezed or discomfort building up, it’s crucial to find a suitable spot to pause and address the issue. Follow these steps to relieve the pressure and prevent toe squeeze from worsening:

  • Find a suitable stopping point: Look for a comfortable spot to take a break, preferably somewhere with a flat surface and minimal debris. This will allow you to focus on adjusting your shoes without any distractions or hazards.
  • Loosen your laces: Untie your shoelaces and loosen them slightly to relieve the pressure on your toes. This will create more space in the toe box and reduce the likelihood of toe squeeze. Be careful not to loosen them excessively, as this can affect the overall stability and fit of your shoes.
  • Readjust your shoe fit: Take the opportunity to readjust your shoe fit to ensure optimal comfort. Gently slide your foot forward and backward inside the shoe to reposition it and relieve any pressure points. Make sure your toes have enough wiggle room and are not pressed against the front of the shoe.
  • Stretch and wiggle your feet: While taking a break, make sure to stretch your feet and wiggle your toes. This helps improve blood circulation and relieves any tension or stiffness in the muscles. Simple toe stretches and foot rotations can go a long way in preventing toe squeeze and maintaining foot comfort.
  • Assess the need for additional measures: If the toe squeeze persists despite adjusting your shoes and taking breaks, consider other measures such as using different lacing techniques or utilizing additional padding or inserts to provide extra cushioning and support.

By taking regular breaks and adjusting your shoes when necessary, you can alleviate pressure on your toes and prevent toe squeeze from becoming a major discomfort during your hike. These brief moments of relief allow your feet to recover, ensuring a more enjoyable and pain-free hiking experience. Remember to listen to your body and address any signs of discomfort promptly to avoid potential foot problems.

9. Maintaining Proper Hiking Posture

Maintaining proper hiking posture is crucial to preventing toe squeeze, especially when descending downhill. Follow these tips to ensure your posture supports your feet and minimizes the risk of toe squeeze:

  • Lean slightly back: While hiking downhill, aim to lean slightly back instead of leaning forward. This posture helps distribute your weight more evenly across your feet, relieving pressure from the front and reducing the chances of toe squeeze. Engage your core muscles to maintain stability and balance.
  • Keep your weight cantered: Focus on keeping your weight centered over your feet. Avoid putting excessive pressure on your toes by shifting your weight too far forward. Instead, distribute your weight evenly from your heels to the balls of your feet. This allows your toes to have more room within your shoes, decreasing the likelihood of compression.
  • Take shorter strides: When descending, take shorter strides rather than long strides. This helps maintain better control and stability while reducing the impact on your feet. Shorter strides also minimize the force exerted on your toes, decreasing the chances of them getting squeezed against the front of your shoes.
  • Use trekking poles: Consider using trekking poles while hiking downhill. These provide additional support and stability, allowing you to maintain a more balanced posture. By transferring some of your weight onto the poles, you can alleviate pressure on your feet and toes, reducing the risk of toe squeeze.
  • Stay mindful of your foot placement: Be conscious of how you place your feet when hiking downhill. Aim to land on your entire foot rather than just the toes. This helps distribute the pressure more evenly and reduces strain on your toes. Additionally, take care to avoid stubbing your toes on rocks or other obstacles along the trail.

By maintaining proper hiking posture, you can minimize the pressure on your toes and prevent toe squeeze while hiking downhill. Remember to listen to your body, make necessary adjustments, and take breaks when needed to ensure optimal foot comfort throughout your hiking adventure.

10. The Impact of Terrain on Toe Squeeze

The terrain you encounter while hiking plays a crucial role in determining the risk of toe squeeze. Certain types of terrain, such as steep and rocky descents, can increase the likelihood of your toes getting squeezed against the tip of your hiking shoes. To prevent toe squeeze in challenging terrains, consider the following tips:

  • Slow down on steep descents: When navigating steep downhill sections, take your time and adjust your pace accordingly. Rushing can lead to increased pressure on your toes as your feet slide forward within your shoes. Take measured steps and maintain control over your movements to minimize the risk of toe squeeze.
  • Watch your footing: Stay vigilant and choose your steps carefully, particularly on rocky terrain. Uneven surfaces and loose rocks can cause your feet to shift within your shoes, potentially squeezing your toes. Pay attention to where you place your feet and aim for stable footholds to maintain stability and reduce the chances of toe compression.
  • Utilize trekking poles: Trekking poles can be invaluable when hiking on challenging terrain. They provide extra stability, support, and balance, allowing you to control your descent more effectively. By using trekking poles, you can shift some of your weight onto the poles and alleviate pressure from your toes, reducing the risk of toe squeeze.
  • Opt for shoes with good traction: Ensure your hiking shoes have proper traction to help you navigate challenging terrains. Shoes with a sturdy and grippy outsole can provide better traction on uneven surfaces, reducing the chances of slipping and shifting your feet within the shoes. This, in turn, helps minimize the risk of toe squeeze.
  • Check and adjust your laces: Periodically check the tightness of your shoelaces while hiking on challenging terrains. If you feel your toes getting squeezed or discomfort building up, find a suitable spot to stop and readjust your laces. Loosening the laces slightly can provide relief and allow your toes to regain some freedom of movement.

Remember, it’s essential to remain cautious and adapt to the terrain you encounter. By adjusting your pace, using trekking poles, choosing appropriate footwear, and paying attention to your foot placement, you can reduce the likelihood of toe squeeze while hiking on steep and rocky descents. Prioritizing your foot comfort will contribute to a more enjoyable and injury-free hiking experience.

11. Training and Strengthening Your Feet

Preparing your feet for the challenges of hiking downhill is crucial in preventing toe squeeze. By engaging in regular foot-strengthening exercises, you can enhance muscle strength and control, leading to better support and reduced risk of toe compression. Here are some exercises to consider:

  • Toe curls: Sit on a chair with your feet flat on the floor. Gradually curl your toes downward, as if you are gripping the floor. Hold this position for a few seconds, then release. Repeat this exercise for several sets, gradually increasing the duration of the hold.
  • Arch lifts: Stand barefoot and raise your arches by lifting the balls of your feet and keeping your heels on the ground. Hold this position for a few seconds, then lower your feet back down. Perform several repetitions to strengthen the muscles in your arches.
  • Toe spreads: Sit on a chair and place a small towel or cloth on the floor in front of you. Using your toes, grasp the cloth and pull it toward you, then release. Repeat this movement for several sets, focusing on using your toes to pull the cloth closer.
  • Marble pickup: Scatter a few marbles or small objects on the floor. Sit on a chair and use your toes to pick up the marbles one by one and place them in a container. This exercise helps improve toe dexterity and strength.
  • Calf raises: Stand on the edge of a step or a raised surface with your heels hanging off the edge. Slowly raise your heels as high as possible, then lower them back down. This exercise strengthens your calf muscles, providing better support to your feet during hikes.

By incorporating these exercises into your regular routine, you can strengthen the muscles in your feet and toes, improving their ability to withstand the demands of hiking downhill. Remember to start slowly and gradually increase the intensity and duration of the exercises over time. Additionally, consult with a healthcare professional or a qualified trainer if you have any underlying foot conditions or concerns.

In conclusion, proactive foot-strengthening exercises can help prevent toe squeeze while hiking downhill. By dedicating time to strengthen your feet and toes, you enhance their stability, control, and overall resilience. So, before your next hiking adventure, add these exercises to your routine and enjoy a more comfortable and enjoyable experience on the trails.

12. While Hiking Downhill, How Do You Prevent Your Toes from Getting Squeezed Against the Tip of Your Hiking Shoes?

While hiking downhill, it’s crucial to take proactive measures to prevent toe squeeze and ensure a comfortable hiking experience. Several factors come into play when it comes to avoiding toe squeeze, including shoe fit, toe alignment, lacing techniques, choice of socks, and awareness of the terrain. By paying attention to these aspects, you can minimize the risk of toe squeeze and enjoy your hike to the fullest. Here are some essential tips to consider:

  • Select the right hiking shoes: Opt for hiking shoes that provide ample space in the toe box. Ensure that your toes can wiggle freely without feeling cramped or restricted. Avoid shoes that are too tight or narrow, as they can squeeze your toes against the front of the shoe, leading to discomfort and potential toe squeeze. Look for shoes that offer a balance between support, protection, and sufficient room for toe movement.
  • Toe alignment: Maintain proper toe alignment to prevent unnecessary pressure on your toes. When choosing hiking shoes, ensure they allow your toes to rest in a natural position, without being forced into an unnatural angle. Your big toe should align with the long axis of your foot. Avoid shoes that excessively point or squeeze your toes together, as this can increase the likelihood of toe squeeze.
  • Lacing techniques: Proper lacing can make a significant difference in preventing toe squeeze. Consider using the heel lock lacing technique, which involves creating an extra loop around the ankle to secure your feet in place. This technique helps prevent your feet from sliding forward and decreases the chances of toe compression.
  • Choose the right socks: Socks play a crucial role in moisture management and reducing friction. Opt for moisture-wicking socks made from materials like merino wool or synthetic blends. These materials help keep your feet dry by wicking away moisture, reducing the chances of blisters and discomfort. Toe socks can also be beneficial as they provide individual toe compartments, allowing each toe to move freely and minimizing the risk of toe squeeze.
  • Utilize insoles or inserts: Consider using insoles or inserts designed specifically for hiking. These products offer additional cushioning, arch support, and padding in the toe area, helping to distribute pressure more evenly across your feet. They can enhance comfort and reduce the risk of toe squeeze during downhill descents.
  • Take regular breaks: During long hikes, it’s essential to take periodic breaks to readjust your shoes if you feel any discomfort or pressure on your toes. Find a suitable spot to stop, loosen your laces, and allow your feet to rest and recover. Take the opportunity to stretch your feet, wiggle your toes, and improve blood circulation. These brief breaks can alleviate pressure and prevent toe squeeze from worsening.
  • Maintain proper hiking posture: Proper posture while hiking downhill can help alleviate pressure on your toes. Lean slightly back, engaging your core muscles and keeping your weight cantered. This posture shifts some of the pressure away from the front of your feet, reducing the likelihood of toe squeeze against the tip of your shoes. It also improves balance and stability during descents.
  • Train and strengthen your feet: Engaging in foot-strengthening exercises can improve the stability and resilience of your feet, reducing the risk of toe squeeze. Toe curls, arch lifts, picking up objects with your toes, and calf raises are effective exercises that target the muscles in your feet and lower legs. Incorporate these exercises into your regular routine to enhance your foot strength and control.

By following these tips and taking a proactive approach to prevent toe squeeze, you can make your downhill hiking experience more enjoyable and comfortable. Remember to listen to your body, adjust your shoes and laces as needed, and choose footwear that prioritizes both comfort and functionality. With the right preparation and attention to detail, you can hike downhill with confidence, knowing that your toes

FAQs: Answering Your Common Questions

1. What are the signs of toe squeeze?

Signs of toe squeeze include discomfort or pain in the toes, a feeling of tightness or pressure against the front of the shoes, and the formation of blisters or calluses on the toes.

2. Can toe squeeze lead to long-term foot problems?

While toe squeeze itself may not necessarily cause long-term foot problems, it can contribute to issues such as bunions, hammertoes, or metatarsalgia if not addressed and prevented.

3. Are there any specific hiking shoe brands that are better at preventing toe squeeze?

There are several hiking shoe brands known for their wide toe boxes and comfortable fits, such as Altra, Salomon, and Keen. However, individual foot shapes and preferences vary, so it’s essential to try on different brands and models to find the best fit for you.

4. Can toe squeeze be prevented by simply choosing a larger shoe size?

Choosing a larger shoe size may not be the most effective solution for preventing toe squeeze. While it can provide more room for your toes, it may compromise overall shoe fit and stability. It’s best to prioritize finding the right shoe with a suitable toe box size.

5. Are there any natural remedies to alleviate toe squeeze discomfort?

To alleviate toe squeeze discomfort, you can try natural remedies such as soaking your feet in warm water with Epsom salts, using ice packs to reduce inflammation, and applying aloe vera or tea tree oil for soothing effects. However, prevention through proper shoe fit and techniques is key.

6. Should I consult a healthcare professional if I experience persistent toe squeeze?

If you experience persistent toe squeeze or foot pain despite trying preventive measures, it’s advisable to consult a healthcare professional or a podiatrist. They can evaluate your specific situation, provide personalized recommendations, and address any underlying foot conditions.

Conclusion

Toe squeeze while hiking downhill can be an uncomfortable and painful experience. By following the tips and techniques outlined in this article, you can effectively prevent toe squeeze and ensure a more enjoyable hiking journey. Remember to choose the right hiking shoes, maintain proper shoe fit and alignment, utilize appropriate lacing techniques, wear suitable socks, and take breaks to readjust as needed. With these precautions in place, you can hike downhill with confidence, knowing that your toes are protected and comfortable.

Posted on Leave a comment

Hiking Baby Carrier

Mother hiking with a baby in baby carrier

Hiking Baby Carrier: The Perfect Gear for Outdoor Adventures with Your Little One

1. Introduction

When you’re a parent who loves outdoor adventures, it’s only natural to want to share those experiences with your little one. Hiking is a fantastic way to explore nature and stay active, but it can become challenging when you have a baby to carry. That’s where a hiking baby carrier comes in. Designed specifically for outdoor enthusiasts with infants and toddlers, a hiking baby carrier allows you to enjoy the great outdoors while keeping your child safe and comfortable. In this article, we will explore the benefits of using a hiking baby carrier, important features to consider, how to choose the right one, safety guidelines, and tips for a memorable hiking experience with your little one.

2. Why Choose a Hiking Baby Carrier?

A hiking baby carrier offers numerous advantages for parents who want to introduce their child to the wonders of nature. Here are a few compelling reasons why you should consider using a hiking baby carrier:

  1. Bonding time: Hiking together creates a strong bond between parent and child, fostering a sense of togetherness and shared experiences.
  2. Explore nature: Exposing your child to the beauty of nature from an early age helps develop their curiosity, love for the outdoors, and appreciation for the environment.
  3. Convenience: A hiking baby carrier allows you to carry your child hands-free, giving you the freedom to navigate challenging terrains and explore trails that are not stroller-friendly.
  4. Physical activity: Hiking provides an excellent opportunity for both you and your baby to engage in physical exercise while enjoying the fresh air and scenic views.
  5. Comfort and safety: Hiking baby carriers are designed with features such as adjustable straps, padded seats, and safety harnesses to ensure your child’s comfort and security throughout the journey.

3. Important Features to Consider

When selecting a hiking baby carrier, it’s crucial to pay attention to the following features:

3.1 Weight Capacity and Age Range

Different carriers have varying weight capacities and age recommendations. Ensure that the carrier you choose can accommodate your child’s weight and age.

3.2 Safety Features

Look for carriers with sturdy construction, reliable buckles and straps, and a secure harness system to keep your baby safe during hikes.

3.3 Comfort for Both Parent and Child

Consider carriers with ergonomic designs, padded shoulder straps, adjustable hip belts, and ample legroom for your baby’s comfort and proper hip development.

3.4 Storage Space

Check for pockets, compartments, and storage options to carry essentials like diapers, snacks, water bottles, and extra clothing.

3.5 Sun and Rain Protection

Opt for carriers with detachable sunshades or rain covers to shield your child from harmful UV rays and unexpected weather changes.

4. How to Choose the Right Hiking Baby Carrier

Now that you understand the important features, here are some steps to help you choose the right hiking baby carrier:

  1. Research: Read reviews, compare different models, and consider recommendations from experienced hikers or outdoor parenting communities.
  2. Try before you buy: If possible, visit a retailer to try on different carriers with your child to ensure a proper fit and evaluate the comfort level.
  3. Consider your needs: Assess your hiking habits, terrain preferences, and anticipated duration of hikes to determine the most suitable carrier for your specific requirements.
  4. Budget: Set a realistic budget and explore options within that range, keeping in mind that investing in a high-quality carrier will provide better durability and comfort.

5. Safety Guidelines for Hiking with a Baby Carrier

Safety should be your top priority when hiking with a baby carrier. Follow these guidelines to ensure a secure and enjoyable experience:

  1. Check weight limits: Always adhere to the carrier’s weight limits and age recommendations to avoid compromising your child’s safety.
  2. Proper fitting: Adjust the carrier’s straps, buckles, and harnesses to ensure a snug fit without restricting your child’s movement or compromising your own comfort.
  3. Balance and stability: Maintain a stable and balanced posture while wearing the carrier, especially on uneven terrains, to prevent accidents or falls.
  4. Stay hydrated: Keep yourself and your baby well-hydrated throughout the hike, especially during hot weather conditions.
  5. Take breaks: Allow for regular breaks to rest, feed your baby, change diapers, and stretch your legs.

6. Tips for a Comfortable and Enjoyable Hiking Experience

To make your hiking adventures with a baby carrier more enjoyable, consider the following tips:

  1. Start with short hikes: Begin with shorter trails to allow your baby to acclimate to the carrier and gradually increase the duration and difficulty of hikes.
  2. Pack essentials: Bring extra diapers, wipes, a change of clothes, snacks, toys, and any other items your baby may need during the hike.
  3. Dress appropriately: Dress your baby in comfortable layers and ensure they are protected from the sun with appropriate clothing and sunscreen.
  4. Engage your baby: Point out interesting sights, sing songs, or play interactive games to keep your baby engaged and entertained during the hike.
  5. Capture the memories: Don’t forget to bring a camera or use your smartphone to capture precious moments and document your adventures together.

7. Best Practices for Cleaning and Maintenance

To keep your hiking baby carrier in excellent condition, follow these cleaning and maintenance practices:

  1. Read the instructions: Familiarize yourself with the manufacturer’s guidelines for cleaning and maintenance.
  2. Spot cleaning: Use a mild detergent and a soft cloth to spot clean any stains or dirt on the carrier.
  3. Machine washing: If the carrier is machine washable, follow the recommended instructions for washing and drying.
  4. Inspect regularly: Check for any signs of wear and tear, loose buckles, or damaged straps. Replace or repair as needed.
  5. Store properly: When not in use, store the carrier in a clean, dry place away from direct sunlight to prevent any damage or fading.

8. Frequently Asked Questions (FAQs)

Q1. Can I use a hiking baby carrier for new-borns? A1. Most hiking baby carriers are suitable for babies who can support their heads independently, typically around 6-8 months of age. However, it’s crucial to check the manufacturer’s recommendations for each specific carrier.

Q2. How long can I hike with a baby in a carrier? A2. The duration of hikes will vary depending on your baby’s age, comfort level, and overall health. It’s important to listen to your baby’s cues and take breaks as needed.

Q3. Can I breastfeed while using a hiking baby carrier? A3. Yes, many hiking baby carriers provide options for discreet breastfeeding. Look for carriers with adjustable panels or detachable hoods that allow for easy and private nursing sessions.

Q4. Are hiking baby carriers suitable for all body types? A4. Yes, most hiking baby carriers offer adjustable straps and harnesses to accommodate different body types and sizes. It’s essential to find a carrier that fits you comfortably to ensure a pleasant hiking experience.

Q5. Can I use a hiking baby carrier for other outdoor activities? A5. While hiking baby carriers are primarily designed for hiking, they can also be used for other outdoor activities such as camping, nature walks, and sightseeing, as long as the terrain and environment are suitable.

Q6: How do I clean a hiking baby carrier? A6: Cleaning instructions may vary depending on the carrier’s materials and construction. In general, most hiking baby carriers can be spot cleaned with mild detergent and water. Refer to the manufacturer’s guidelines for specific cleaning instructions and recommendations.

Q7: At what age can I start using a hiking baby carrier? A7: The age at which you can start using a hiking baby carrier depends on the specific carrier and your baby’s development. Some carriers are suitable for newborns, while others are recommended for infants who can hold their heads up independently (typically around 6 months). Always consult the manufacturer’s guidelines for the recommended age range.

In conclusion, a hiking baby carrier opens up a world of outdoor exploration and adventure for parents who want to introduce their little ones to nature’s beauty. By choosing the right carrier, prioritizing safety, and following best practices, you can create lasting memories and instil a love for the outdoors in your child from an early age. So pack your gear, find a scenic trail, and embark on unforgettable hikes with your baby by your side. Happy hiking!

Baby Carriers ideal for hiking – Unforgettable Hikes with Your Baby

Showing 1 – 5 of 14 results Showing all 14 results Showing the single result No results found
Sort by Popularity
Filters Sort results
Reset Apply
Image
Name
Description
Price
Quantity
Add to cart
Adjustable AirSpeed trampoline suspended mesh backsystem Adjustable child safety harness, seat…
£270.94
Max:
Min: 1
Step: 1
DROMADER Baby Carrier - Backpack Quokka for Hiking with Toddlers 100%…
£132.99-£187.99
Max:
Min: 1
Step: 1
Beco Gemini Baby Carrier Newborn to Toddler ★ The NEW AND…
£52.50-£139.33
Max:
Min: 1
Step: 1
Design: Breathable carrier with adjustable ergonomic seat, shoulder straps and…
£31.99-£50.86
Max:
Min: 1
Step: 1
Ergonomic baby carrier for the summer, with 4 ergonomic carry…
£91.14-£164.90
Max:
Min: 1
Step: 1
123


Posted on Leave a comment

How to prevent blisters when hiking

Blister on foot underneath the big toe

How to Prevent Blisters When Hiking: Your Ultimate Guide

Introduction

When it comes to hiking, blisters can be a real pain—literally! They can turn a pleasant outdoor adventure into an uncomfortable experience. Whether you’re a seasoned hiker or a beginner, it’s essential to know how to prevent blisters when hiking. In this comprehensive guide, we will explore various tips, techniques, and preventive measures to keep blisters at bay and ensure an enjoyable hiking experience. So, lace up your boots, grab your backpack, and let’s dive in!

How to Prevent Blisters When Hiking

Hiking is an exhilarating activity that allows you to connect with nature and explore breathtaking landscapes. However, the repetitive motion, friction, and pressure exerted on your feet during hiking can lead to painful blisters. Here are some effective strategies to prevent blisters and keep your feet happy on the trail:

1. Choose the Right Footwear

Choosing the right footwear is paramount when it comes to preventing blisters. Ill-fitting shoes or boots can cause increased friction and discomfort, ultimately leading to blisters. To ensure you make the best choice, follow these helpful tips:

  • Opt for footwear with ample toe space and a snug fit: Look for hiking shoes or boots that provide enough room for your toes to wiggle comfortably. Your toes should not feel cramped or squished together. Additionally, the heel area should fit snugly, providing support and preventing excessive movement that can lead to blisters. Remember that a proper fit is essential for preventing friction and discomfort.
  • Try on shoes in the afternoon: It’s recommended to try on hiking footwear in the afternoon or later in the day. This is because our feet tend to swell slightly throughout the day, particularly during physical activity. By trying on shoes when your feet are at their largest, you can ensure a better fit that accommodates potential swelling during hiking. This step is crucial for preventing blisters caused by tight or constricting footwear.
  • Wear moisture-wicking socks: When selecting hiking socks, opt for those made of moisture-wicking materials such as synthetic fibres or wool. These fabrics efficiently draw moisture away from your skin, keeping your feet dry and reducing the likelihood of friction. Moisture-wicking socks help maintain a comfortable environment inside your shoes, minimizing the risk of blisters. Avoid cotton socks, as they tend to retain moisture and can lead to increased friction.

2. Break-in Your Footwear

Before embarking on a long hiking trip, it is crucial to break in your footwear properly. Walking in new shoes for extended periods can cause friction and increase the risk of blisters. Here’s how you can effectively break in your hiking footwear:

  • Wear your new shoes or boots on shorter hikes or walks: Instead of diving straight into a long hiking trip with brand-new footwear, start by wearing them on shorter hikes or walks. This allows your feet to adjust to the shoes gradually and reduces the chances of developing blisters. By giving your feet time to adapt, you minimize the risk of discomfort and potential foot problems.
  • Apply moleskin or blister prevention patches: Identify potential problem areas on your feet, such as the back of the heel or areas that tend to rub against the shoes. Before heading out on your hike, apply moleskin or blister prevention patches to these specific areas. These protective measures act as a barrier between your skin and the shoe, reducing friction and minimizing the likelihood of blisters forming.
  • Gradually increase duration and intensity: Once you’ve worn your new footwear on shorter hikes without any discomfort or blister formation, it’s time to gradually increase the duration and intensity of your hikes. Start by extending the length of your hikes or tackling more challenging terrain while wearing the new shoes. This progressive approach helps your feet build up tolerance and allows the shoes to mould to your feet more effectively.

3. Use Moisture-Wicking Socks

Moisture plays a significant role in blister prevention, as damp or sweaty feet are more susceptible to blisters due to increased friction. To combat this issue, it’s important to invest in high-quality moisture-wicking socks that effectively manage moisture and keep your feet dry. Here are some tips to consider:

  • Avoid cotton socks: Cotton socks tend to retain moisture, which can lead to increased friction and blister formation. Instead, opt for socks made of synthetic or wool materials. These fabrics have excellent moisture-wicking properties, pulling sweat away from your skin and allowing it to evaporate more efficiently. By choosing socks that don’t trap moisture, you reduce the chances of blisters.
  • Look for synthetic or wool materials: Synthetic fibres like nylon, polyester, or acrylic are known for their moisture-wicking abilities. These materials draw sweat away from your skin, promoting better ventilation and reducing friction. Wool is also a great option as it has natural moisture-wicking properties and helps regulate temperature, keeping your feet dry and comfortable during hikes.
  • Consider double-layered socks or liner socks: Another option to prevent blisters is wearing double-layered socks or liner socks. Double-layered socks consist of an inner sock and an outer sock. The inner sock provides a snug fit and acts as a moisture-wicking layer, while the outer sock adds cushioning and further reduces friction. Liner socks, on the other hand, are thin socks worn underneath your regular hiking socks. They create a smooth surface, reducing friction between your feet and the outer sock.

Best Hiking/Walking Socks

Showing 1 – 5 of 31 results Showing all 31 results Showing the single result No results found
Sort by Popularity
Filters Sort results
Reset Apply
Image
Name
Description
Price
Quantity
Add to cart
83.5% Cotton, 15% Polyamide fibre, 1.5% Spandex. Large fits women's…
£21.95-£33.60
Max:
Min: 1
Step: 1
CityComfort Womens Socks, Cotton Ladies Socks size 4, 5, 6, 7, Socks
£7.99
Max:
Min: 1
Step: 1
MERINO WOOL COMFORT: Our socks with thermoregulating merino wool and…
£21.67-£34.95
Max:
Min: 1
Step: 1
YUEDGE Women's 5 Pairs: Your Feet's New Best Friends! BREATHABLE FABRIC…
£14.77-£21.99
Max:
Min: 1
Step: 1
Waterproof - three layer construction for warmth, durability and waterproofingFoot…
£32.99
Max:
Min: 1
Step: 1
127

4. Apply Foot Powder or Anti-Chafing Products

  • To minimize friction and reduce the likelihood of blisters, it’s beneficial to apply foot powder or anti-chafing products before embarking on your hike. These products work to absorb moisture, decrease friction, and keep your feet comfortable throughout the journey. Here’s a step-by-step guide to follow:
    • Apply foot powder: Before putting on your socks, take a small amount of foot powder and sprinkle it over your feet. Focus on areas that are prone to moisture build-up and blister formation, such as the heels and toes. The foot powder helps to absorb excess moisture, keeping your feet drier and reducing the chances of friction-induced blisters. Make sure to spread the powder evenly across the entire foot surface for optimal effectiveness.
    • Pay attention to blister-prone areas: When applying foot powder, pay special attention to areas of your feet that are susceptible to blister formation. These commonly include the back of the heel, areas where your shoes tend to rub against your skin, or any other spots that have previously been prone to blistering. Applying foot powder to these specific areas helps to create an extra protective barrier against friction.
    • Consider anti-chafing balms or creams: In addition to foot powder, you can also use anti-chafing balms or creams as an alternative option. These products typically come in the form of a balm or lotion and create a protective barrier on your skin. Apply the balm or cream to areas prone to blistering or chafing, ensuring complete coverage. The protective layer reduces friction and minimizes the risk of blisters forming during your hike.

    .

5. Take Regular Breaks

When embarking on long hikes, it’s crucial to incorporate regular breaks to give your feet a chance to rest and recover. Continuous walking without proper breaks can result in excessive friction and increase the risk of developing blisters. To ensure the well-being of your feet, follow these guidelines:

  • Plan breaks and rest stops: When planning your hiking itinerary, make sure to include designated breaks and rest stops along the way. These breaks allow you to give your feet a break from the constant pressure and friction of walking. Schedule short breaks at regular intervals, such as every hour or two, depending on the intensity and duration of your hike. Use this time to relax, stretch your legs, and give your feet a well-deserved break.
  • Take off your shoes and socks: During these breaks, it’s beneficial to remove your shoes and socks to allow your feet to breathe and dry out. This gives your feet a chance to air out, reducing moisture and preventing the accumulation of sweat. It also helps in preventing fungal infections. By exposing your feet to fresh air, you promote better ventilation and create a less favorable environment for blister formation.
  • Elevate your feet: If possible, take advantage of breaks by elevating your feet. Find a comfortable spot where you can prop up your feet, preferably higher than your heart level. Elevating your feet helps reduce swelling by aiding blood circulation and lymphatic drainage. It also provides temporary relief from pressure and can alleviate discomfort caused by prolonged walking.

6. Keep Your Feet Clean and Dry

Maintaining proper foot hygiene is essential when it comes to preventing blisters. By keeping your feet clean and dry, you minimize the risk of moisture build-up and reduce friction. Follow these steps to ensure good foot hygiene:

  • Wash your feet thoroughly: Before and after hiking, make it a habit to wash your feet thoroughly. Use warm water and mild soap to cleanse your feet, paying attention to all areas, including the soles, toes, and in between the toes. Gently scrub your feet to remove dirt, sweat, and bacteria that can contribute to moisture and potential blister formation.
  • Pat your feet dry: After washing, it’s crucial to thoroughly dry your feet. Take a clean towel and gently pat your feet dry, making sure to focus on the spaces between your toes where moisture tends to accumulate. Avoid rubbing your feet vigorously, as this can cause irritation. Ensuring your feet are completely dry helps prevent the development of a moist environment that favors blister formation.
  • Apply talcum powder or corn-starch: Once your feet are dry, consider applying a thin layer of talcum powder or corn-starch to further absorb any remaining moisture. These powders help to keep your feet dry by absorbing sweat and reducing friction. Focus on areas that are more prone to moisture, such as the soles and in between the toes. The powder acts as a barrier and aids in preventing excess moisture build-up during your hike.

By following these steps and maintaining good foot hygiene, you significantly reduce the risk of blisters. Washing your feet before and after hiking, drying them thoroughly, and applying talcum powder or corn-starch creates an environment that discourages moisture and reduces friction. This promotes overall foot health and enhances your hiking experience.

Anti Blister Socks

Showing 1 – 5 of 14 results Showing all 14 results Showing the single result No results found
Sort by Price low to high
Filters Sort results
Reset Apply
Image
Name
Description
Price
Quantity
Add to cart
No-show cushioned running sock provides comfort and performance during extended…
£9.45-£22.86
Max:
Min: 1
Step: 1
Single pack of warm trekking socks for women and teenage…
£21.95-£26.45
Max:
Min: 1
Step: 1
Athletic RibbedTerry Loop In Forefoot, Heel, And Toe For Medium…
£9.00-£17.27
Max:
Min: 1
Step: 1
Indestructawool technology with extended durability zones4 Degree elite fit system…
£18.52-£22.99
Max:
Min: 1
Step: 1
Single pack of warm trekking socks for women and teenage…
£16.19-£25.00
Max:
Min: 1
Step: 1
123

FAQs about Preventing Blisters When Hiking

Q1: How do blisters form when hiking?

A1: Blisters form when the skin undergoes excessive friction or repetitive pressure. Hiking can lead to blisters due to the continuous rubbing of footwear against the skin, especially in areas where there is increased friction.

Q2: Are blisters a common problem while hiking?

A2: Yes, blisters are a common problem among hikers, particularly those who engage in long-distance or multi-day hikes. However, by taking preventive measures, blisters can be minimized or avoided altogether.

Q3: Should I pop a blister if it forms during a hike?

A3: It is generally recommended not to pop a blister during a hike. Popping a blister increases the risk of infection and prolongs the healing process. Instead, protect the blister with a bandage or blister-specific adhesive pad and seek appropriate treatment after your hike.

Q4: Can wearing two pairs of socks prevent blisters?

A4: Wearing two pairs of socks, also known as double-socking, can help reduce friction and prevent blisters. The inner sock should be a thin, moisture-wicking liner, while the outer sock provides additional cushioning and support.

Q5: Are there any home remedies for treating blisters?

A5: While it’s best to prevent blisters from forming in the first place, there are some home remedies that can help alleviate discomfort if a blister develops. These include applying aloe vera gel, using antibiotic ointments, or covering the blister with a clean, sterile bandage.

Q6: Can I continue hiking with a blister?

A6: If you develop a blister during a hike, it’s advisable to assess the severity of the blister and the level of discomfort. Small, unbroken blisters may be manageable, but larger or painful blisters may require proper treatment and rest before resuming hiking.

Conclusion

Preventing blisters when hiking is all about proactive measures and proper foot care. By selecting the right footwear, breaking it in, wearing moisture-wicking socks, applying foot powder, taking regular breaks, and maintaining clean and dry feet, you can significantly reduce the risk of blisters. Remember, prevention is key, but if a blister does form, take the necessary steps to ensure proper treatment and healing. With these tips in mind, you can confidently hit the trails and enjoy the wonders of hiking blister-free!

First Aid Kits

Showing 1 – 5 of 15 results Showing all 15 results Showing the single result No results found
Sort by Popularity
Filters Sort results
Reset Apply
123
Posted on Leave a comment

Best Hiking Boots For Flat Feet

Man's flat feet

Best Hiking Boots For Flat Feet: Discover the Perfect Fit for Comfortable Adventures

Introduction

Embarking on hiking adventures with flat feet can pose unique challenges, but fear not! With the right pair of hiking boots, you can conquer the trails and enjoy the great outdoors comfortably. In this comprehensive guide, we will explore the best hiking boots for flat feet, providing you with expert recommendations and valuable insights to help you find the perfect fit. From understanding the needs of flat feet to exploring the features to look for in hiking boots, we’ve got you covered. Get ready to step out with confidence and conquer the trails like never before.

Best Hiking Boots For Flat Feet: Understanding the Needs

What are Flat Feet?

Flat feet, also referred to as fallen arches, is a condition characterized by the flattening of the foot’s arches, causing the entire sole of the foot to make contact with the ground. This can lead to various problems, including overpronation, which is an excessive inward rolling of the foot, and a lack of arch support. When engaging in hiking activities, individuals with flat feet require adequate support and stability to minimize discomfort and reduce the risk of potential injuries.

Hiking with flat feet can be challenging, but with the right precautions and proper footwear, individuals can enjoy the great outdoors without unnecessary pain or discomfort. Here are some essential tips to consider when hiking with flat feet:

  1. Choose the Right Footwear: Opt for hiking shoes or boots that provide excellent arch support and stability. Look for models that offer built-in arch support or consider using orthotic inserts to provide additional support and cushioning for your flat feet.
  2. Focus on Stability: Look for hiking footwear with a firm and stable midsole to help control overpronation and provide a solid foundation for your feet. A sturdy outsole with good traction is also crucial to prevent slipping and maintain stability on different terrains.
  3. Consider Ankle Support: Hiking boots with higher ankle support can provide extra stability and prevent excessive ankle rolling, particularly on uneven or challenging trails. This feature can help minimize strain on the feet and ankles.
  4. Gradual Conditioning: If you’re new to hiking or have been inactive for a while, start with shorter and less demanding trails. Gradually increase the intensity and duration of your hikes to allow your feet and muscles to adapt and strengthen over time.
  5. Stretch and Strengthen: Regular stretching and strengthening exercises can help improve the flexibility and strength of the muscles and ligaments in your feet and ankles. Consult with a physical therapist or podiatrist to learn specific exercises that target your flat feet.
  6. Pay Attention to Terrain: Be mindful of the terrain you choose to hike on. Avoid steep, uneven, or rocky trails that can put excessive stress on your feet and ankles. Opt for well-maintained paths with a moderate level of difficulty until you feel more confident and comfortable.
  7. Rest and Listen to Your Body: It’s important to listen to your body and take breaks when needed. Resting allows your feet to recover and helps prevent overuse injuries. If you experience persistent pain or discomfort, consult a healthcare professional who specializes in foot conditions for further evaluation and guidance.

Remember, everyone’s feet are unique, and what works for one person may not work for another. It’s crucial to find the right combination of footwear, support, and conditioning exercises that suit your individual needs. By taking the necessary precautions and prioritizing foot care, individuals with flat feet can enjoy the beauty of nature and embark on memorable hiking adventures.

The Importance of Arch Support

Having proper arch support is crucial for individuals with flat feet, as it plays a vital role in distributing weight evenly and maintaining proper alignment of the feet and ankles. When it comes to choosing hiking boots, it’s essential to opt for models that offer adequate arch support specifically designed to alleviate strain on the arches and provide stability during long hikes. The inclusion of proper arch support in your hiking boots can significantly enhance comfort, reduce the risk of foot fatigue, and minimize the occurrence of pain and discomfort.

When searching for hiking boots with suitable arch support for flat feet, consider the following factors:

  1. Arch Support Technology: Look for hiking boots that feature built-in arch support technology. These boots are designed to provide the necessary structure and cushioning to support the arches of the feet. Brands like Merrell, Salomon, and Keen offer hiking boots with excellent arch support options.
  2. Removable Insoles: Some hiking boots come with removable insoles, allowing you to replace them with custom orthotic inserts or arch support inserts tailored to your specific needs. This customization option can provide additional support and enhance comfort for flat feet.
  3. Midsole Design: Check the construction of the midsole in the hiking boots. Look for boots that have a supportive and cushioned midsole, such as those with EVA (ethylene-vinyl acetate) or PU (polyurethane) foam. These materials provide both shock absorption and arch support.
  4. Try Before You Buy: Visit a specialized outdoor or footwear store and try on different hiking boots to assess their arch support. Pay attention to how the boots feel around your arches and whether they provide the necessary support and stability. Walk around the store and mimic hiking movements to gauge their overall comfort.
  5. Consult with a Podiatrist: If you have severe flat feet or experience persistent foot pain, it may be beneficial to consult with a podiatrist. They can evaluate your foot structure and recommend specific hiking boots or custom orthotics that cater to your individual needs.

Remember that finding the right hiking boots with proper arch support is essential for individuals with flat feet. Investing in high-quality boots that prioritize arch support will enhance your hiking experience, allowing you to explore the great outdoors comfortably and with reduced risk of foot-related issues.

Cushioning for Impact Absorption

When it comes to hiking, traversing uneven surfaces and rocky paths is common, making cushioning a vital consideration in choosing the right hiking boots. Ample cushioning in the midsole and heel areas plays a crucial role in absorbing impact and reducing stress on the feet. It enhances shock absorption, ensuring a comfortable hiking experience even on rugged trails. Moreover, adequate cushioning helps minimize the risk of foot-related injuries.

Here are some key points to consider when looking for hiking boots with proper cushioning:

  1. Midsole Cushioning: Look for hiking boots that feature a well-cushioned midsole, typically made of materials like EVA (ethylene-vinyl acetate) or PU (polyurethane) foam. These materials offer excellent shock absorption properties, reducing the impact on your feet with every step.
  2. Heel Cushioning: The heel area is particularly prone to absorbing shock, especially during descents. Opt for hiking boots that provide extra cushioning in the heel, ensuring maximum comfort and protection against repetitive impact.
  3. Arch Support and Cushioning: While addressing cushioning, it’s essential to consider the arch support as well. Look for hiking boots that offer a combination of cushioning and arch support to maintain proper foot alignment and reduce strain on the arches.
  4. Fit and Comfort: Properly cushioned hiking boots should provide a snug and comfortable fit. Make sure to try on different boots, walk around in them, and assess how they feel. Pay attention to the cushioning’s responsiveness and whether it adequately absorbs the impact as you walk on various surfaces.
  5. Terrain-specific Cushioning: Depending on the type of hiking you plan to do, consider the specific cushioning needs for that terrain. For example, if you’ll be tackling rocky trails or rugged terrain, prioritize boots with enhanced cushioning and shock absorption to handle the uneven surfaces effectively.

Remember, proper cushioning in hiking boots enhances comfort, reduces fatigue, and minimizes the risk of foot-related injuries. It’s worth investing in high-quality boots that prioritize cushioning to ensure an enjoyable and safe hiking experience.

Exploring the Best Hiking Boots for Flat Feet

1. Merrell Moab 2 Mid Waterproof Hiking Boot

The Merrell Moab 2 Mid Waterproof Hiking Boot stands out as a top choice for hikers with flat feet. This boot is highly regarded for its exceptional arch support, making it an ideal option for individuals seeking proper foot alignment and comfort. The contoured footbed of the Moab 2 Mid offers excellent support to the arches, reducing strain and promoting a more stable gait.

In addition to its supportive design, this hiking boot boasts impressive cushioning in the heel and midsole areas. The cushioned heel effectively absorbs shock, while the midsole provides an extra layer of comfort and protection against impact, ensuring a comfortable hiking experience even on rugged terrain. With each step, the boot’s cushioning system helps reduce fatigue and minimize the risk of foot-related injuries.

One of the notable features of the Merrell Moab 2 Mid is its waterproof construction. Made with durable and reliable materials, this boot keeps your feet dry and protected in wet and challenging conditions. Whether you encounter muddy trails, stream crossings, or unexpected rain showers, the waterproof capabilities of the Moab 2 Mid provide peace of mind and allow you to focus on the trail ahead.

Overall, the Merrell Moab 2 Mid Waterproof Hiking Boot is a trusted companion for hikers with flat feet. Its combination of excellent arch support, cushioning, and waterproof features makes it a reliable and comfortable choice for various hiking adventures. Invest in these boots and enjoy the benefits of proper support and protection as you explore the great outdoors.

2. Salomon Quest 4D 3 GTX Backpacking Boot

The Salomon Quest 4D 3 GTX Backpacking Boot stands out as a top-tier choice for hikers who prioritize maximum support and stability. This boot is specifically designed to offer unparalleled performance on the trails, making it a reliable option for those with flat feet.

One of the key features of the Quest 4D 3 GTX is Salomon’s innovative 4D Advanced Chassis. This technology provides exceptional arch support, helping to maintain proper foot alignment and prevent overpronation. With the advanced chassis, hikers with flat feet can enjoy improved stability and a more efficient stride, reducing the risk of discomfort and potential injuries.

In addition to its superb support, the Quest 4D 3 GTX features a cushioned midsole that offers excellent shock absorption. This cushioning system helps to reduce the impact on your feet during long hikes, providing optimal comfort even on challenging terrains. Whether you encounter rocky trails or uneven surfaces, the boot’s cushioned midsole ensures a smooth and enjoyable hiking experience.

Another standout feature of the Quest 4D 3 GTX is its GORE-TEX waterproof lining. This advanced technology keeps your feet dry and protected in wet conditions, allowing you to confidently navigate through streams, muddy paths, and rainy weather. The waterproof feature enhances the boot’s durability and ensures your feet remain comfortable and dry throughout your backpacking adventures.

Overall, the Salomon Quest 4D 3 GTX Backpacking Boot is a high-performance option that offers exceptional support and stability for hikers with flat feet. Its 4D Advanced Chassis, cushioned midsole, and waterproof features make it an ideal choice for longer backpacking trips where durability and comfort are essential. Invest in the Quest 4D 3 GTX and enjoy the benefits of superior arch support and reliable performance on the trails.

3. Keen Targhee II Mid Waterproof Hiking Boot

The Keen Targhee II Mid Waterproof Hiking Boot offers a combination of durability, comfort, and support. Its metatomical footbed is designed to provide excellent arch support, catering to the needs of hikers with flat feet. The boot’s waterproof membrane keeps your feet dry, while the rugged outsole offers excellent traction on various surfaces. Whether you’re tackling rocky trails or muddy paths, the Targhee II Mid is up to the challenge.

4. Lowa Renegade GTX Mid Hiking Boot

The Lowa Renegade GTX Mid Hiking Boot is a versatile and reliable choice that delivers exceptional comfort and support for hikers, particularly those with flat feet. This boot is designed to provide a secure fit and optimal arch support, ensuring a comfortable hiking experience.

One of the standout features of the Renegade GTX Mid is its Monowrap midsole technology. This innovative construction offers stability and excellent arch support, promoting proper foot alignment and reducing the strain on flat feet. With the Monowrap midsole, hikers can enjoy enhanced comfort and stability, even during long hikes on challenging terrains.

The boot’s waterproof GORE-TEX lining adds another layer of functionality, making it suitable for various weather conditions. Whether you encounter rain, mud, or wet trails, the Renegade GTX Mid keeps your feet dry and protected. This feature not only enhances the boot’s durability but also ensures your comfort and confidence in any weather.

Additionally, the Renegade GTX Mid is equipped with a grippy outsole, providing excellent traction on different surfaces. This reliable grip allows you to navigate slippery or uneven terrains with ease, reducing the risk of slips and falls. With its durable construction and reliable performance, the Renegade GTX Mid is well-suited for avid hikers who seek a boot that can withstand the demands of various hiking adventures.

In summary, the Lowa Renegade GTX Mid Hiking Boot is a versatile and dependable option that excels in comfort, support, and durability. Its Monowrap midsole technology offers stability and arch support, while the waterproof GORE-TEX lining ensures dryness and protection in various weather conditions. With its grippy outsole, this boot is ready to tackle different terrains with confidence. Invest in the Renegade GTX Mid and experience the comfort and performance it brings to your hiking journeys.

FAQs (Frequently Asked Questions)

1. Can hiking boots help with flat feet?

Yes, it’s essential for individuals with flat feet to choose hiking boots that are specifically designed to provide the necessary support and stability. These boots should offer proper arch support and cushioning to alleviate discomfort and reduce the risk of overpronation.

When shopping for hiking boots, look for models that feature built-in arch support. This support helps to distribute weight evenly across the foot, reducing strain on the arches and promoting proper alignment. A contoured footbed or an orthotic insert can also provide additional arch support and enhance the overall comfort of the boots.

In addition to arch support, cushioning is crucial for individuals with flat feet. Look for boots that feature ample cushioning in the midsole and heel areas. This cushioning helps to absorb shock and impact, providing a comfortable experience even on rugged terrain. It helps to minimize the risk of foot fatigue and pain, allowing you to hike longer and enjoy your outdoor adventures to the fullest.

Furthermore, consider boots with a sturdy and supportive construction. Look for materials that offer stability and structure, such as durable leather or synthetic uppers. A secure lacing system and ankle support can also enhance stability and prevent excessive foot movement, reducing the risk of discomfort or injury.

By choosing hiking boots with proper arch support, cushioning, and stability, individuals with flat feet can enjoy their outdoor adventures with greater comfort and confidence. These boots provide the necessary support to minimize discomfort and promote optimal foot alignment, allowing you to fully enjoy the beauty of nature while keeping your feet happy and protected.

2. How can I determine if a hiking boot offers adequate arch support?

When trying on hiking boots, it’s important to pay attention to how the arch area feels. Look for boots that have a contoured footbed or specialized arch support technology. These features are designed to provide targeted support to the arches of the feet, helping to alleviate discomfort and promote proper foot alignment.

Take the time to walk around in the boots and assess how they feel. The arch area should feel supportive and snug, without any excessive pressure or discomfort. Keep in mind that some boots may require a break-in period, so it’s a good idea to wear them around the house or on shorter walks before embarking on a long hiking trip.

If you find that the arch support in the boots is not sufficient for your flat feet, consider using custom insoles or orthotics. These can be obtained from a podiatrist or orthopedic specialist who can assess your specific needs and provide you with inserts that offer the right amount of support and alignment for your feet.

Custom insoles or orthotics can be inserted into the boots to provide additional arch support and enhance overall comfort. They are designed to conform to the shape of your feet, providing personalized support and stability.

By paying attention to the arch area and choosing boots with a contoured footbed or specialized arch support technology, you can ensure that your hiking boots provide the necessary support for your flat feet. And if needed, custom insoles or orthotics can further enhance the comfort and stability of your boots, allowing you to fully enjoy your hiking adventures while keeping your feet happy and supported.

3. Are there any specific features to look for in hiking boots for flat feet?

Aside from arch support, it’s important to look for hiking boots that offer cushioning in the midsole and heel areas. This cushioning helps absorb the impact of each step, reducing stress on your feet and providing additional comfort during long hikes. Look for boots that feature materials such as EVA (ethylene-vinyl acetate) or polyurethane foam in the midsole, as these materials are known for their excellent shock absorption properties.

A secure and supportive lacing system is also crucial for hikers with flat feet. Look for boots that provide multiple lacing points and allow you to adjust the tightness in different areas of the boot. This allows for a customized fit, ensuring that your feet are properly supported and stable while hiking. A secure lacing system helps prevent your feet from sliding or moving excessively within the boots, reducing the risk of foot fatigue and discomfort.

When trying on hiking boots, make sure to lace them up properly and walk around to assess how they feel. The boots should feel snug and secure, providing a comfortable fit without any excessive pressure points or areas of looseness.

By choosing hiking boots with cushioning in the midsole and heel areas, as well as a supportive and secure lacing system, you can enhance stability, prevent foot fatigue, and enjoy a more comfortable hiking experience. Take the time to find the right boots that meet these criteria, and you’ll be well-equipped for your outdoor adventures.

4. Should I choose waterproof hiking boots for flat feet?

While waterproof hiking boots can offer protection against wet conditions, it’s important to consider your hiking preferences and the expected weather conditions before making a decision. Waterproof boots can be beneficial in preventing moisture build-up and keeping your feet dry, which can be particularly advantageous when hiking in rainy or muddy environments.

However, it’s essential to keep in mind that waterproof boots may not be as breathable as non-waterproof options. In warm or dry weather, your feet may sweat more inside waterproof boots, leading to discomfort or the potential for blisters. Additionally, waterproof boots tend to be slightly heavier than their non-waterproof counterparts due to the added waterproofing materials.

If you anticipate encountering wet or damp conditions during your hikes, such as crossing streams, hiking in rain-prone areas, or traversing muddy terrains, waterproof boots can be a valuable investment. They provide an extra layer of protection, keeping your feet dry and minimizing the risk of water-related discomfort or blisters.

On the other hand, if you typically hike in dry or hot conditions or prefer breathability over waterproofing, non-waterproof boots may be more suitable. Non-waterproof boots are generally more breathable, allowing for better airflow and moisture evaporation, which can help keep your feet cooler and drier in such conditions.

Ultimately, the choice between waterproof and non-waterproof hiking boots depends on your specific needs and the prevailing weather conditions. Consider the climate and terrain you’ll be hiking in, as well as your personal comfort preferences, when deciding which type of boots to invest in.

5. Can I use over-the-counter insoles for additional arch support?

Indeed, over-the-counter insoles can be an excellent choice for enhancing arch support in hiking boots. These insoles are readily available and can provide additional cushioning and support to alleviate discomfort and promote proper foot alignment for individuals with flat feet.

When selecting over-the-counter insoles, look for options that are specifically designed for flat feet or provide targeted arch support. These insoles are typically contoured to follow the natural shape of the foot, providing the necessary support to the arch area. They can help distribute weight evenly and reduce strain on the arches, enhancing overall comfort and stability during hikes.

It’s also worth considering seeking professional advice, such as consulting with a podiatrist or footwear specialist, to find the most suitable insoles for your specific needs. They can offer personalized recommendations based on your foot structure, gait, and hiking requirements. Customized orthotic insoles may be recommended for individuals with more severe flat foot conditions or specific foot biomechanical issues.

Remember to remove the existing insoles from your hiking boots before inserting the new insoles. Follow the manufacturer’s instructions for proper trimming and fitting, ensuring that the insoles fit snugly and comfortably within your boots.

By adding over-the-counter insoles to your hiking boots, you can enhance arch support, improve overall foot comfort, and minimize the risk of discomfort or fatigue during your hiking adventures.

6. How often should I replace my hiking boots?

The lifespan of hiking boots can vary based on several factors. Factors such as the frequency of use, the type of terrain you hike on, and how well you maintain and care for your boots can impact their durability and lifespan.

As a general guideline, it is recommended to replace hiking boots every 500 to 1,000 miles of use. This range can give you an idea of when to consider getting a new pair. However, it’s important to remember that this is just an estimate, and individual experiences may vary.

Pay attention to the condition of your boots. If you start noticing significant wear and tear, such as worn-out soles, holes, or separation of the upper and outsole, it may be a sign that it’s time to replace them. Loss of support, decreased cushioning, or discomfort during hikes can also indicate that your boots have reached the end of their lifespan.

Regular maintenance and care can extend the lifespan of your hiking boots. Clean them after each hike, remove any debris or dirt, and let them dry thoroughly before storage. Applying waterproofing treatments and conditioning the leather (if applicable) can help maintain the boots’ integrity and protect them from moisture.

It’s important to listen to your feet and pay attention to any signs of discomfort or lack of support. If you find that your boots are no longer providing the necessary protection or comfort, it’s advisable to invest in a new pair to ensure optimal performance and minimize the risk of foot-related issues on your future hikes.

Remember, the lifespan of hiking boots is not set in stone, and it’s essential to assess their condition regularly and make a judgment based on factors like wear, tear, and overall performance. Your comfort and safety should always be the priority when determining whether it’s time to replace your hiking boots.

Conclusion

Choosing the best hiking boots for flat feet is a critical aspect of preparing for comfortable and enjoyable hiking experiences. With the right combination of arch support, cushioning, and durability, you can confidently conquer the trails while minimizing the risk of discomfort or injuries. It’s important to consider your specific needs, the terrain conditions you’ll encounter, and your personal preferences when selecting hiking boots.

Start by focusing on arch support. Look for hiking boots that offer adequate arch support to help maintain the natural alignment of your feet and prevent overpronation. Boots with contoured footbeds or specialized arch support technologies can provide the necessary stability and reduce strain on your arches.

Cushioning is another essential factor to consider. Opt for hiking boots with ample cushioning in the midsole and heel areas. This cushioning helps absorb the impact of each step, providing extra comfort and reducing the risk of foot fatigue. It’s particularly crucial when hiking on uneven or rocky terrain.

Durability is key, especially if you plan to embark on frequent or challenging hikes. Look for hiking boots made from high-quality materials that can withstand the demands of rugged trails. Consider features like reinforced toe caps and sturdy outsoles for added protection and longevity.

Don’t forget to try on several pairs of hiking boots to find the right fit. Proper fit is crucial for flat feet, as it ensures optimal support and prevents slippage or discomfort during your hikes. Take the time to walk around in the boots and assess their comfort and stability.

Lastly, consider any additional features that may be important to you, such as waterproofing, breathability, or a secure lacing system. These features can enhance your overall hiking experience and keep your feet protected and comfortable in various weather conditions.

By carefully selecting hiking boots that address the specific needs of your flat feet, you can embark on your outdoor adventures with confidence and comfort. So, lace up your new pair of hiking boots, embrace the beauty of nature, and embark on unforgettable hiking experiences with the support and comfort your flat feet deserve.

Lowa Boots for Men and Women

Showing 1 – 5 of 11 results Showing all 11 results Showing the single result No results found
Sort by Popularity
Filters Sort results
Reset Apply
Image
Name
Description
Price
Quantity
Add to cart
Lowa |GDT-81VibramTraction / Adhesion
£247.25
Max:
Min: 1
Step: 1
EUR 41 41.5 42 42.5 43.5 44 44.5 45 46…
£140.56-£201.20
Max:
Min: 1
Step: 1
If you no longer want to freeze your toes in…
£221.85
Max:
Min: 1
Step: 1
Lowa; Boots; Renegade
£150.48-£202.72
Max:
Min: 1
Step: 1
Obermaterial aus Nubukleder ist strapazierfähig und langlebigGORE-TEX - bietet dauerhafte…
£317.00
Max:
Min: 1
Step: 1
123
Posted on Leave a comment

What type of map is best for hiking?

A Stack of paper maps

What Type of Map is Best for Hiking? Exploring the Options

Introduction

When it comes to hiking, having the right map can make all the difference. A good map not only helps you navigate the trails but also provides valuable information about the terrain, landmarks, and potential hazards. With so many options available, it can be overwhelming to choose the best map for your hiking adventures. In this article, we will explore the different types of maps commonly used for hiking and help you understand which one is best suited for your needs.

1. Topographic Maps: A Detailed Overview 

Compass on Topographic Map

1.1 Understanding Topographic Maps

Topographic maps are detailed representations of the Earth’s surface, showcasing both natural and man-made features. They use contour lines to depict elevation changes, allowing hikers to understand the terrain they’ll be traversing. These maps provide a wealth of information, including trails, water sources, landmarks, and even vegetation. By studying a topographic map, hikers can gain valuable insights into the difficulty and potential challenges of their chosen routes.

1.2 Key Features of Topographic Maps

Topographic maps include various key features that aid in navigation. These features include contour lines, scale, legend, and symbols. Contour lines indicate changes in elevation, helping hikers visualize hills, valleys, and ridges. The scale provides a ratio of distance on the map to the actual distance on the ground, allowing hikers to estimate the length of their hike. The legend explains the symbols used on the map, such as trails, water bodies, and landmarks. Symbols provide additional information, such as campgrounds, viewpoints, and points of interest.

1.3 Advantages of Using Topographic Maps

Topographic maps offer several advantages for hikers. Firstly, they provide a comprehensive view of the terrain, allowing hikers to plan their routes effectively. The detailed information on elevation changes helps in assessing the difficulty of the trail and preparing for steep ascents or descents. Additionally, topographic maps can be used in conjunction with a compass to navigate in areas without clear trail markings.

Moreover, topographic maps are reliable even in remote locations where technology may fail. They don’t require batteries or signal reception, making them a dependable backup option. Furthermore, studying topographic maps can enhance hikers’ understanding of the landscape, geology, and natural features they encounter during their hike.

2. Trail Maps: Your Guide to the Trails

2.1 What Are Trail Maps?

Trail maps specifically focus on hiking trails and are designed to provide hikers with detailed information about specific areas or trail systems. These maps highlight trail routes, trailheads, points of interest, and potential obstacles along the way. Trail maps often include difficulty ratings, distances, and estimated hiking times for different sections of the trail. They can be obtained from local hiking associations, national parks, or outdoor retailers.

2.2 The Importance of Trail Maps

Trail maps are essential for hikers as they offer a clear understanding of the trail network in a particular area. They provide valuable information about trail conditions, potential hazards, and any temporary closures or restrictions. By consulting a trail map, hikers can plan their routes, estimate their hiking times, and make informed decisions about the trails that best suit their abilities and preferences.

2.3 Benefits of Using Trail Maps

Using trail maps enhances the overall hiking experience in several ways. These maps enable hikers to explore new areas with confidence, knowing they have a reliable guide to navigate the trails. Trail maps often include interesting points of interest, such as viewpoints, waterfalls, or historical sites, which can add excitement and variety to the hike.

Additionally, trail maps help hikers stay on track and prevent getting lost. They can be especially valuable in areas with complex trail systems or multiple intersecting trails. By following a trail map, hikers can avoid unnecessary detours and stay on the intended route.

3. Digital Maps: The Power of Technology

3.1 Introduction to Digital Maps

Digital maps have revolutionized the way hikers navigate the wilderness. These maps are accessible through various smartphone apps, GPS devices, or online platforms. Digital maps provide real-time navigation, accurate GPS coordinates, and detailed trail information at the touch of a button.

3.2 Pros and Cons of Digital Maps

Digital maps offer several advantages for hikers. Firstly, they provide convenience and portability since most hikers already carry a smartphone or GPS device. Digital maps can be easily downloaded, eliminating the need for physical copies. They also offer interactive features such as zooming, panning, and the ability to track your location in real-time.

Moreover, digital maps can provide additional layers of information, including live weather updates, user-generated reviews and tips, and even real-time trail conditions. Some apps even allow hikers to record their hikes, track distance and elevation, and share their experiences with fellow outdoor enthusiasts.

However, there are a few considerations when relying solely on digital maps. Firstly, they require battery life, and hikers must ensure they have enough power or portable chargers for longer hikes to avoid running out of battery. Additionally, digital maps rely on a stable GPS signal, which may be limited or unavailable in remote areas or dense forests. Hikers should be prepared with alternative navigation methods in case of technical difficulties or signal loss.

3.3 Popular Digital Mapping Apps for Hiking

There are several popular digital mapping apps specifically designed for hiking and outdoor activities. These apps provide comprehensive trail maps, GPS tracking, and additional features to enhance the hiking experience. Some notable apps include:

  1. AllTrails: All Trails is a widely used app that offers a vast collection of trail maps with detailed information about trail difficulty, length, elevation, and user reviews. It allows hikers to track their progress, discover new trails, and save favourite routes.
  2. Gaia GPS: Gaia GPS provides topographic and satellite maps with extensive trail coverage. It offers offline maps, route planning, and waypoint navigation. Gaia GPS also enables hikers to record tracks, measure distance and elevation, and share their adventures.
  3. Komoot: Komoot is a popular app for hiking, cycling, and other outdoor activities. It offers detailed trail maps, turn-by-turn navigation, and the ability to plan multi-day adventures. Komoot also provides personalized recommendations based on user preferences and fitness levels.

These are just a few examples of the many digital mapping apps available. It’s essential to explore different options and choose an app that best suits your needs, offers reliable trail data, and has positive user reviews.

4. Navigation Compass: A Reliable Tool

Navigation Compass on blue background

4.1 The Role of a Navigation Compass

A navigation compass is a traditional tool that remains a reliable companion for hikers. It helps determine directions, orient maps, and navigate in areas without clear trail markers or GPS signals. A compass consists of a magnetic needle that aligns with Earth’s magnetic field and points towards the magnetic north.

4.2 Types of Navigation Compasses

There are various types of navigation compasses available, each with its features and benefits. The two most common types are the baseplate compass and the lensatic compass.

  • The baseplate compass is lightweight and versatile. It features a transparent baseplate with ruler markings and a rotating bezel with degree markings. Baseplate compasses are ideal for general navigation and map orientation.
  • The lensatic compass is more durable and designed for rugged outdoor use. It features a sighting lens, a hinged cover, and a rear sight for accurate readings. Lensatic compasses are commonly used by military personnel and hikers who require precise navigation.

4.3 How to Use a Navigation Compass for Hiking

Using a navigation compass for hiking requires some basic knowledge and practice. Here’s a simple step-by-step guide:

  1. Orient the map: Place the compass on the map, aligning the edge of the baseplate with your desired route. Rotate the bezel until the compass needle aligns with the orienting arrow on the baseplate.
  2. Find your direction: Hold the compass flat in your hand, ensuring the direction of travel arrow points away from you. Rotate your body until the magnetic needle aligns with the orienting arrow.
  3. Follow the bearing: While keeping the compass level, move in the direction where the direction of travel arrow is pointing. Periodically check the compass to ensure you’re staying on course.
  4. Adjust for declination: In areas with significant magnetic declination, adjust your compass to compensate for the difference between magnetic north and true north. This ensures accurate navigation.

Remember to practice using a compass before relying on it during a hike.

5. Paper Maps: Traditional and Trustworthy

hiking checking paper map

5.1 The Charm of Paper Maps

Despite the rise of digital technology, paper maps continue to hold their charm and reliability. There’s something special about unfolding a map, tracing your finger along the trails, and immersing yourself in the physical representation of the landscape. Paper maps provide a tangible connection to the outdoors and offer a sense of adventure.

5.2 Benefits of Carrying Paper Maps for Hiking

Carrying a paper map as a backup is always a wise decision for hikers. Paper maps don’t rely on batteries or GPS signals, making them dependable in any situation. They provide an overall view of the area and allow hikers to plan their routes effectively. Paper maps also serve as a visual aid in understanding the terrain, elevation changes, and potential landmarks.

In addition, paper maps can be marked up with notes, highlights, and personalized route information. They offer a level of customization that digital maps may not provide. Furthermore, paper maps are accessible to all hikers, regardless of their technological expertise or access to electronic devices.

5.3 Tips for Using Paper Maps Effectively

To make the most of a paper map during a hiking adventure, consider the following tips:

  • Get a waterproof map: Choose a map made of durable and waterproof material. This ensures that the map remains readable and usable even in wet or damp conditions.
  • Keep it protected: Store the map in a protective map case or a zip lock bag to prevent damage from moisture, dirt, or tearing. This will extend the lifespan of the map and keep it in good condition for future hikes.
  • Practice map reading: Familiarize yourself with the symbols, legends, and scale on the map. Practice reading contour lines and understanding how they represent the terrain. The more you practice, the more comfortable you’ll become with map navigation.
  • Combine with a compass: Use a compass in conjunction with the paper map to enhance navigation accuracy. By aligning the map with the compass, you can determine your direction and follow a specific bearing.
  • Refer to trail markers: Pay attention to trail markers, signs, and physical features on the ground that correspond to the information on the map. This will help you confirm your location and stay on the correct path.

6. Hiking Guidebooks: The Comprehensive Companion

6.1 What Are Hiking Guidebooks?

Hiking guidebooks are comprehensive resources that provide detailed information about specific hiking trails or regions. These books include trail descriptions, difficulty ratings, elevation profiles, maps, and valuable insights from experienced hikers. They often cover a range of trails, from easy day hikes to challenging multi-day adventures.

6.2 Why Should You Consider Hiking Guidebooks?

Hiking guidebooks offer a wealth of information and insider tips that can greatly enhance your hiking experience. They provide in-depth trail descriptions, including points of interest, historical information, and natural features to look out for. Guidebooks also help hikers plan their trips, offering suggestions for the best seasons to visit, nearby camping or accommodation options, and necessary permits or regulations.

Additionally, guidebooks often include practical advice on equipment, safety considerations, and recommended itineraries. They can inspire hikers with stunning photographs, stories, and personal anecdotes from the authors’ experiences on the trails.

6.3 Features to Look for in Hiking Guidebooks

When choosing a hiking guidebook, consider the following features:

  • Trail information: Look for guidebooks that provide detailed trail descriptions, including distance, elevation gain, and difficulty ratings. It should also mention any potential hazards or challenges along the trail.
  • Maps and visuals: Choose a guidebook that includes maps, preferably topographic maps, to help you visualize the trail and its surroundings. Photographs or illustrations can also be helpful in understanding the landscape and points of interest.
  • Updated information: Ensure that the guidebook is up to date with the latest trail conditions, closures, and regulations. Trail systems can change over time, so having accurate and current information is crucial for a successful hike.
  • Author credibility: Research the author’s credentials and experience in hiking and writing guidebooks. Look for guidebooks written by reputable authors or experts in the field to ensure reliable and trustworthy information.
  • User reviews: Read reviews from other hikers to get an idea of the guidebook’s usefulness and accuracy. Honest feedback from fellow outdoor enthusiasts can help you make an informed decision.

FAQs about Hiking Maps

Q1: What type of map is best for hiking?

A1: The best type of map for hiking depends on personal preferences and the specific needs of the hike. Topographic maps are highly recommended as they provide detailed information on terrain, elevation changes, and landmarks. Trail maps are also beneficial for focusing specifically on hiking trails, offering route information and potential points of interest.

Q2: Where can I find topographic maps for hiking?

A2: Topographic maps can be obtained from various sources. Local outdoor retailers often carry maps of popular hiking areas. National parks or forest service offices provide maps specific to their respective regions. Online platforms such as the US Geological Survey (USGS) or mapping apps like Gaia GPS offer digital versions of topographic maps.

Q3: Are digital maps reliable for hiking?

A3: Digital maps can be reliable for hiking, especially when used in conjunction with other navigation tools. However, they are dependent on battery life, signal reception, and technology, which may not always be available in remote areas. It’s essential to have alternative navigation methods and carry a backup paper map as a precaution.

Q4: Can I use a navigation compass with digital maps?

A4: Absolutely! A navigation compass can be a valuable tool even when using digital maps. It provides a reliable method for determining direction, orienting the map, and navigating in areas with limited GPS signal. Combining a compass with digital maps offers a comprehensive navigation system.

Q5: Are hiking guidebooks worth investing in?

A5: Hiking guidebooks can be a worthwhile investment for hikers, especially if you enjoy exploring new trails and regions. Guidebooks provide comprehensive information, insider tips, and inspiration for your hikes. They offer insights into the trail conditions, points of interest, safety considerations, and other valuable details that can enhance your overall hiking experience.

Q6: Can I rely solely on digital maps for navigation during a hike?

A6: While digital maps can be useful, it’s not recommended to rely solely on them for navigation during a hike. Technical issues, battery drainage, or signal loss can occur unexpectedly. Having a backup paper map, a compass, and the necessary map-reading skills ensures a reliable and safe hiking experience.

Conclusion

When it comes to choosing the best type of map for hiking, there are various options available, each with its own advantages. Topographic maps provide detailed terrain information, while trail maps focus specifically on hiking trails. Digital maps offer real-time navigation and additional features, but they should be used alongside other navigation tools. Paper maps and hiking guidebooks offer a tangible and comprehensive approach to navigating the trails.

Ultimately, the best map for hiking depends on your preferences, the specific hike, and your comfort level with different navigation methods. It’s always a good idea to be well-prepared and equipped with multiple navigation options, such as a combination of digital maps, a navigation compass, paper maps, and hiking guidebooks. This ensures that you have reliable resources at your disposal and can navigate confidently during your hiking adventures.

In summary, when it comes to choosing the best type of map for hiking, there isn’t a one-size-fits-all answer. It’s essential to consider your specific needs, preferences, and the nature of the hike. Topographic maps, trail maps, digital maps, navigation compasses, paper maps, and hiking guidebooks all have their advantages and can be used in combination for optimal navigation.

So, before embarking on your next hiking expedition, take the time to evaluate the options available and choose the maps and navigation tools that best suit your requirements. Remember to familiarize yourself with the chosen maps, practice using a compass, and consider investing in a reliable hiking guidebook. By doing so, you’ll enhance your hiking experience, ensure your safety, and make the most of your time spent in the great outdoors.

Hiking Maps – Top Picks

Posted on Leave a comment

Hiking rules and trail etiquette

Group of hikers on a hiking trail

Hiking Rules and Trail Etiquette: Essential Tips for a Safe and Enjoyable Hike

Introduction:

Hiking is a wonderful way to explore nature, stay active, and enjoy breathtaking views. However, it’s important to follow hiking rules and practice trail etiquette to ensure both your safety and the preservation of the environment. In this blog post, we will provide you with essential tips on hiking rules and trail etiquette, empowering you to have a safe and enjoyable hiking experience.

Hiking Rules:

  1. Plan and Prepare: Before heading out on a hike, research the trail, check the weather forecast, and assess your fitness level. Inform someone about your hiking plans, including the estimated duration of your hike.
  2. Know Your Limits: Choose a trail that matches your fitness level and experience. Start with shorter and easier hikes if you’re a beginner and gradually progress to more challenging ones as you build stamina and confidence.
  3. Dress Appropriately: Wear appropriate clothing and footwear for hiking. Dress in layers to adjust to changing weather conditions, and opt for sturdy hiking boots that provide ankle support and traction.
  4. Pack the Essentials: Carry essential items such as a map, compass, first aid kit, extra clothing, plenty of water, snacks, sun protection (hat, sunscreen), insect repellent, and a whistle for emergencies.
  5. Stay Hydrated and Nourished: Drink water regularly to stay hydrated throughout your hike. Pack energy-boosting snacks or a light meal to keep your energy levels up during longer hikes.
  6. Leave No Trace: Adhere to the principles of Leave No Trace. Properly dispose of waste, pack out what you pack in, and respect the environment by not damaging flora or fauna.
  7. Stay on Designated Trails: Stick to marked trails to prevent getting lost and to minimize your impact on the ecosystem. Straying off the trail can cause erosion and harm wildlife habitats.

Trail Etiquette:

  1. Yield to Uphill Hikers: When encountering hikers going uphill, step aside and give them the right of way. Uphill hikers have a more challenging ascent, and it’s courteous to let them pass.
  2. Practice Proper Passing: When overtaking slower hikers, announce your presence by politely saying “On your left.” Ensure there is enough space to pass safely and without causing disturbance.
  3. Minimize Noise: Respect the tranquillity of nature by keeping noise levels low. Avoid playing loud music or shouting, allowing other hikers to enjoy the peaceful surroundings.
  4. Be Mindful of Nature: Observe and appreciate the beauty of nature, but refrain from disturbing wildlife or damaging plants. Leave natural objects where you find them and refrain from picking flowers or removing rocks.
  5. Leave It as You Found It: Preserve the hiking trails for future hikers by not littering or leaving any trace of your presence. Carry out all trash and dispose of it properly.

FAQs:

Q: Are hiking poles necessary? A: Hiking poles can provide stability, especially on steep or uneven terrain. They can help reduce strain on your joints and provide balance. Consider using them for added support, particularly on longer or more challenging hikes.

Q: How do I handle encounters with wildlife while hiking? A: When encountering wildlife while hiking, maintain a safe distance and observe from afar. Do not approach or feed the animals. It’s important to respect their natural habitat and avoid any actions that may endanger them or yourself. If you encounter larger wildlife like bears or mountain lions, stay calm, make yourself appear larger, and slowly back away without turning your back on the animal.

Q: Should I hike alone or with a group? A: It is generally recommended to hike with a buddy or in a group, especially on longer or more remote trails. Hiking with others provides additional safety and support in case of emergencies. However, if you do choose to hike alone, make sure to inform someone about your plans, carry a communication device, and be prepared with the necessary skills and knowledge.

Q: How do I choose the right hiking trail? A: When selecting a hiking trail, consider factors such as distance, difficulty level, elevation gain, and the time you have available. Research trail descriptions, reviews, and difficulty ratings to find one that suits your preferences and fitness level.

Q: Should I carry a map and compass even if I use a GPS device or smartphone? A: Yes, it is advisable to carry a map and compass as a backup, even if you have a GPS device or smartphone. Technology can sometimes fail or run out of battery, so having traditional navigation tools ensures you can find your way if needed.

Q: How do I prevent blisters while hiking? A: To prevent blisters, wear comfortable and properly fitting hiking boots or shoes. Break them in before embarking on a long hike. Use moisture-wicking socks and consider using blister prevention products, such as moleskin or blister pads, on areas prone to friction.

Q: How should I prepare for hiking at high altitudes? A: Hiking at high altitudes can be physically demanding due to lower oxygen levels. Gradual acclimatization is crucial. Stay hydrated, take breaks to rest and adjust to the altitude, and listen to your body. If experiencing severe symptoms of altitude sickness, descend to a lower elevation.

Q: What should I do in case of a hiking emergency? A: In case of a hiking emergency, stay calm and assess the situation. If someone is injured or in immediate danger, prioritize their safety and seek medical help if necessary. If possible, call emergency services or activate a personal locator beacon. It’s important to carry a first aid kit and know basic first aid skills.

Q: Are there any hiking rules specific to national parks or protected areas? A: Yes, national parks and protected areas may have specific rules and regulations. It’s essential to familiarize yourself with the rules of the area you are visiting, such as permits, camping restrictions, and wildlife guidelines. Respect the rules to help preserve the natural environment and ensure the safety of all visitors.

Q: How can I estimate hiking times for a trail? A: Hiking times can vary depending on factors like terrain, elevation gain, and your fitness level. As a general guideline, estimate an average speed of 2-3 miles per hour on flat terrain. Factor in additional time for breaks, rest stops, and challenging sections of the trail.

Q: What are some essential safety tips for hiking in hot weather? A: When hiking in hot weather, stay hydrated by drinking plenty of water. Start early in the morning to avoid the hottest part of the day, and wear lightweight, breathable clothing with sun protection. Take frequent breaks in shaded areas, and be aware of signs of heat exhaustion or heat stroke, such as dizziness, fatigue, and nausea.

Q: How do I prevent and deal with insect bites while hiking? A: To prevent insect bites, apply insect repellent containing DEET or other recommended ingredients. Wear long sleeves, pants, and socks to minimize exposed skin. If you do get bitten, clean the area with soap and water, apply an anti-itch cream or calamine lotion, and avoid scratching to prevent infection.

Q: What should I do if I encounter a snake on the trail? A: If you encounter a snake on the trail, give it space and do not provoke or attempt to handle it. Most snakes are non-venomous and will try to avoid confrontation. Step back slowly and allow the snake to move away. If the snake is venomous or you get bitten, seek immediate medical attention and try to remember the snake’s appearance for identification purposes.

Q: How do I stay safe from lightning during a hike? A: If there is a risk of lightning during your hike, avoid open areas, tall trees, and exposed ridges. Seek shelter in a vehicle or a substantial building if available. If caught in an open area, crouch down with your feet together, minimizing contact with the ground. Avoid isolated trees, bodies of water, and metal objects.

Q: Can I bring my dog hiking with me? A: Many trails allow dogs, but it’s important to check beforehand. Some trails have specific rules regarding leashes, waste disposal, and dog-friendly areas. Make sure your dog is well-trained, and bring essentials such as water, food, and poop bags. Respect other hikers by keeping your dog under control and minimizing any disturbances.

Q: How do I deal with hiking in cold weather or winter conditions? A: When hiking in cold weather, dress in layers to stay warm and regulate body temperature. Wear a base layer that wicks moisture away from the skin, insulating layers for warmth, and a waterproof and windproof outer layer. Protect extremities with hats, gloves, and warm socks. Carry additional safety items such as hand warmers, a headlamp, and an emergency blanket.

Q: Are there any specific considerations for hiking with children? A: Hiking with children can be a great way to introduce them to nature. Choose trails suitable for their age and abilities, and plan for frequent breaks and shorter distances. Ensure they have proper footwear, sun protection, and sufficient snacks and water. Make it a fun and educational experience, teaching them about the environment and wildlife along the way.

Conclusion:

By following these essential hiking rules and practicing trail etiquette, you can ensure a safe, enjoyable, and responsible hiking experience. Remember to plan and prepare adequately, respect nature and wildlife, and be considerate towards other hikers. Hiking offers incredible opportunities for adventure and connection with the outdoors, so embrace these guidelines and embark on memorable hiking journeys while preserving the beauty of nature for future generations. Happy hiking!